Setting up Azure OAuth Application
In this section we will provide a guide and references on how to set up an Azure OAuth application for Q.
Azure Setup
Before we begin, you will need to have an Azure account. If you do not have one, you can create one for free at the Azure website.
Sign into the Azure portal
Navigate to the Azure portal at https://portal.azure.com and sign in with your Azure account credentials.
Navigate to Azure Active Directory

Once you’ve signed in, look for the Azure Active Directory service in the left-hand menu. Click on it to open the Azure Active Directory dashboard.
Register a new application
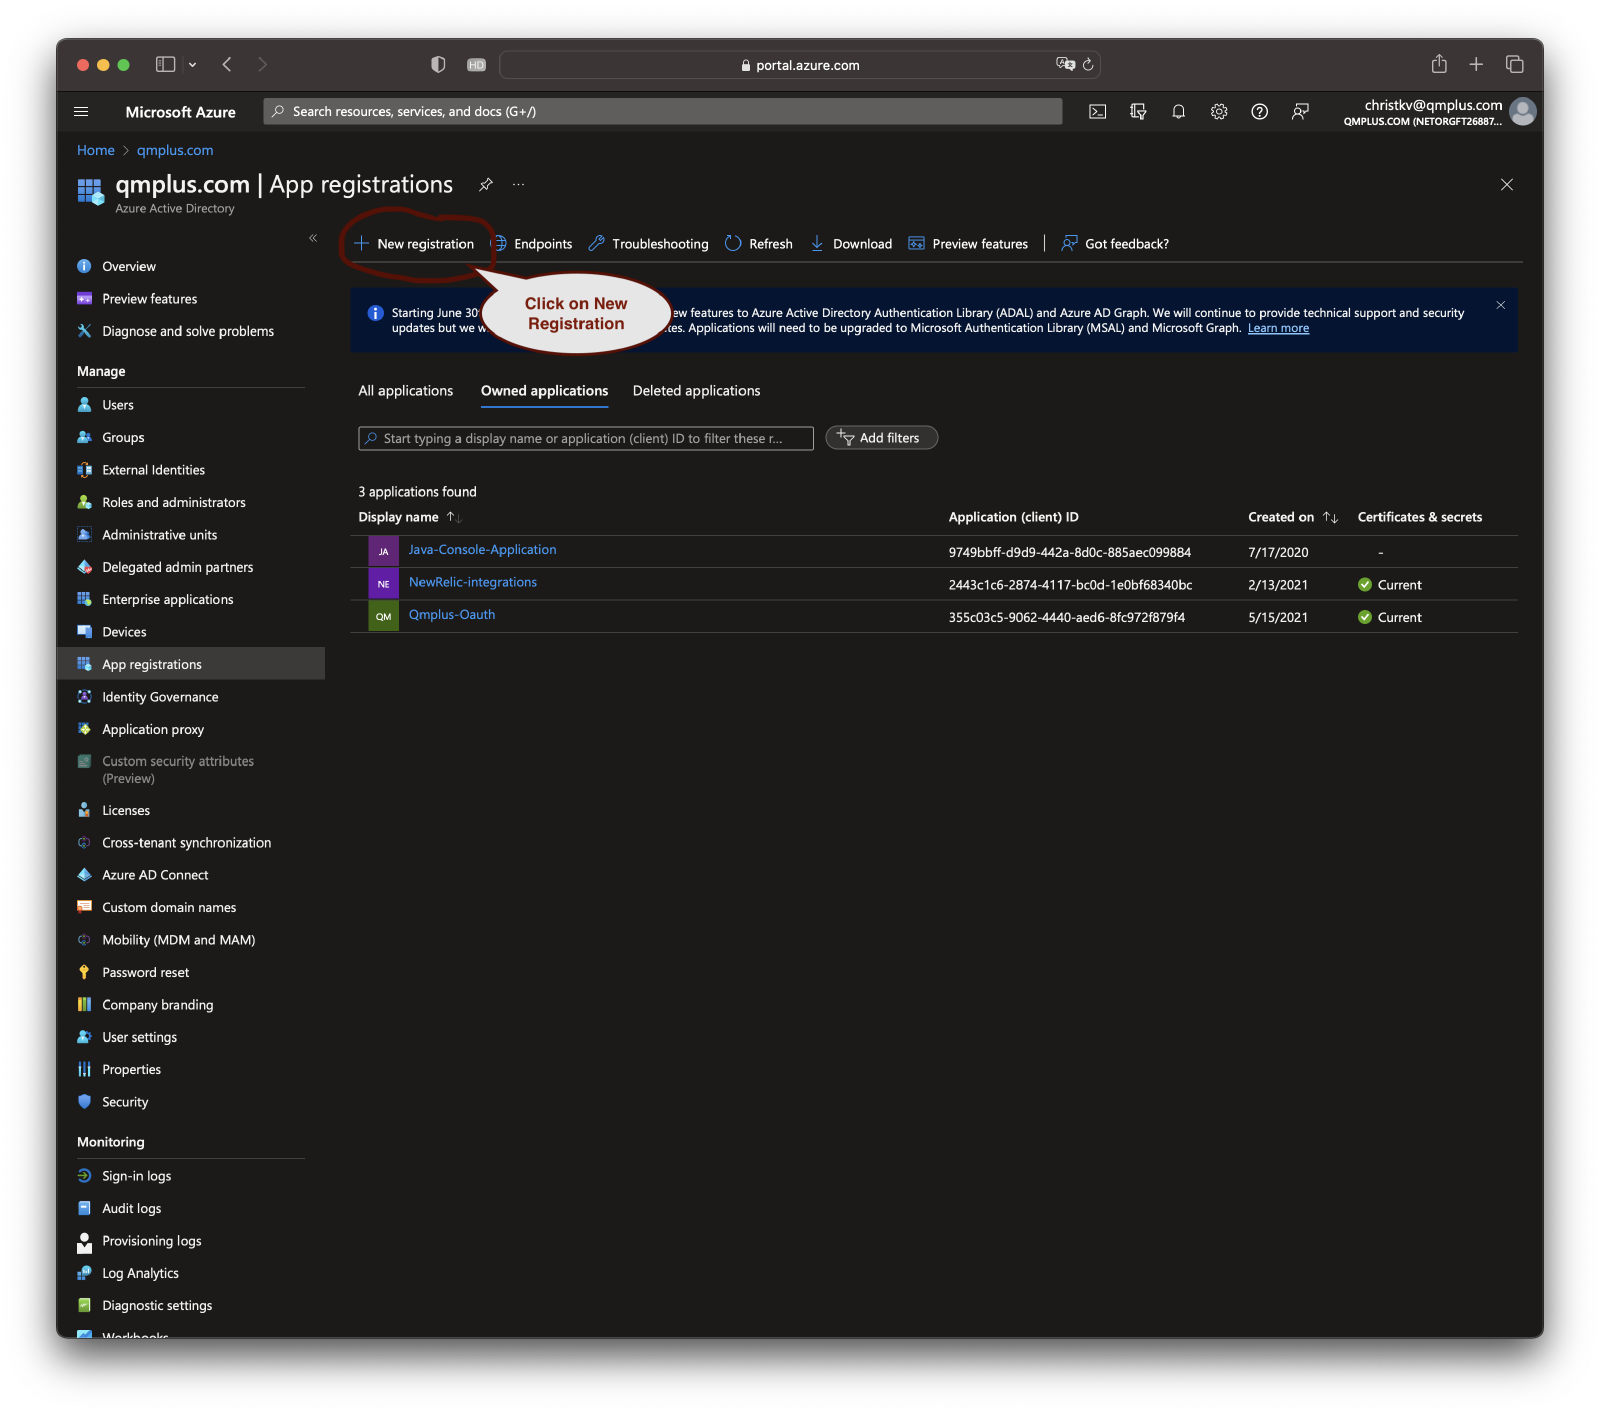
In the Azure Active Directory dashboard, look for the “App registrations” link in the Manage section and click on it. Then, click on the “New registration” button at the top of the page.

- Fill in the name for your application. This should be a name that easily identifies your application and its purpose.
- For the “Supported account types” option, choose who can use the application. This can be accounts in this organizational directory only (single tenant), accounts in any organizational directory (multi-tenant), or accounts in any organizational directory and personal Microsoft accounts (multi-tenant).
- For the “Redirect URI” option, enter the URL where users will be redirected after they have authenticated with Microsoft. Use the following url.
https://qmplus.app/api/authentication/oauth/reply
Click on the “Register” button to create the application.
Get the Application (client) ID and Directory (tenant) ID
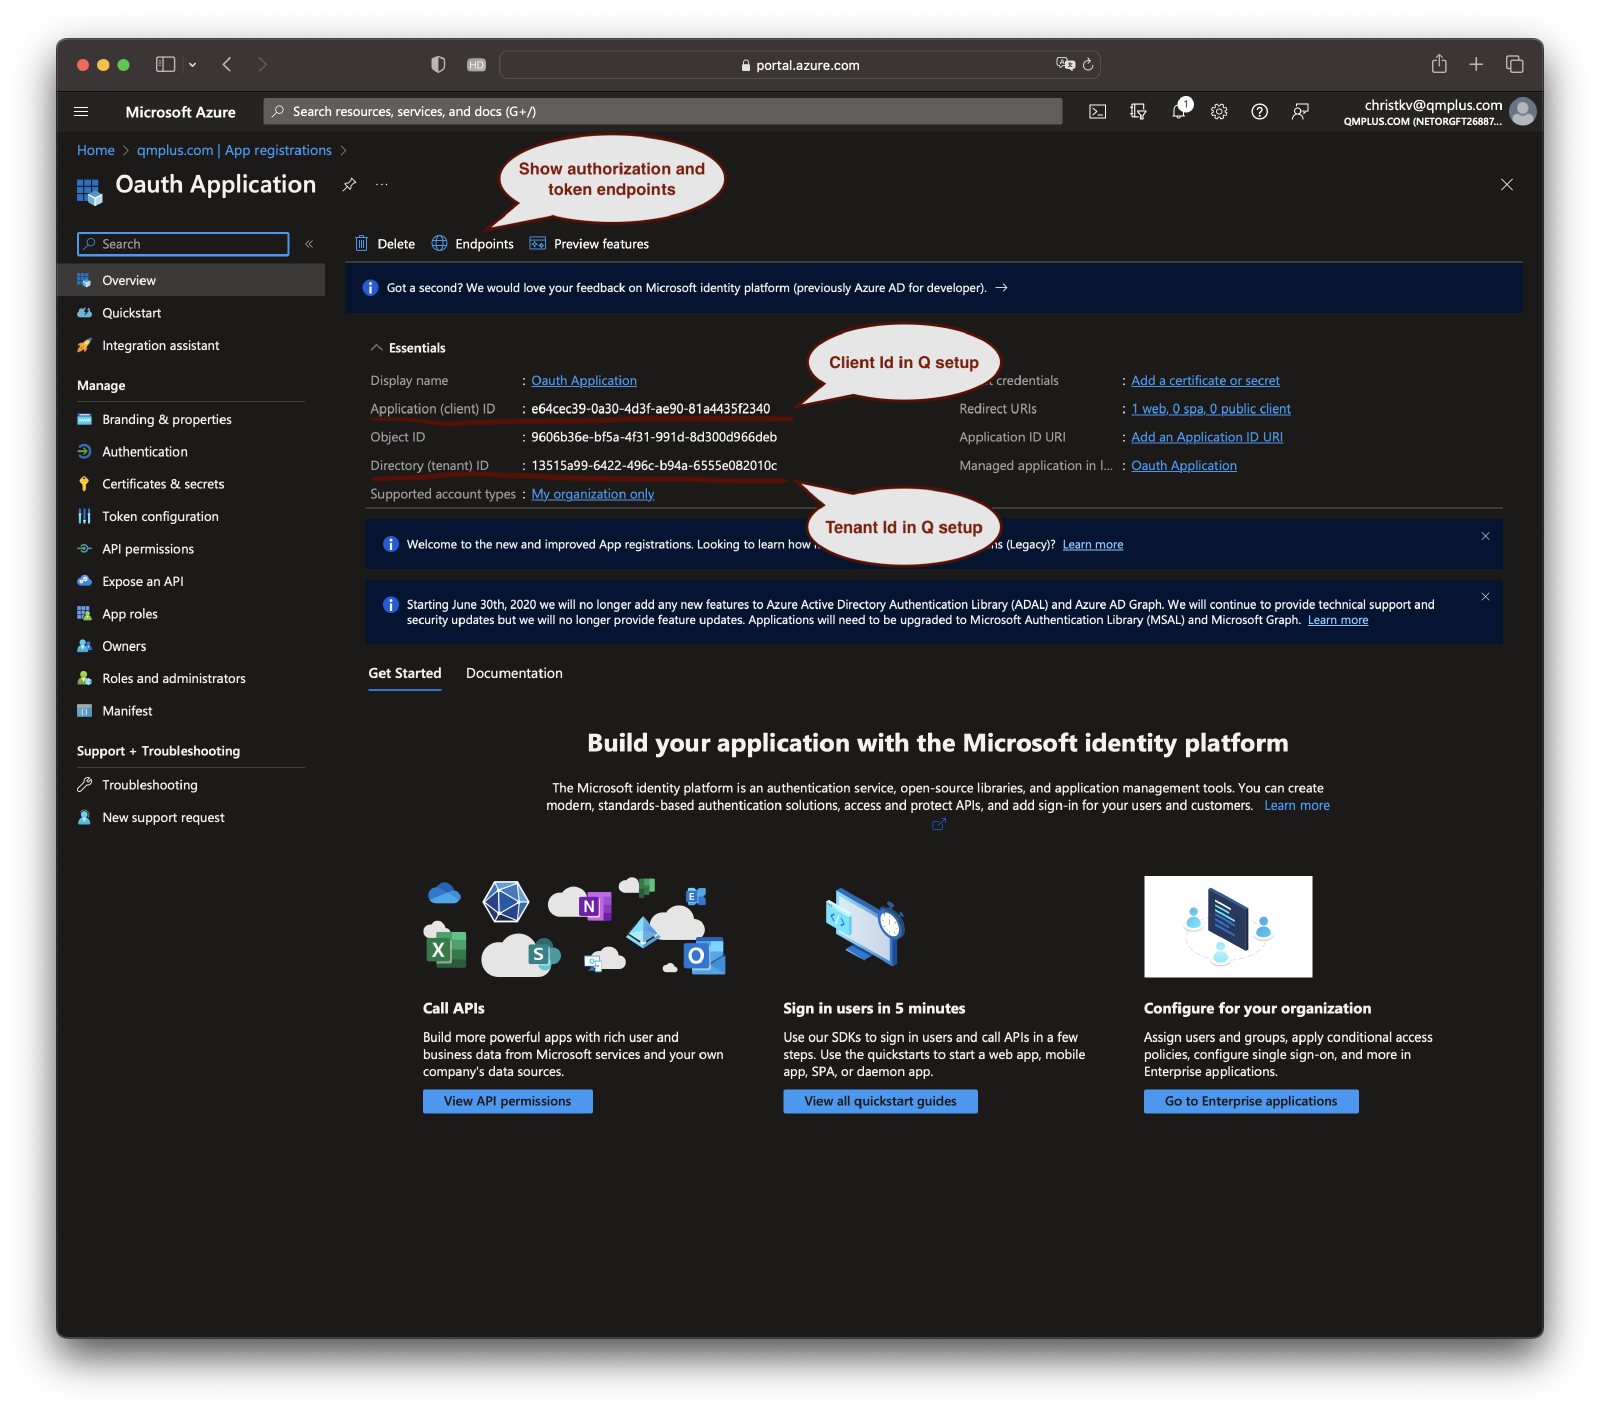
After registering the app, you will be redirected to the application dashboard. Here, you can find the Application (client) ID and Directory (tenant) ID. These will be used in your application to initiate the OAuth 2.0 flow. Keep them safe.
Get the Authorization and Token endpoints

Click the Endpoints link to bring up the list of OAuth endpoints and copy the underlined Authorization and Token endpoints as they will be used to configure the Q OAuth settings.
Create a client secret
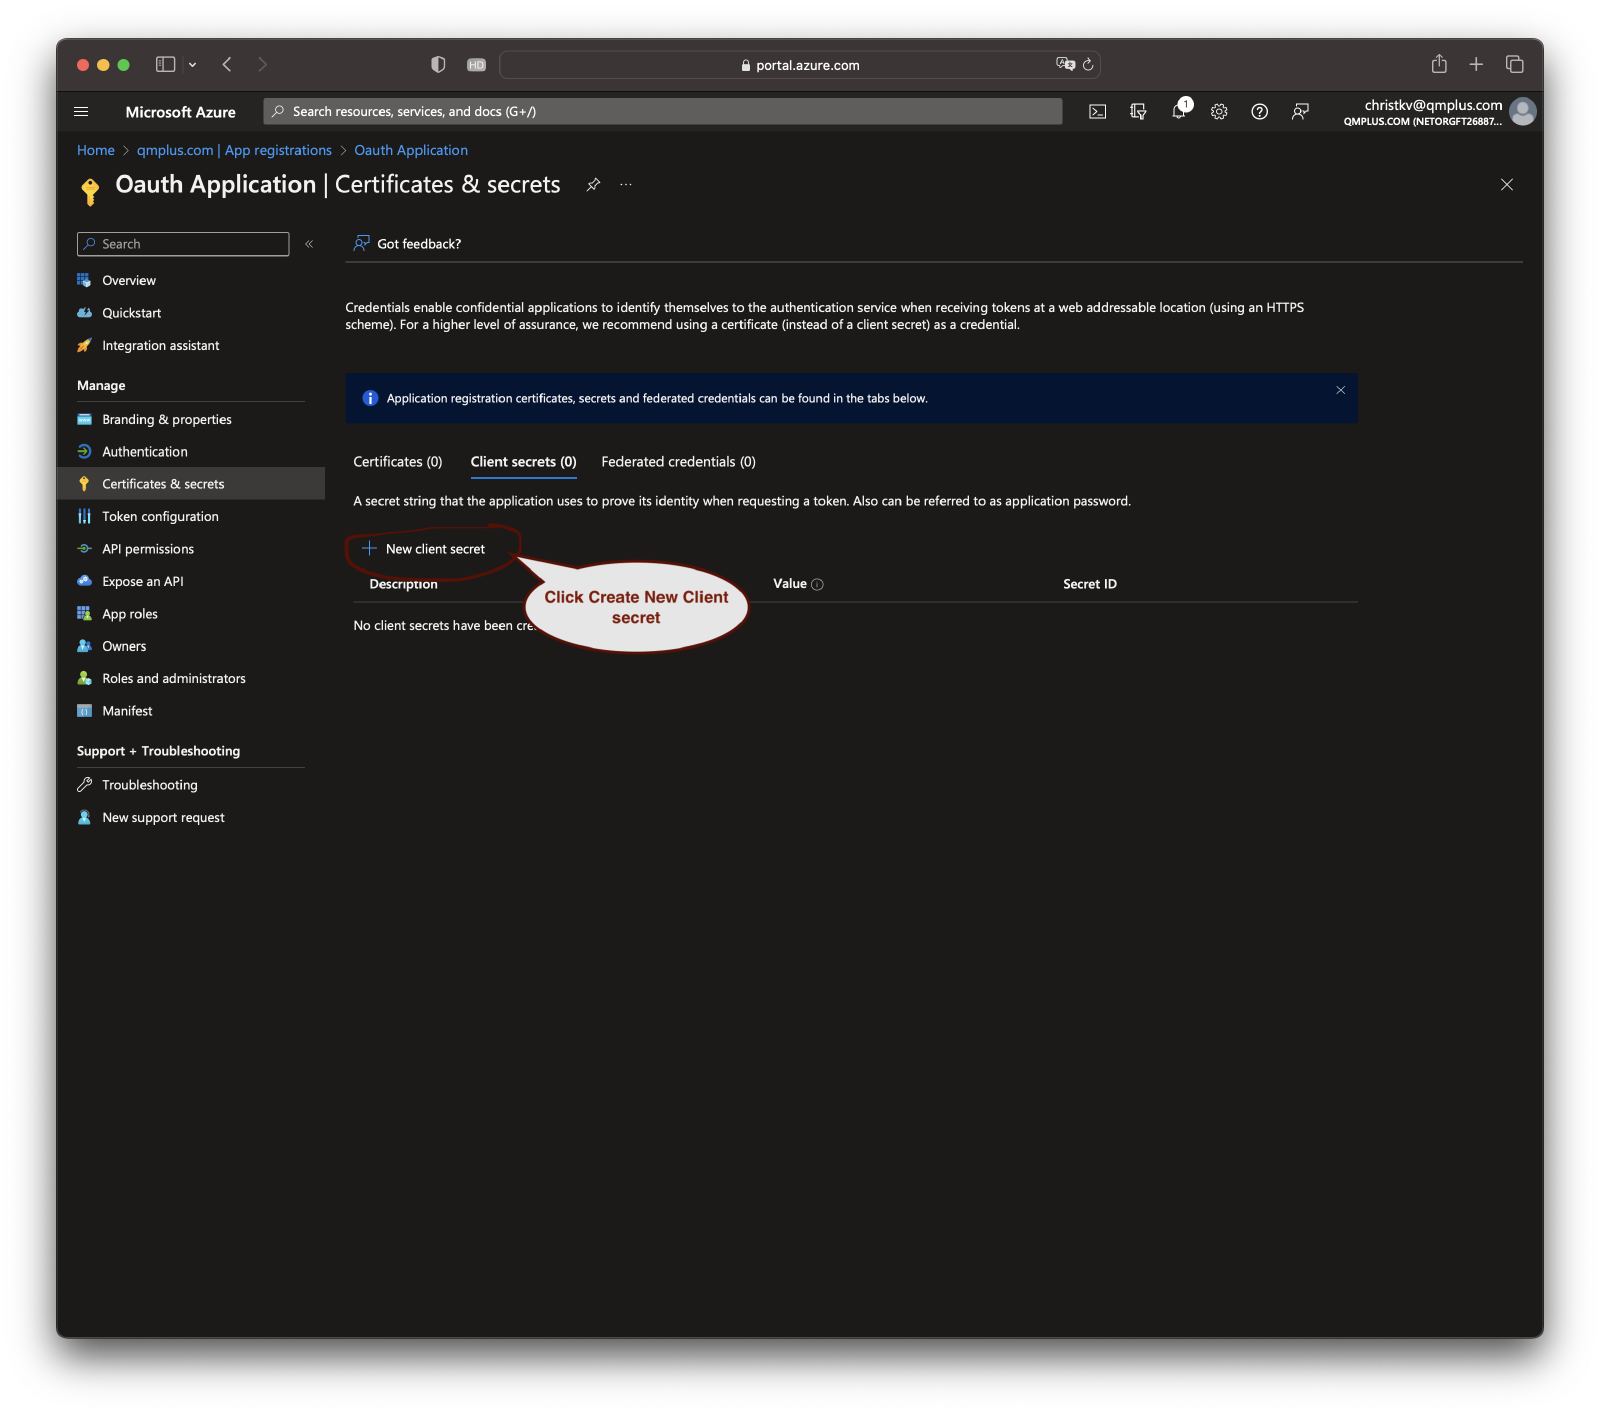
In the left-hand menu of your application dashboard, look for the “Certificates & secrets” link and click on it. Then, click on the “New client secret” button.

- Add a description for the secret.
- Choose an expiry period for the secret.
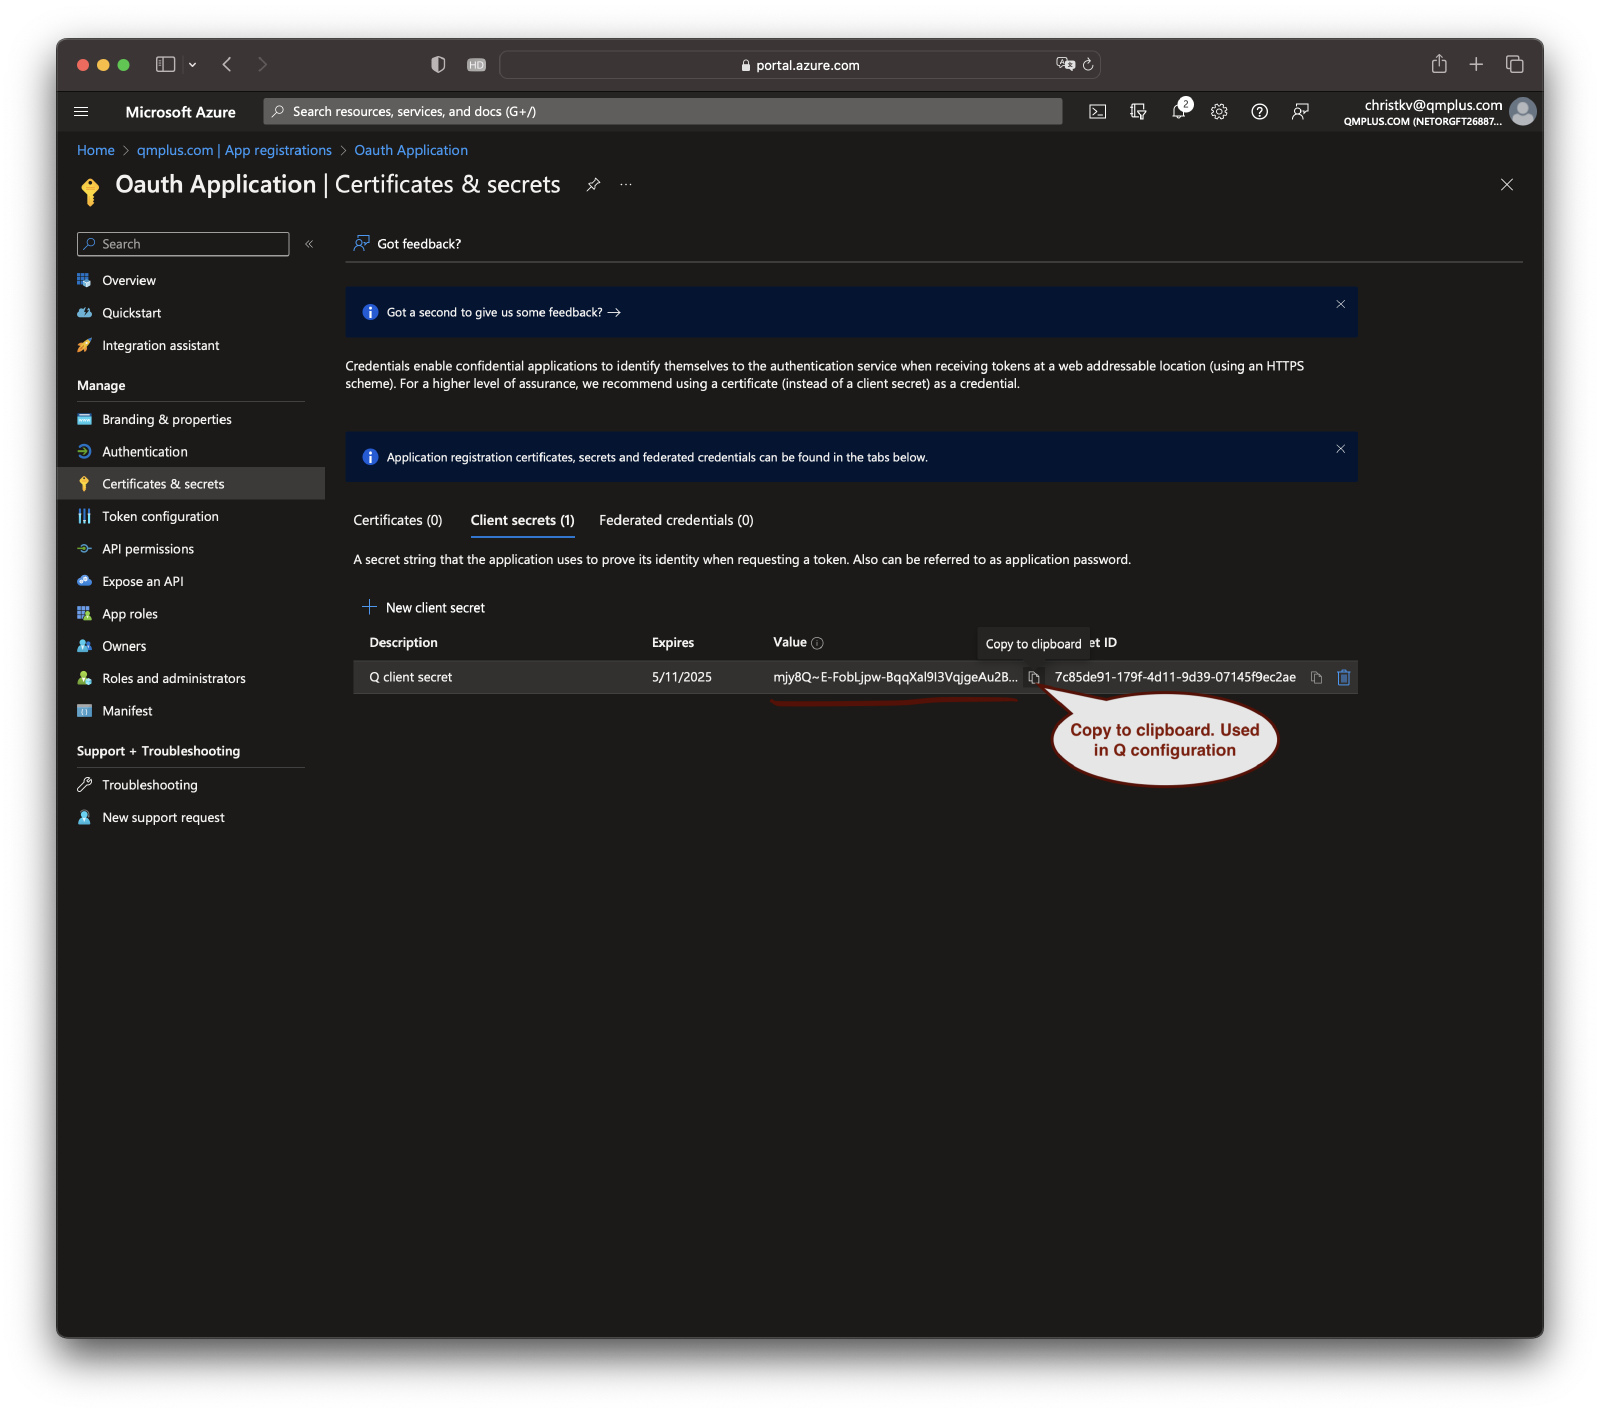
Click on “Add”. After the secret is created, make sure to copy the value and keep it safe. You won’t be able to see it again.
Setup API permissions

In the left-hand menu of your application dashboard, look for the “API permissions” link and click on it. Here, you can set up permissions for Microsoft Graph or other APIs that your application will need to access.
Click on the “Add a permission” button to add new permissions. Follow the prompts to add the necessary permissions for your application.
Configure API claims
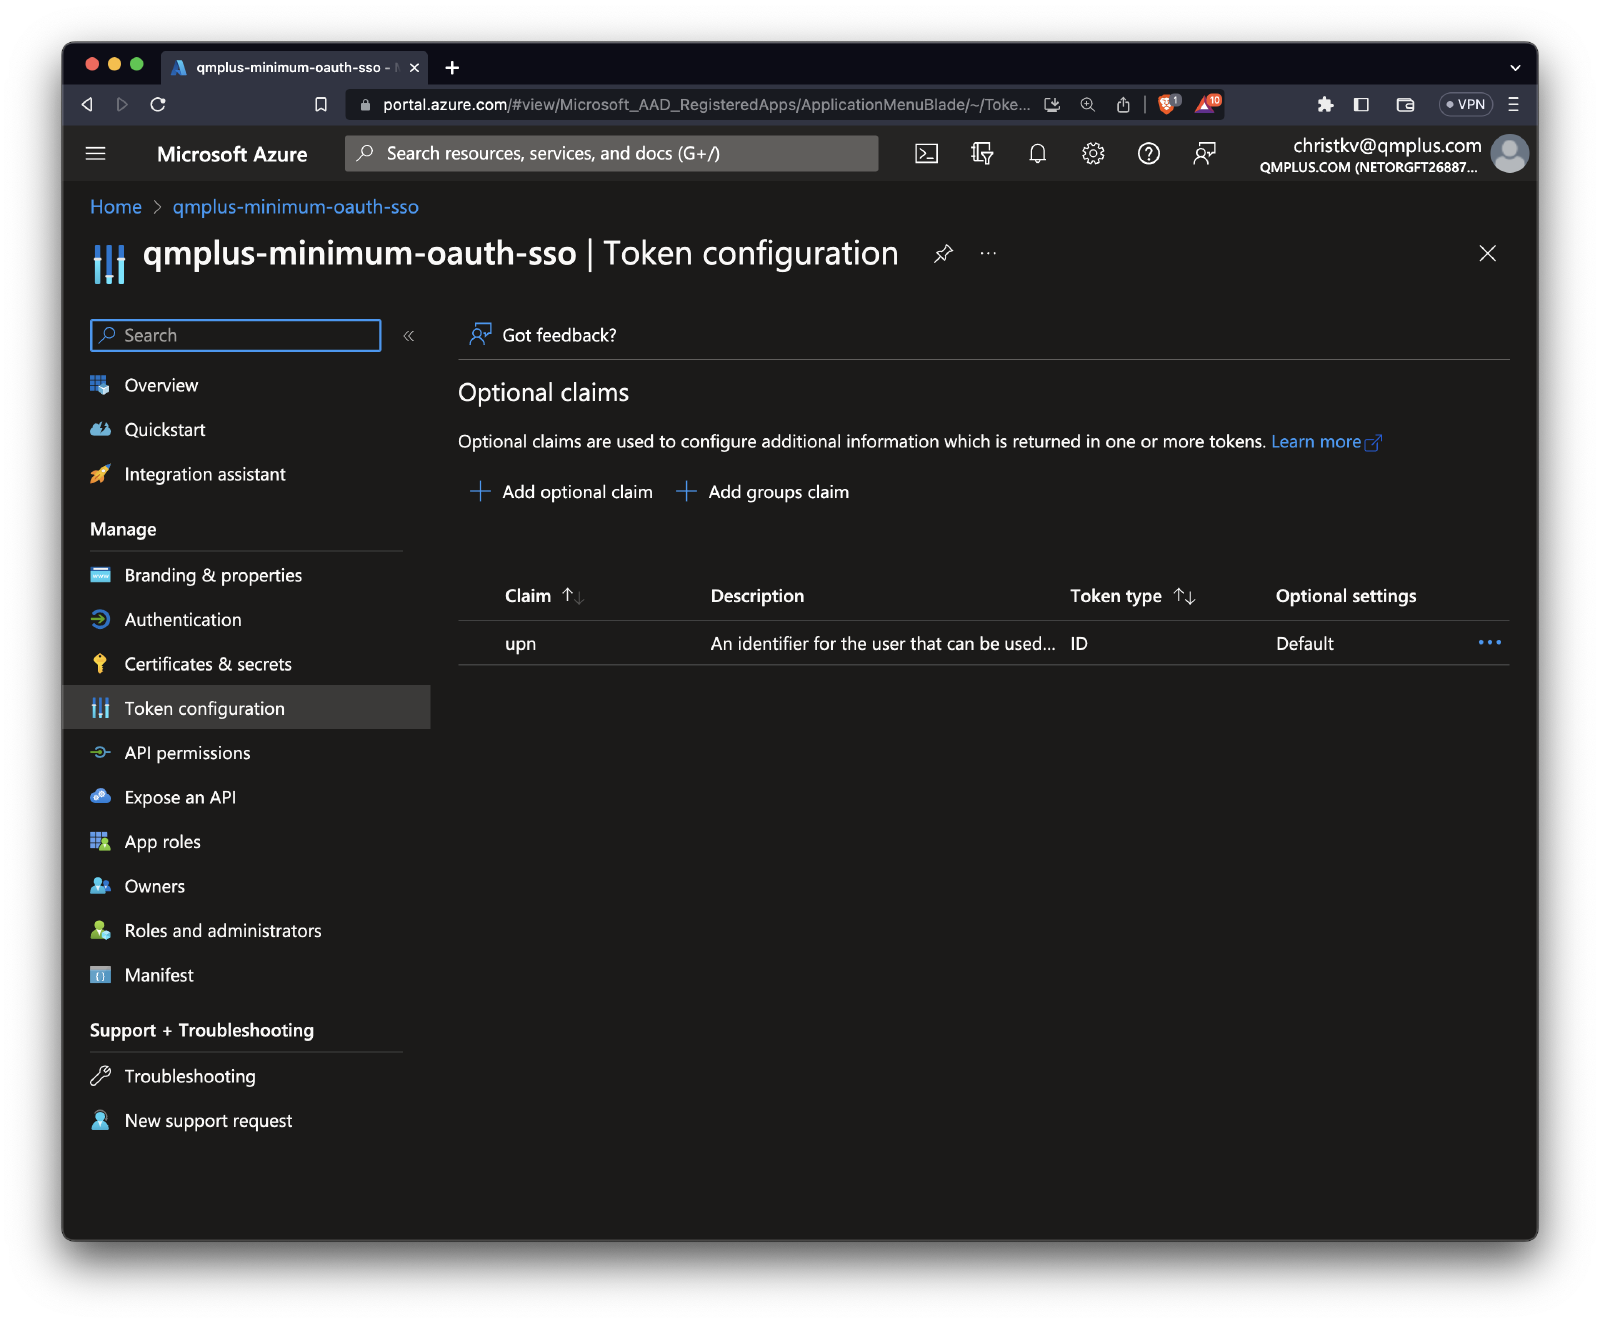
You can add additional claims to the token returned by Oauth to Q allowing you to for example use upn to match against the username or email field in Q.
Configure reply URLs
In the left-hand menu of your application dashboard, look for the “Authentication” link and click on it. Under the “Platform configurations” section, click on “Add a platform” and provide the redirect URIs your application will use after completing the OAuth process.
(Optional) Enable ID tokens
If you’re planning to authenticate users using OpenID Connect, under the “Authentication” section you can find the “Implicit grant and hybrid flows” section. Here, check the “ID tokens” checkbox.
Now, you have an Azure AD application configured to use OAuth 2.0. You can use the client ID, tenant ID, and client secret that you got from this process to initiate the OAuth 2.0 flow from your application. Make sure to follow the OAuth 2.0 authorization code flow in your application to get access tokens.
Q Setup
OAuth SSO must be enabled for your account before you can proceed with the setup. Please contact sales at post at qmplus.com to get in touch about cost and availability for your plan.
Navigate to Settings
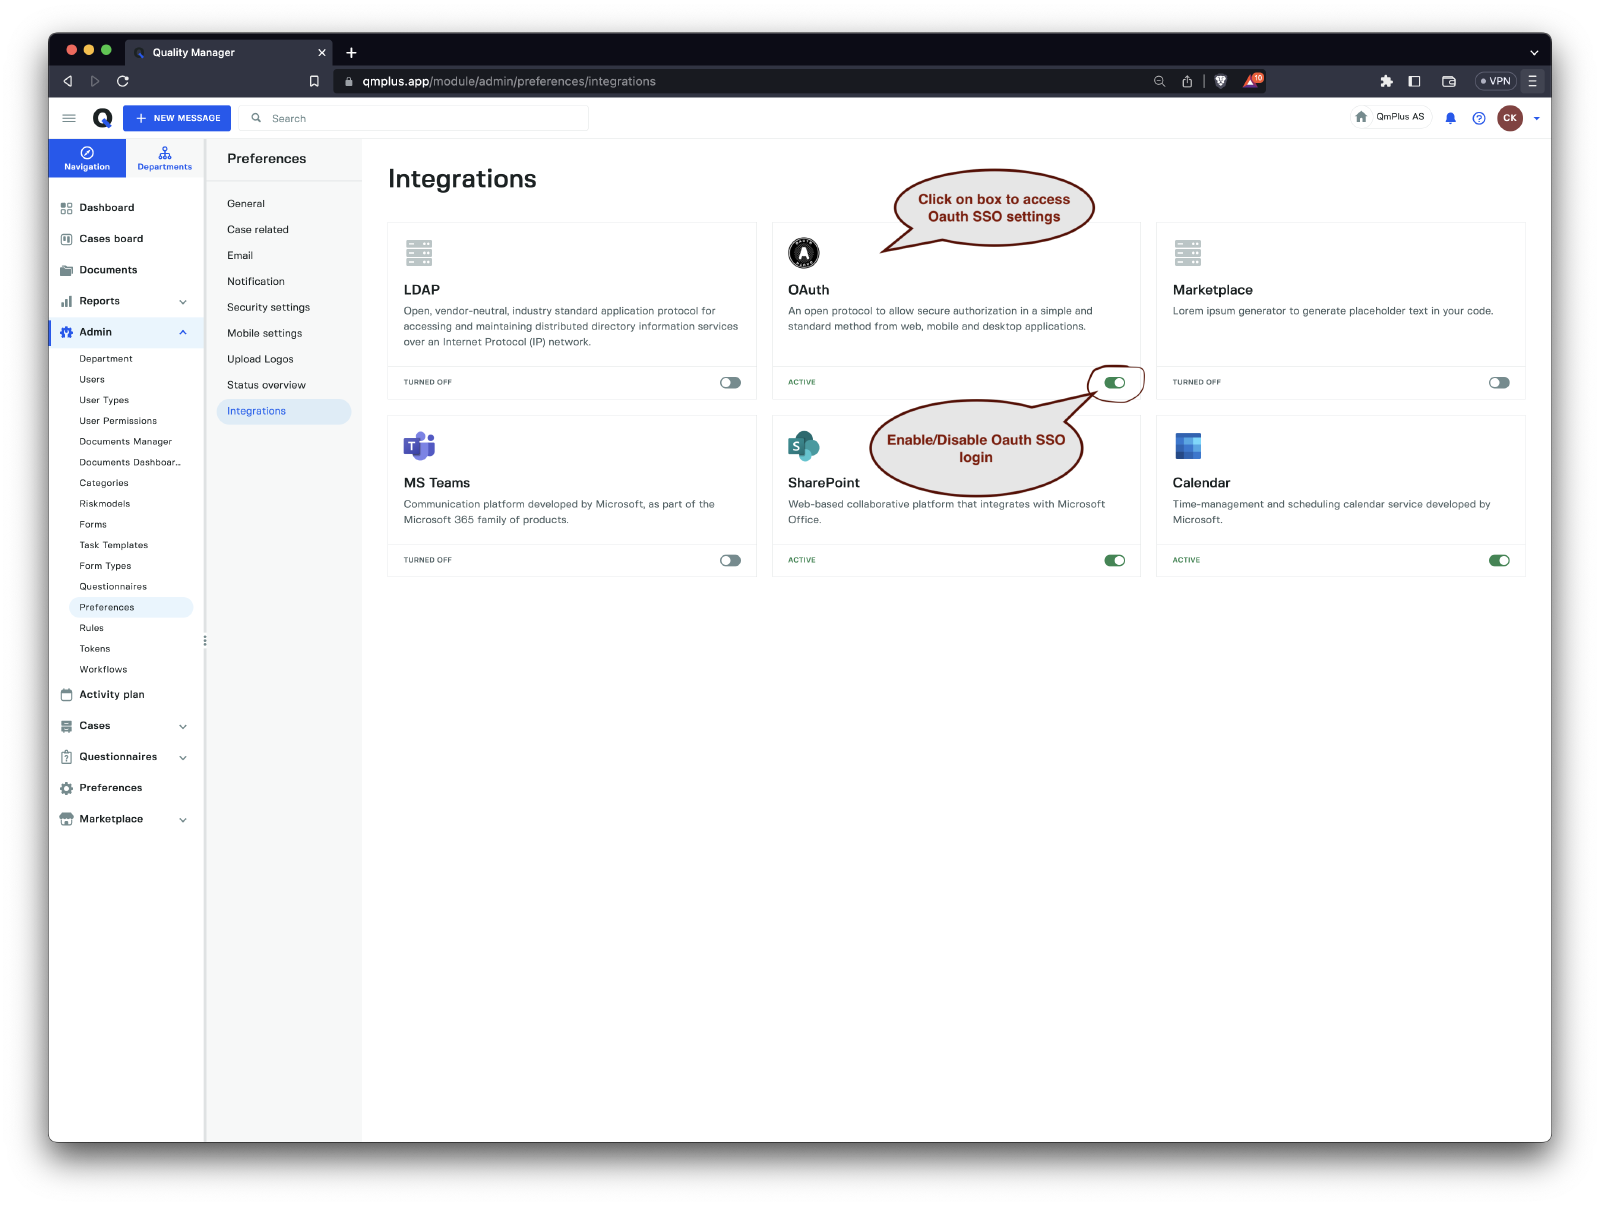
Click on Admin in the menu on the left and then click Preferences to bring up the list of avilable platform preferences. Finally click Integrations to bring up the list of available integrations configured for you platform.
Clicking on the OAuth box will bring you to the Q configuration settings.
Configuring OAuth settings
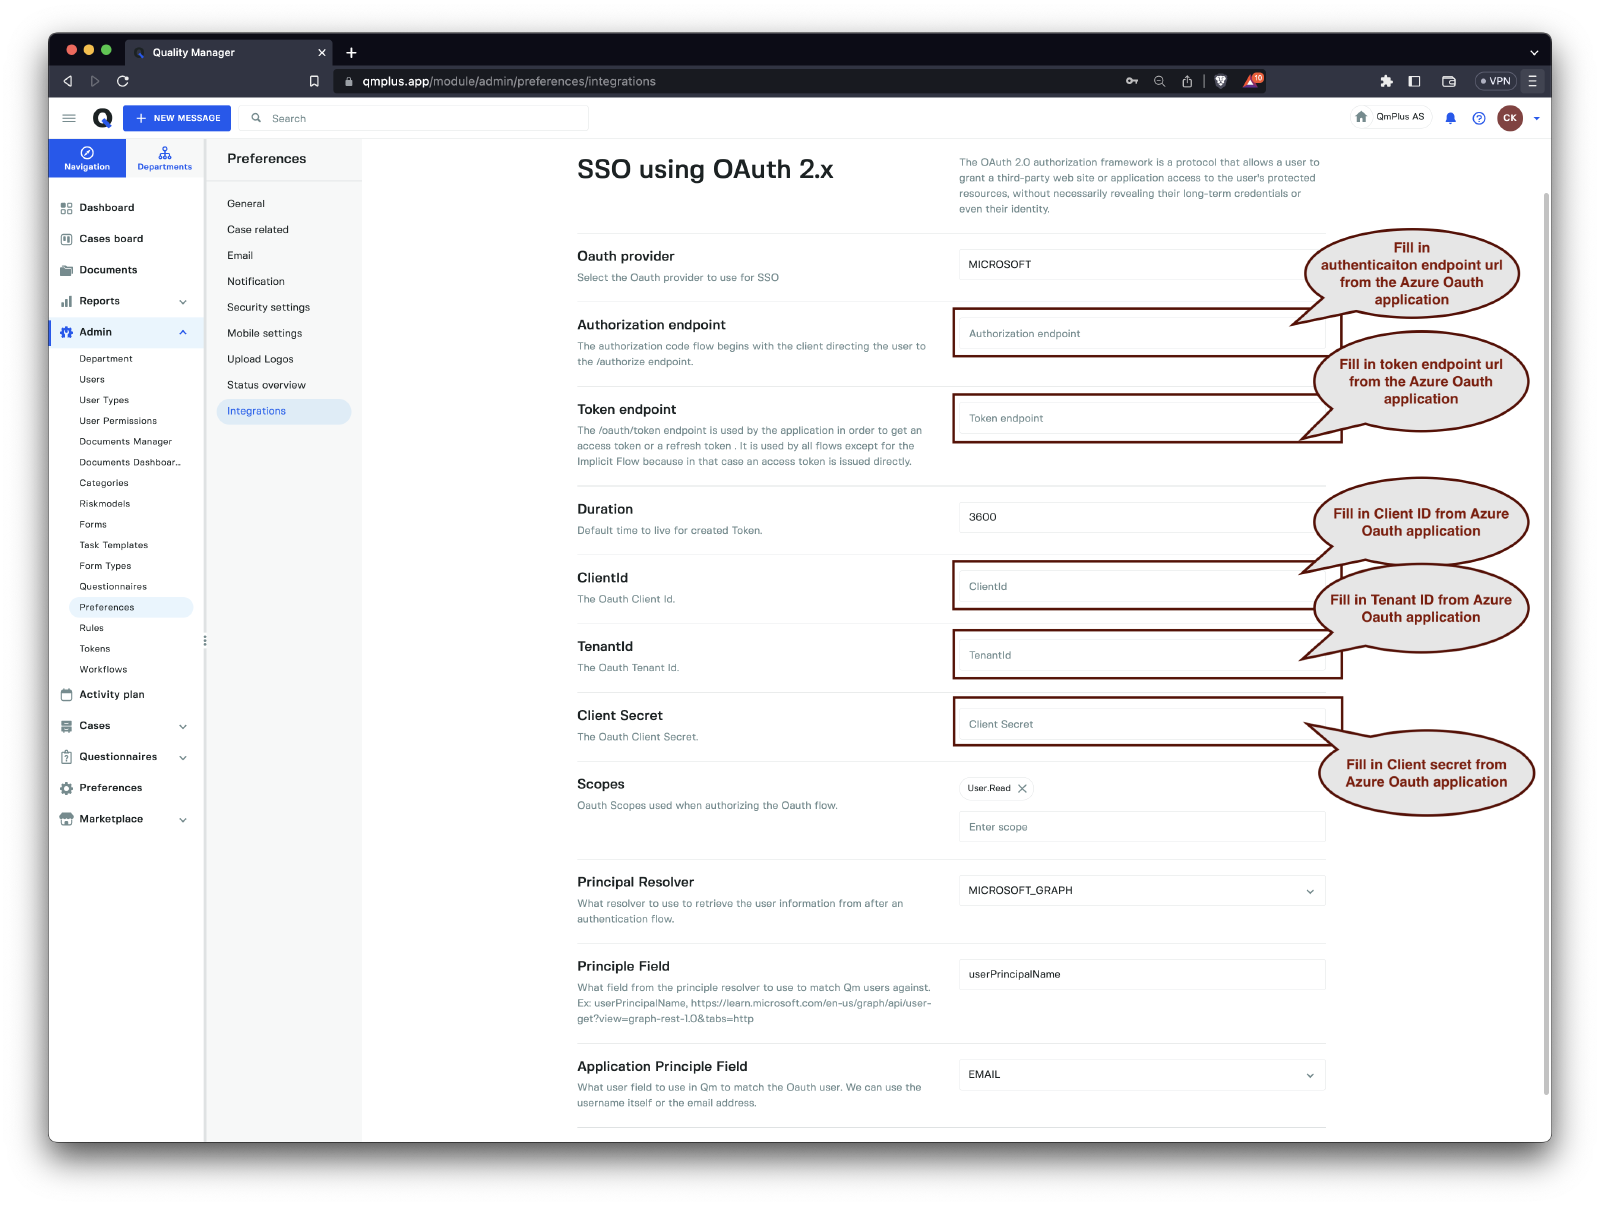
The following fields can be configured for an OAuth integration.
| Option | Values | Description |
|---|---|---|
OAuth provider | MICROSOFT | Select the Oauth provider to use for SSO |
Authorization endpoint | The authorization code flow begins with the client directing the user to the /authorize endpoint. | |
Token endpoint | The /oauth/token endpoint is used by the application in order to get an access token or a refresh token . It is used by all flows except for the Implicit Flow because in that case an access token is issued directly. | |
Duration | Default time to live for created Token. | |
ClientId | The OAuth Client Id. | |
TenantId | The OAuth Tenant Id. | |
Client Secret | The OAuth Client Secret. | |
Scopes | Oauth Scopes used when authorizing the Oauth flow. | |
Principal Resolver | MICROSOFT_GRAPH | What resolver to use to retrieve the user information from after an authentication flow. |
Claim Field | Optional field. Set the name of the claim field you wish to use to identify the user when matching against the users in Q. | |
Principle Field | What field from the principle resolver to use to match Qm users against. Ex: userPrincipalName, https://learn.microsoft.com/en-us/graph/api/user-get?view=graph-rest-1.0&tabs=http | |
Application Principle Field | USERNAME, EMAIL | What user field to use in Qm to match the Oauth user. We can use the username itself or the email address. |
For
Scopesmake sure to enter the scopeUser.Readunless you have custom scopes defined which is out of scope for this tutorial.