Subscribe to Calendar
In this tutorial we will show you how to subscribe to your Activity calendar in Exchange or Apple Calendar.
Select the Activity Calendar

To start the process click the little Calendar icon in the top left. This will open the create subscription link dialog.
Create Subscription Link

The dialog will allow the generation of a link that you can use to subscribe to the calendar using any compatible calendar application that support the iCalendar format. This includes Microsoft Exchange, Apple Calendar, Google Calendar and many others.
Ensure the calendar name field is filled in with the title you want to appear in your calendar application. If you leave it blank the calendar name will be set to Activity Calendar.
There are some options in the calendar subscription link dialog that allows you to configure what is included in the calendar subscription.
On the left side we have settings that control the following options.
| Option | Description |
|---|---|
Department | The department that will be used as the basis for the calendar. |
Visibility | The visibility option that will be used for the calendar when selecting sub departments. The options are This department and This and subordinate departments |
Select artifact types | The task types that will be included in the calendar subscription. The options are Forms, Questionnaires and Read and Confirm |
Since all the data in the platform is associated with departments the departments and visibility option lets you set what department data should be included in the subscription.
The right side allows for the selection of what calendars should be included in the subscription. It allows the user to create a calendar that includes or or more calendars into a single subscription to avoid having to subscribe to multiple calendars.
Finally to copy the link to your clipboard click the Copy link button. This will copy the link to your clipboard and allow you to paste it into your calendar application.
You can create as many variations of the calendar subscription link as you like. This allows you to create a calendar subscription link for each department or artifact type that you want to subscribe to. You can also create a calendar subscription link for each department and artifact type combination that you want to subscribe to.
Add subscription to Office 365 Calendar (Outlook)
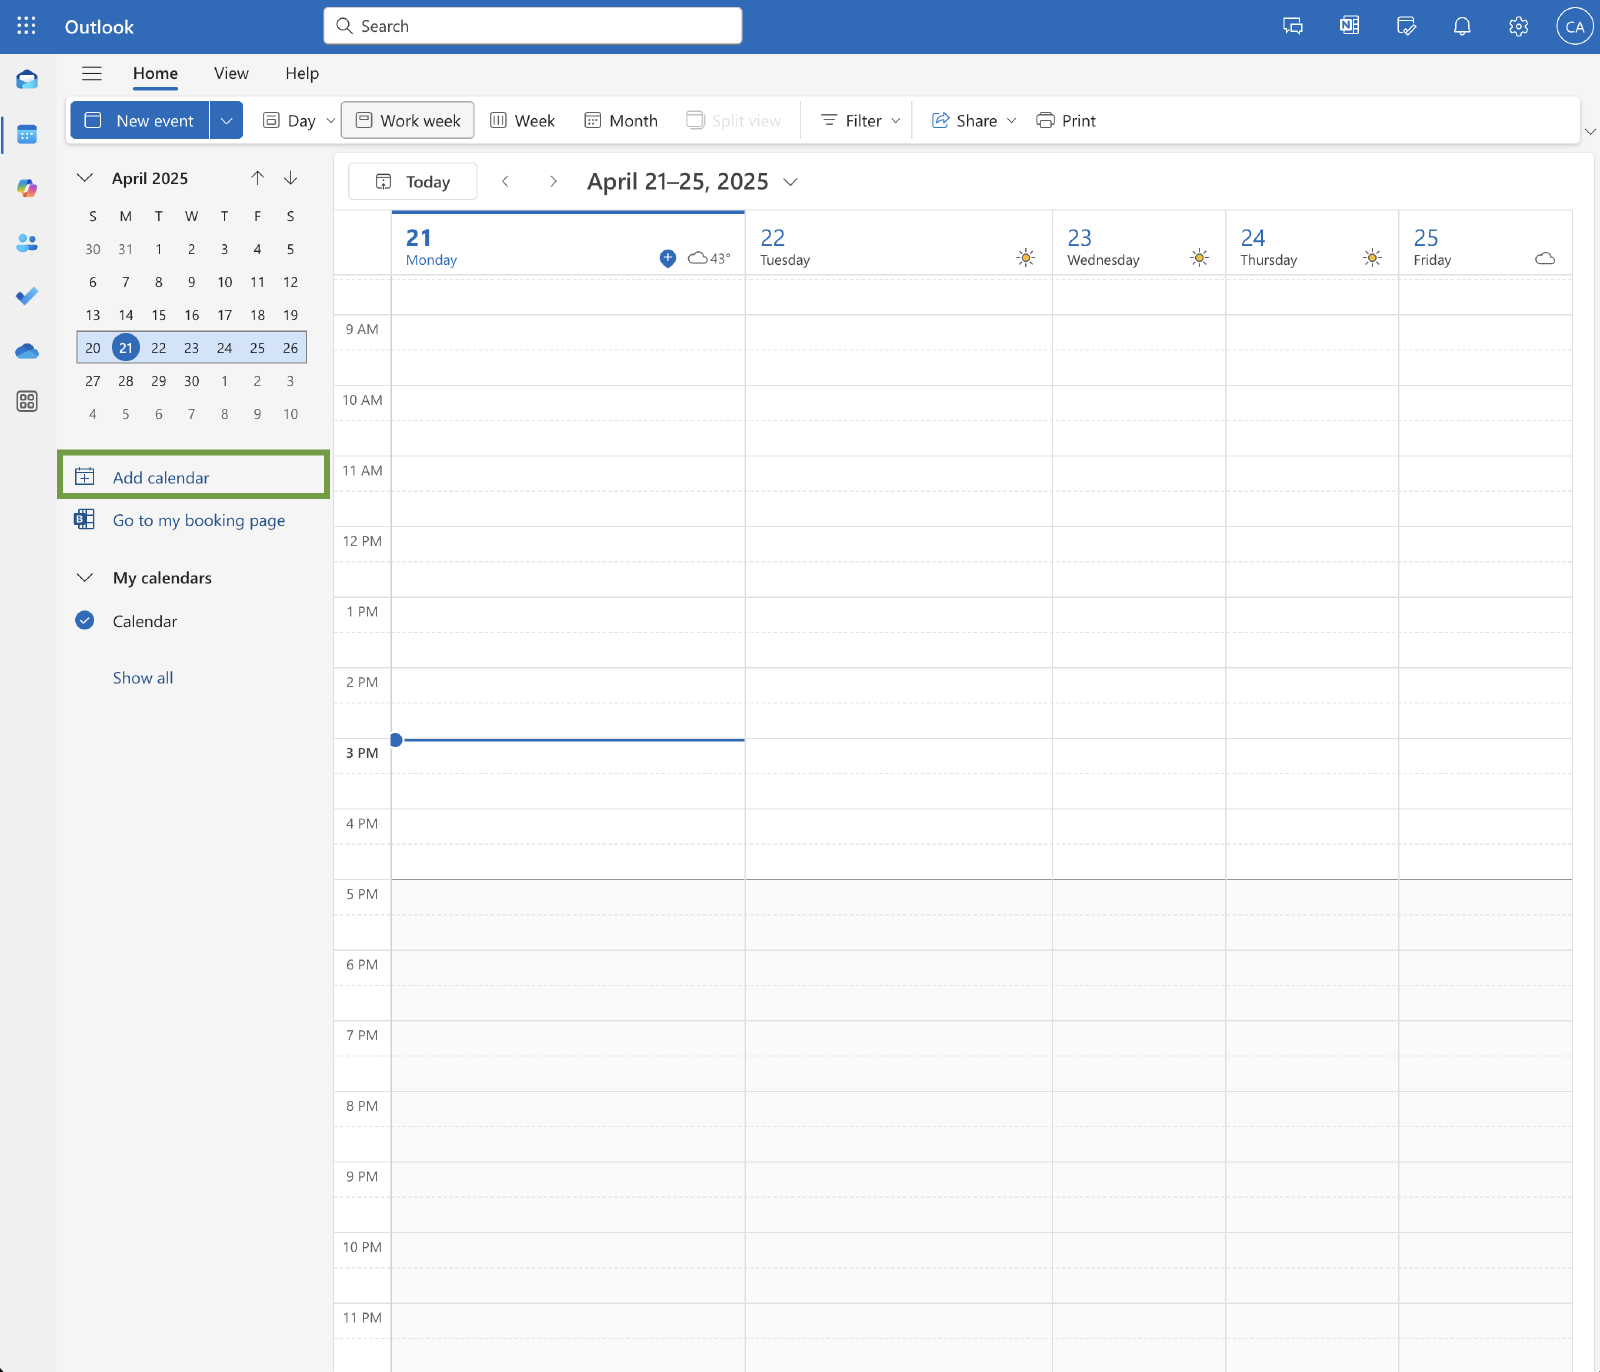
Navigate to the calendar functionality of your Office 365 account. This is typically done by clicking the Calendar icon in the top left corner of the screen.
Next click on the Add calendar button in the top right corner of the screen. This will open a dialog that allows you to add a calendar subscription.
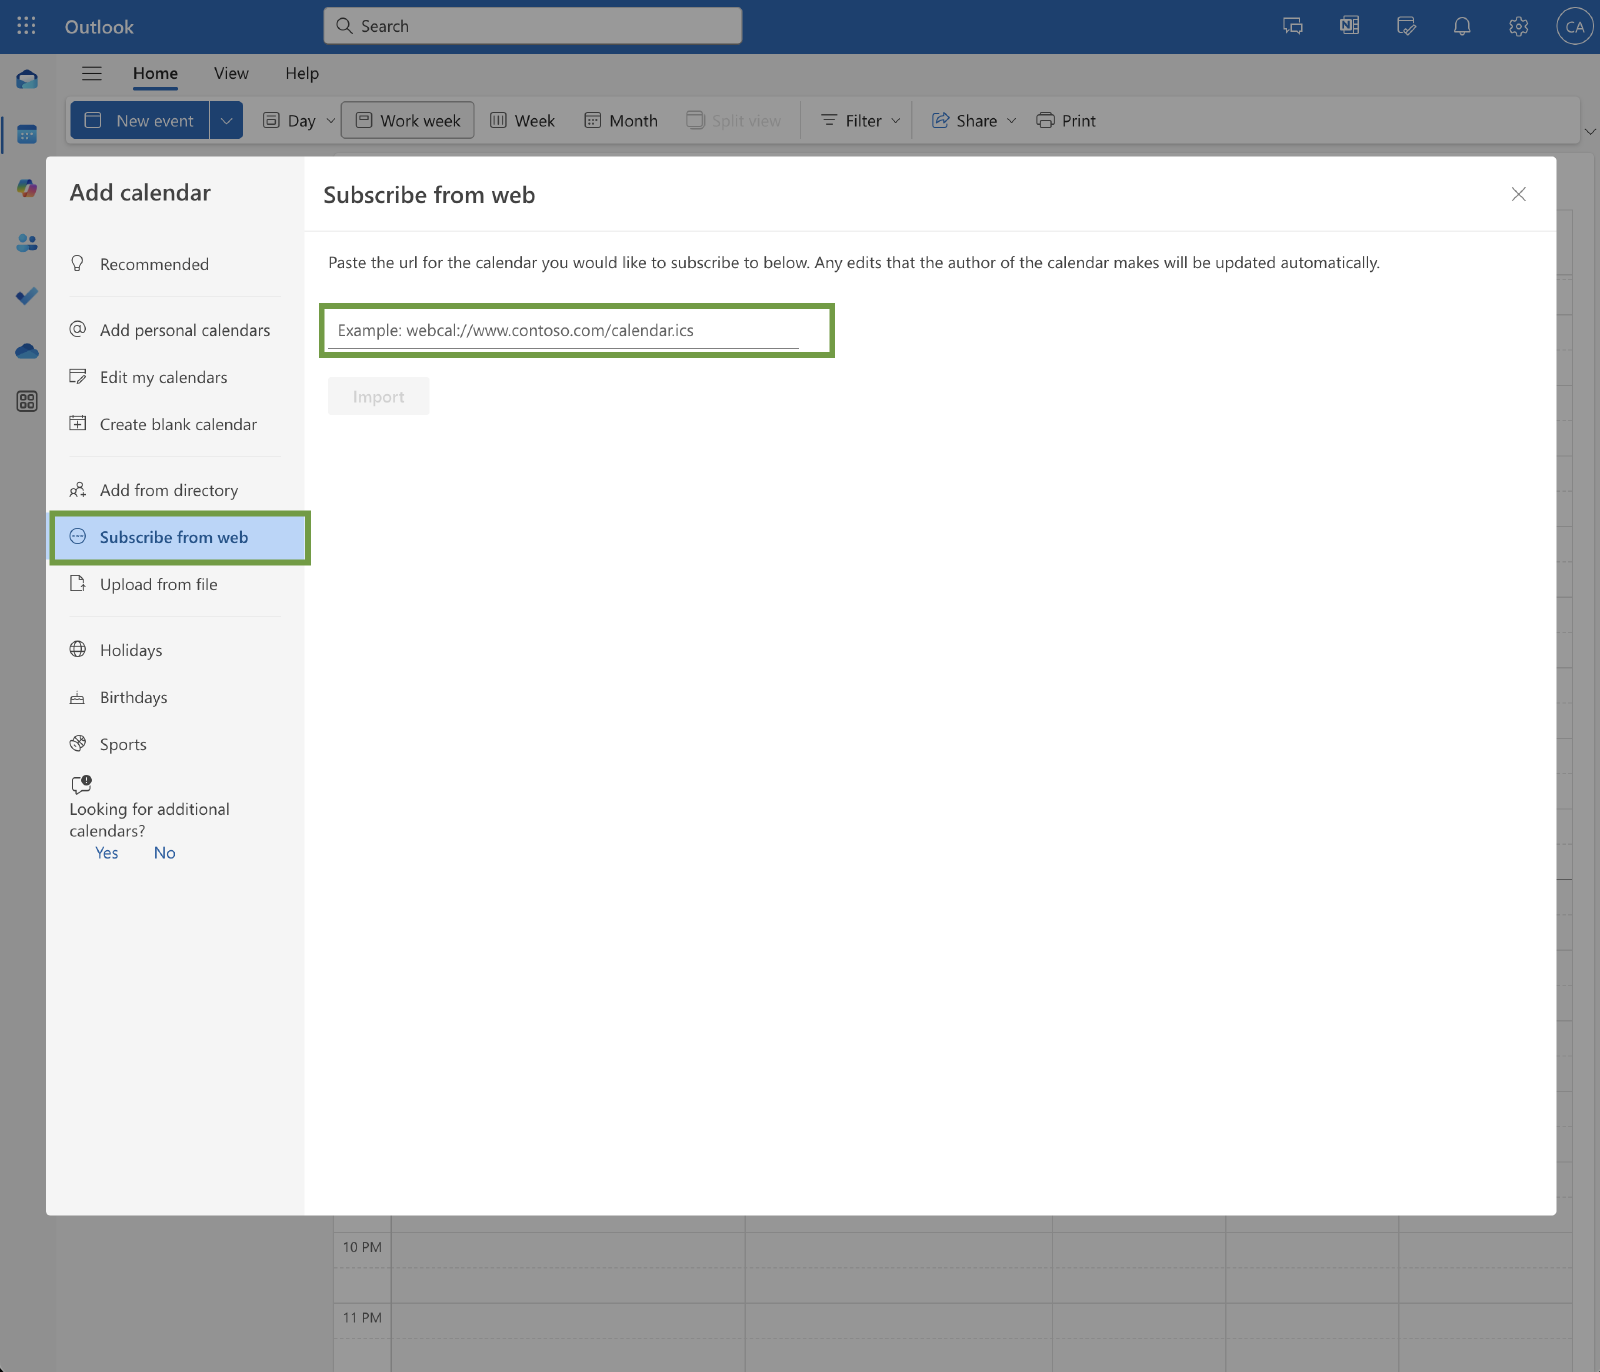
Select the Subscribe from web option and paste the link you copied from the Activity Calendar subscription link dialog into the Link to the calendar field. This will open a dialog that allows you to configure the calendar subscription.

The dialog will allow you to configure the calendar subscription. You can set the name of the calendar, the location of the calendar, the color and other options.
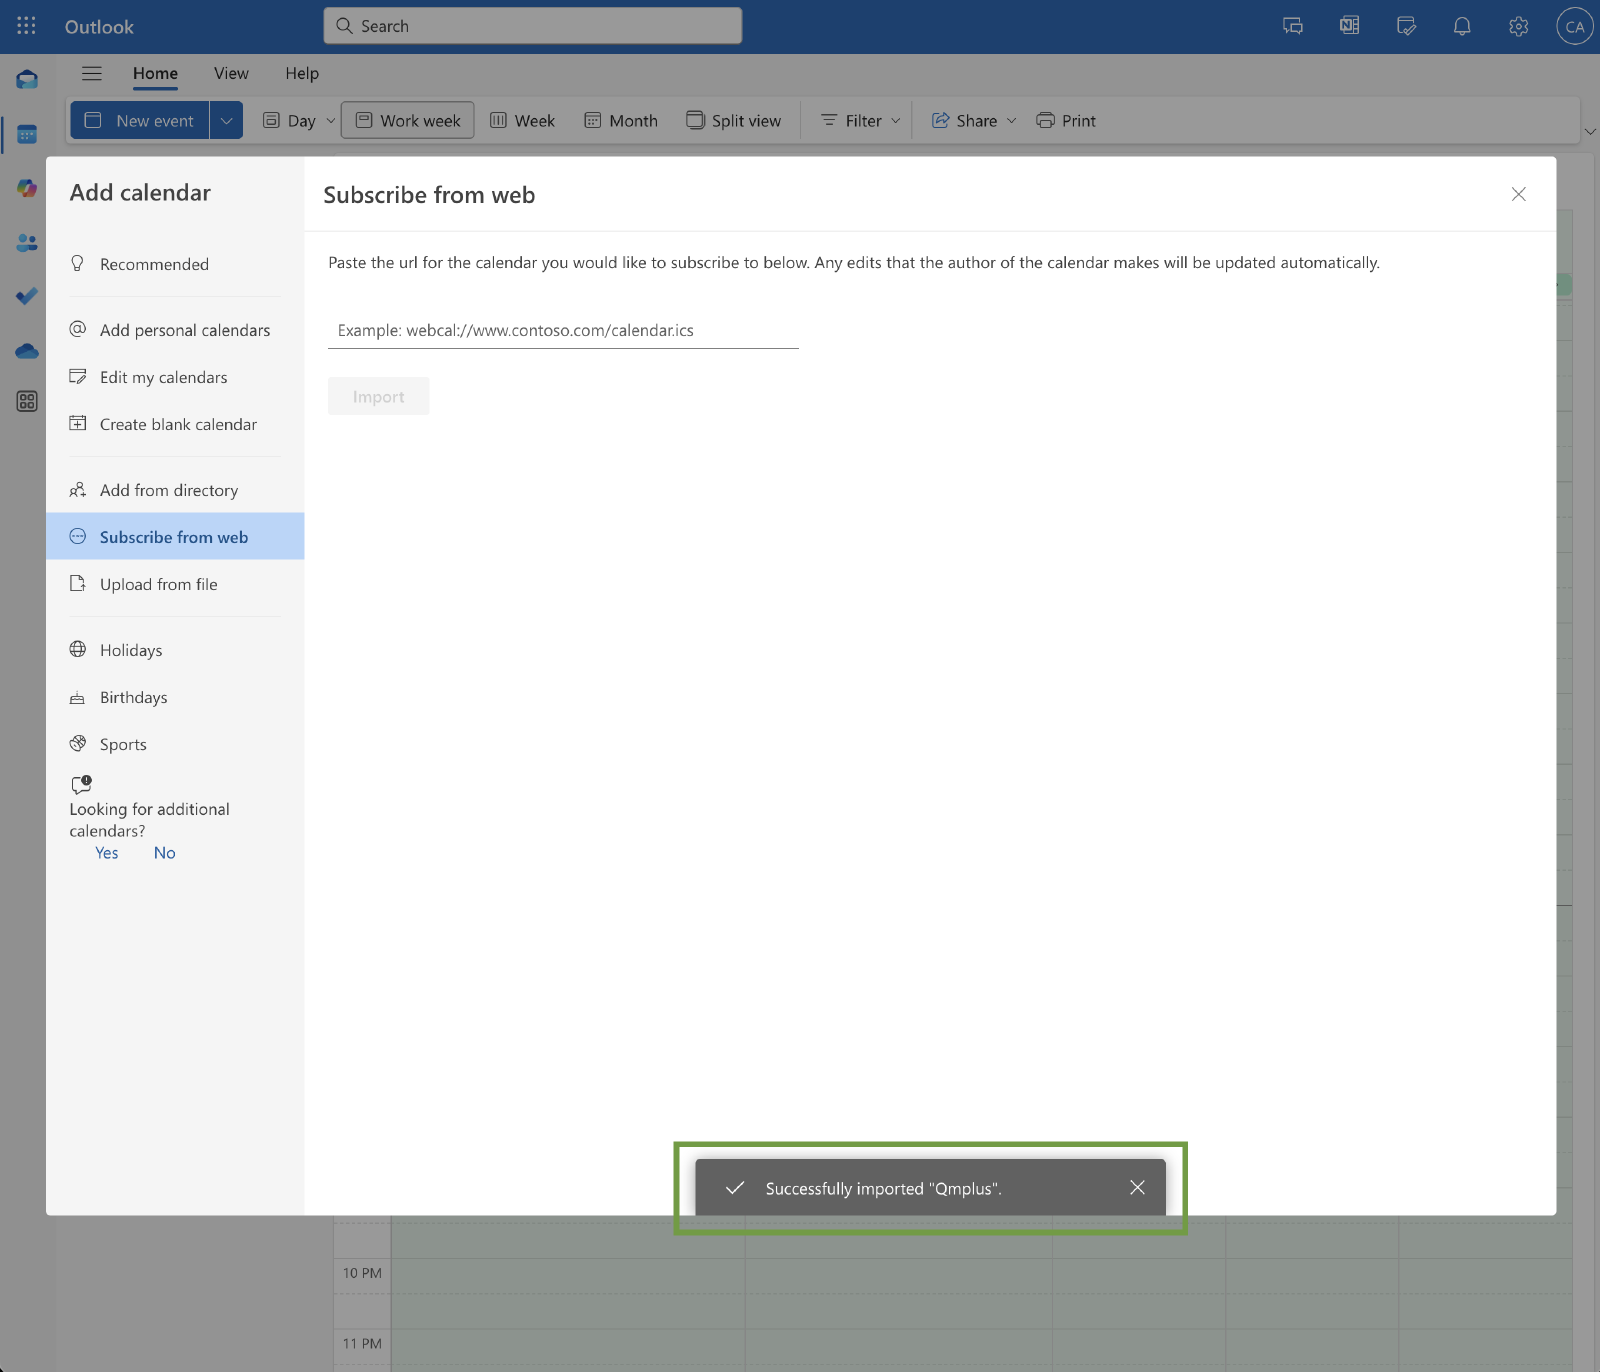
If entered correctly you should see a notification that the calendar was added successfully. You can now see the calendar in your calendar list.

Select the new Qmplus calendar subscription in the calendar selection in the left menu and you will see the calendar events in the calendar view.
Add subscription to Google Calendar

Click the + on Other calendars.
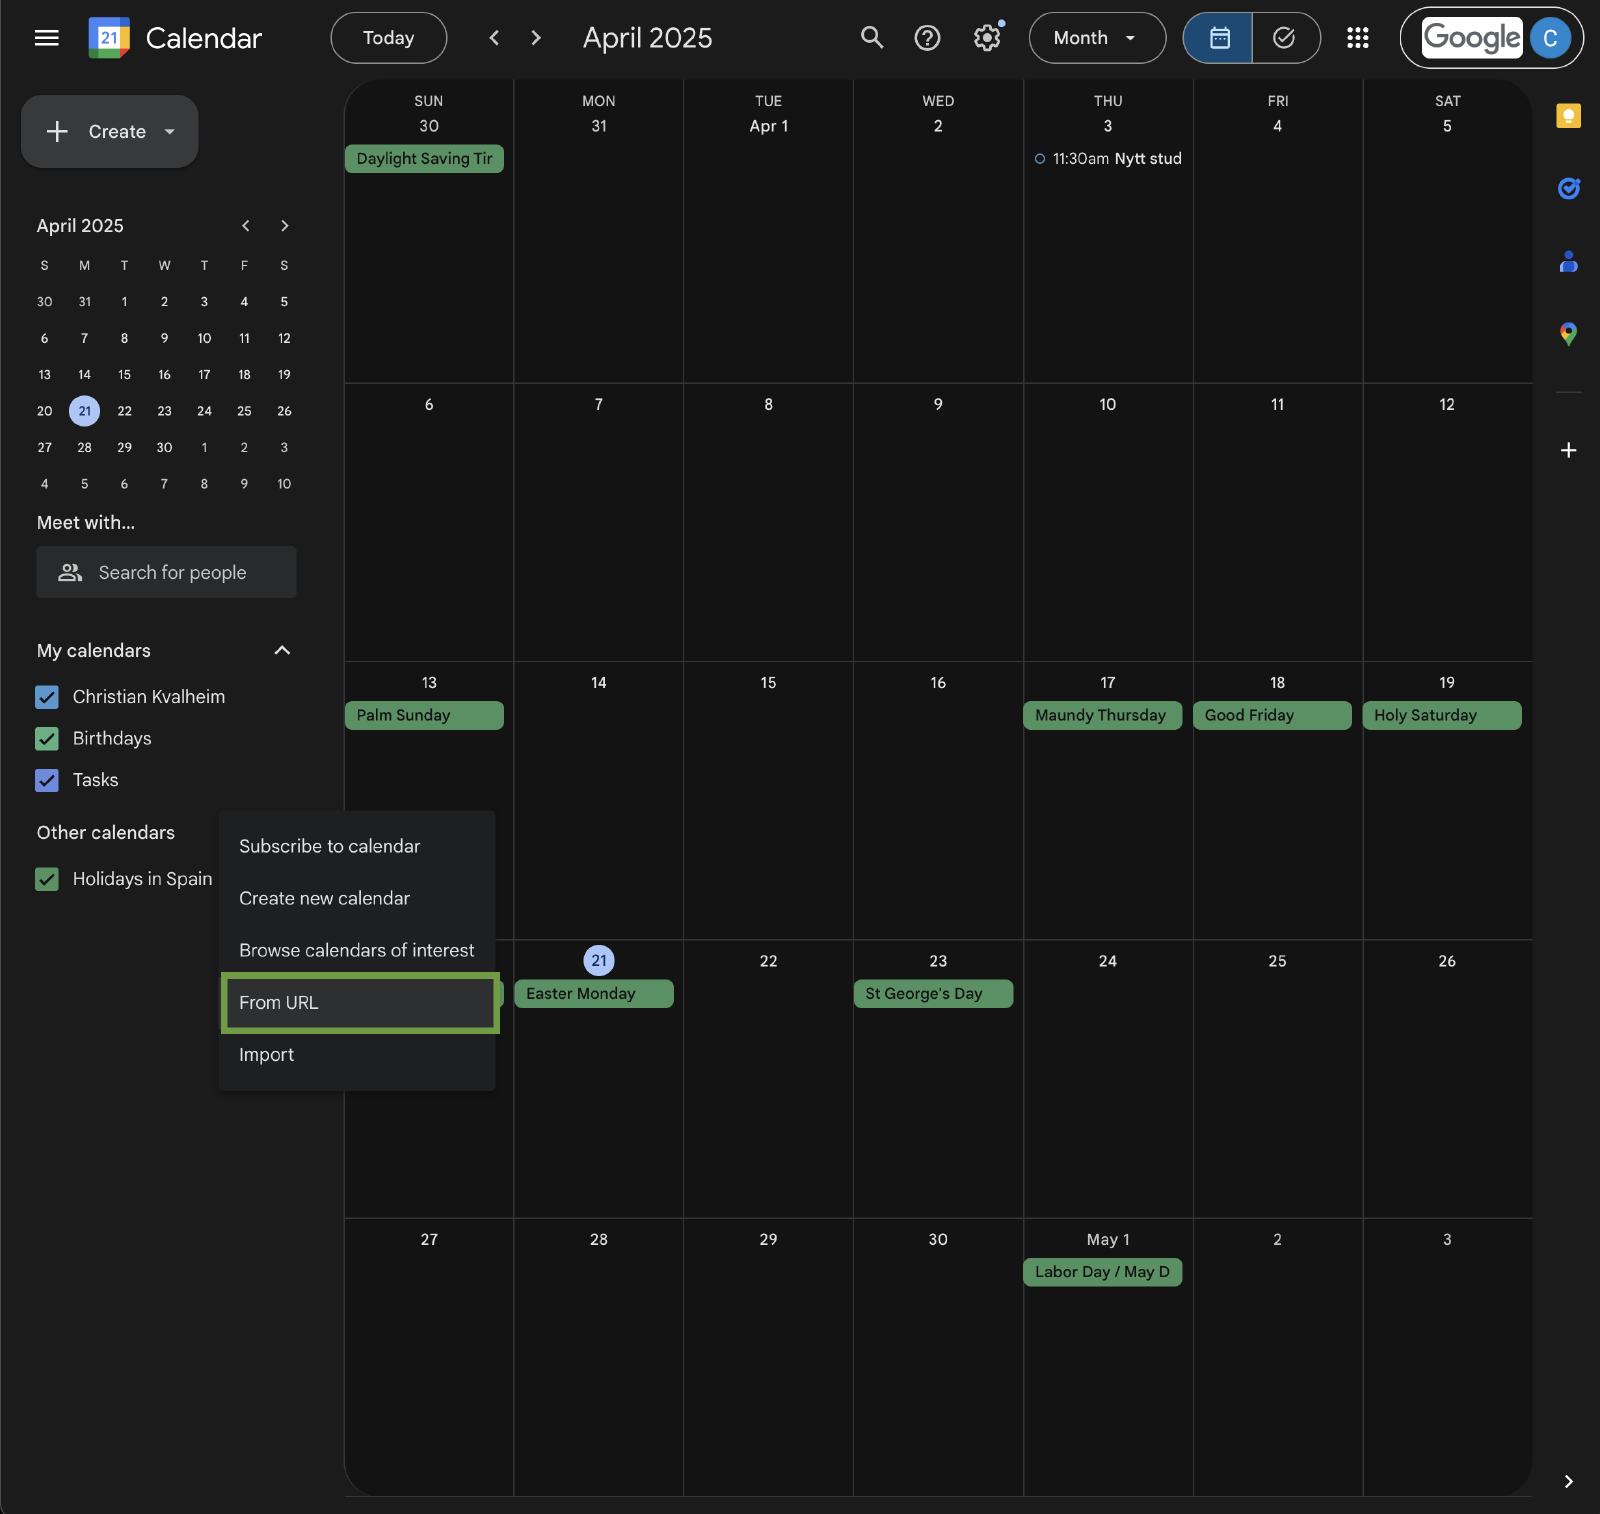
Select the From URL option from the drop down menu.
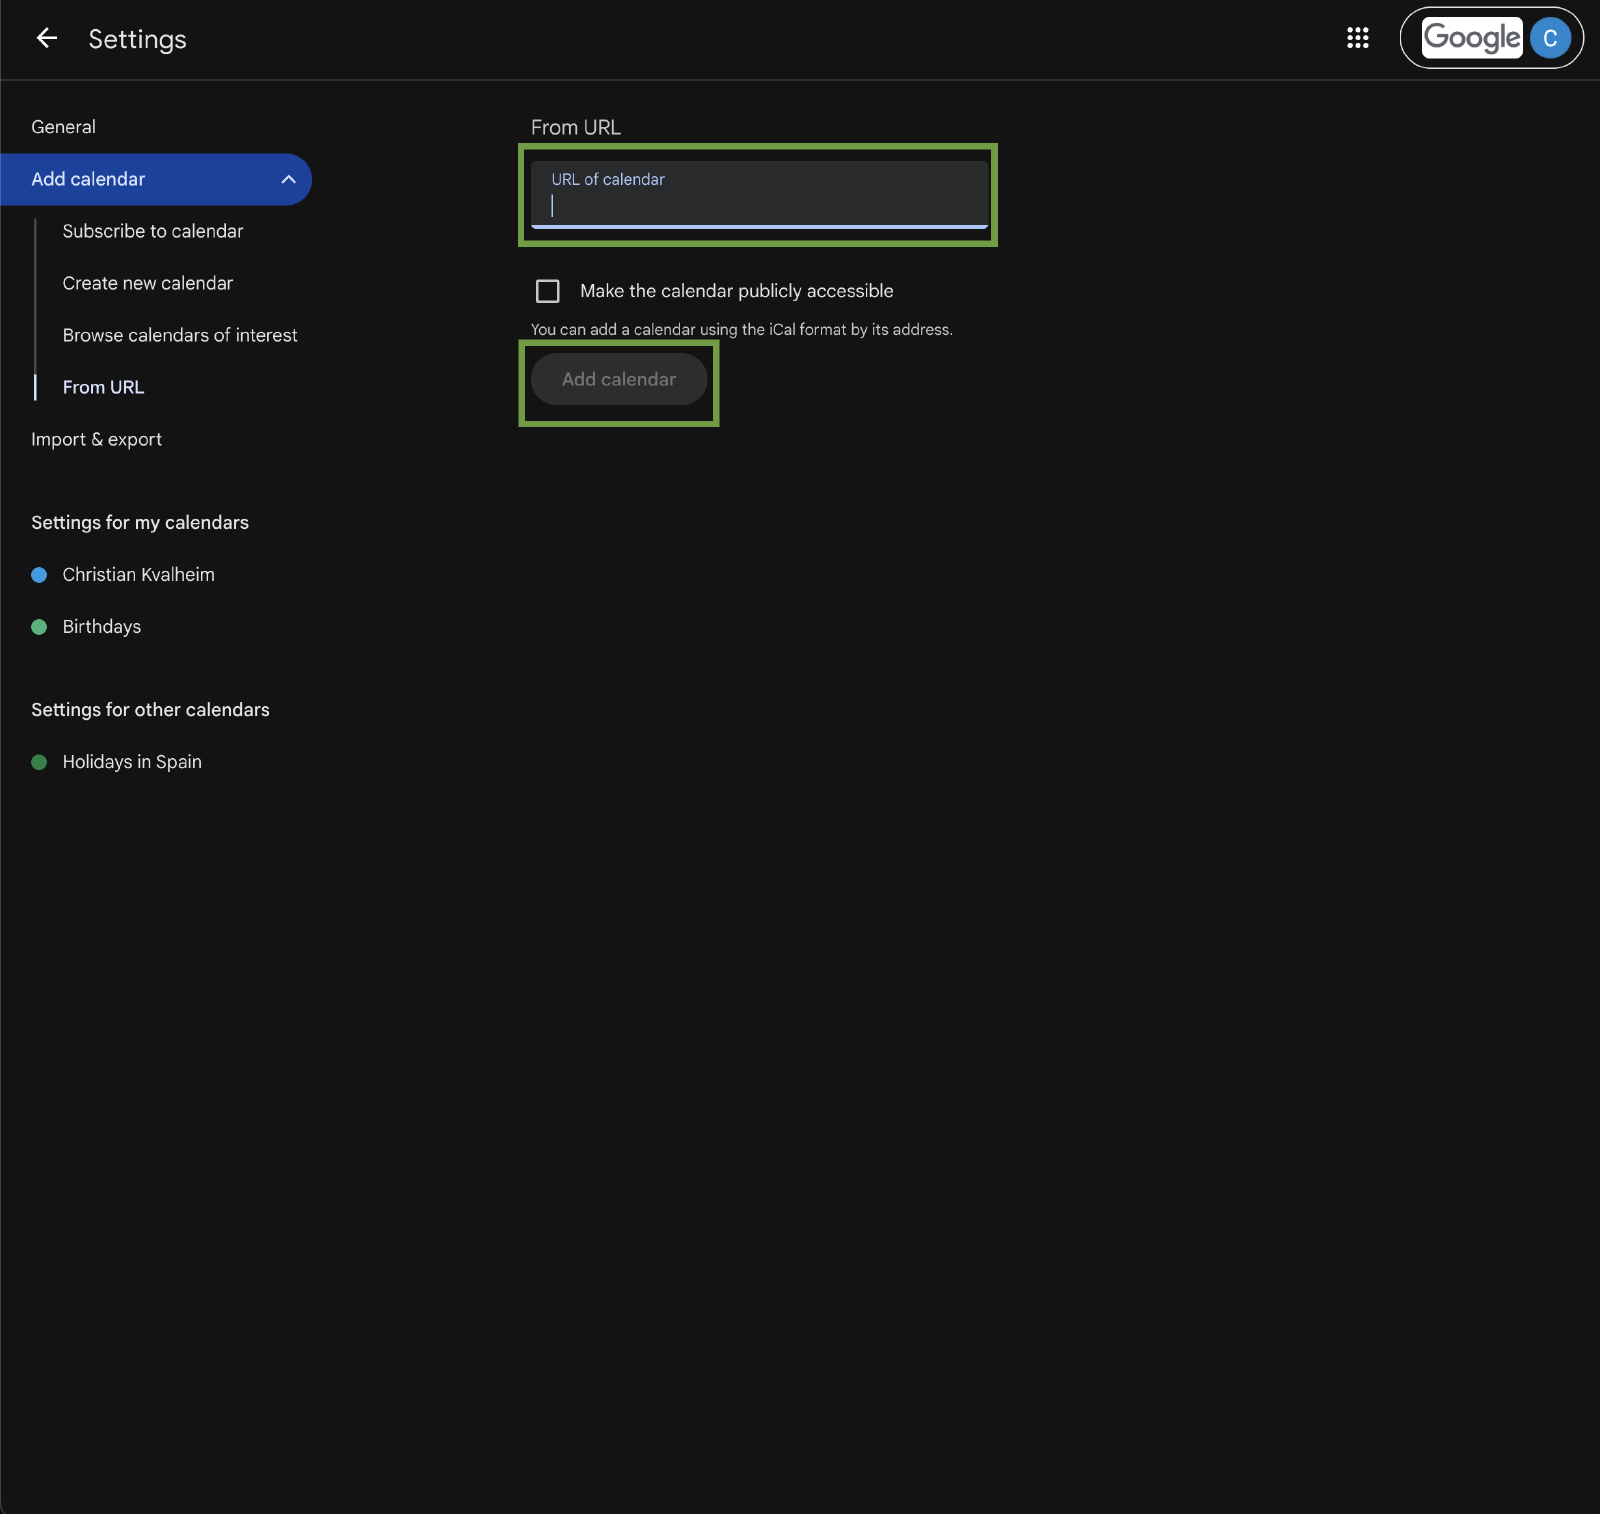
Paste the link you copied from the Activity Calendar subscription link dialog into the URL of calendar field. Then click on the Add calendar button.
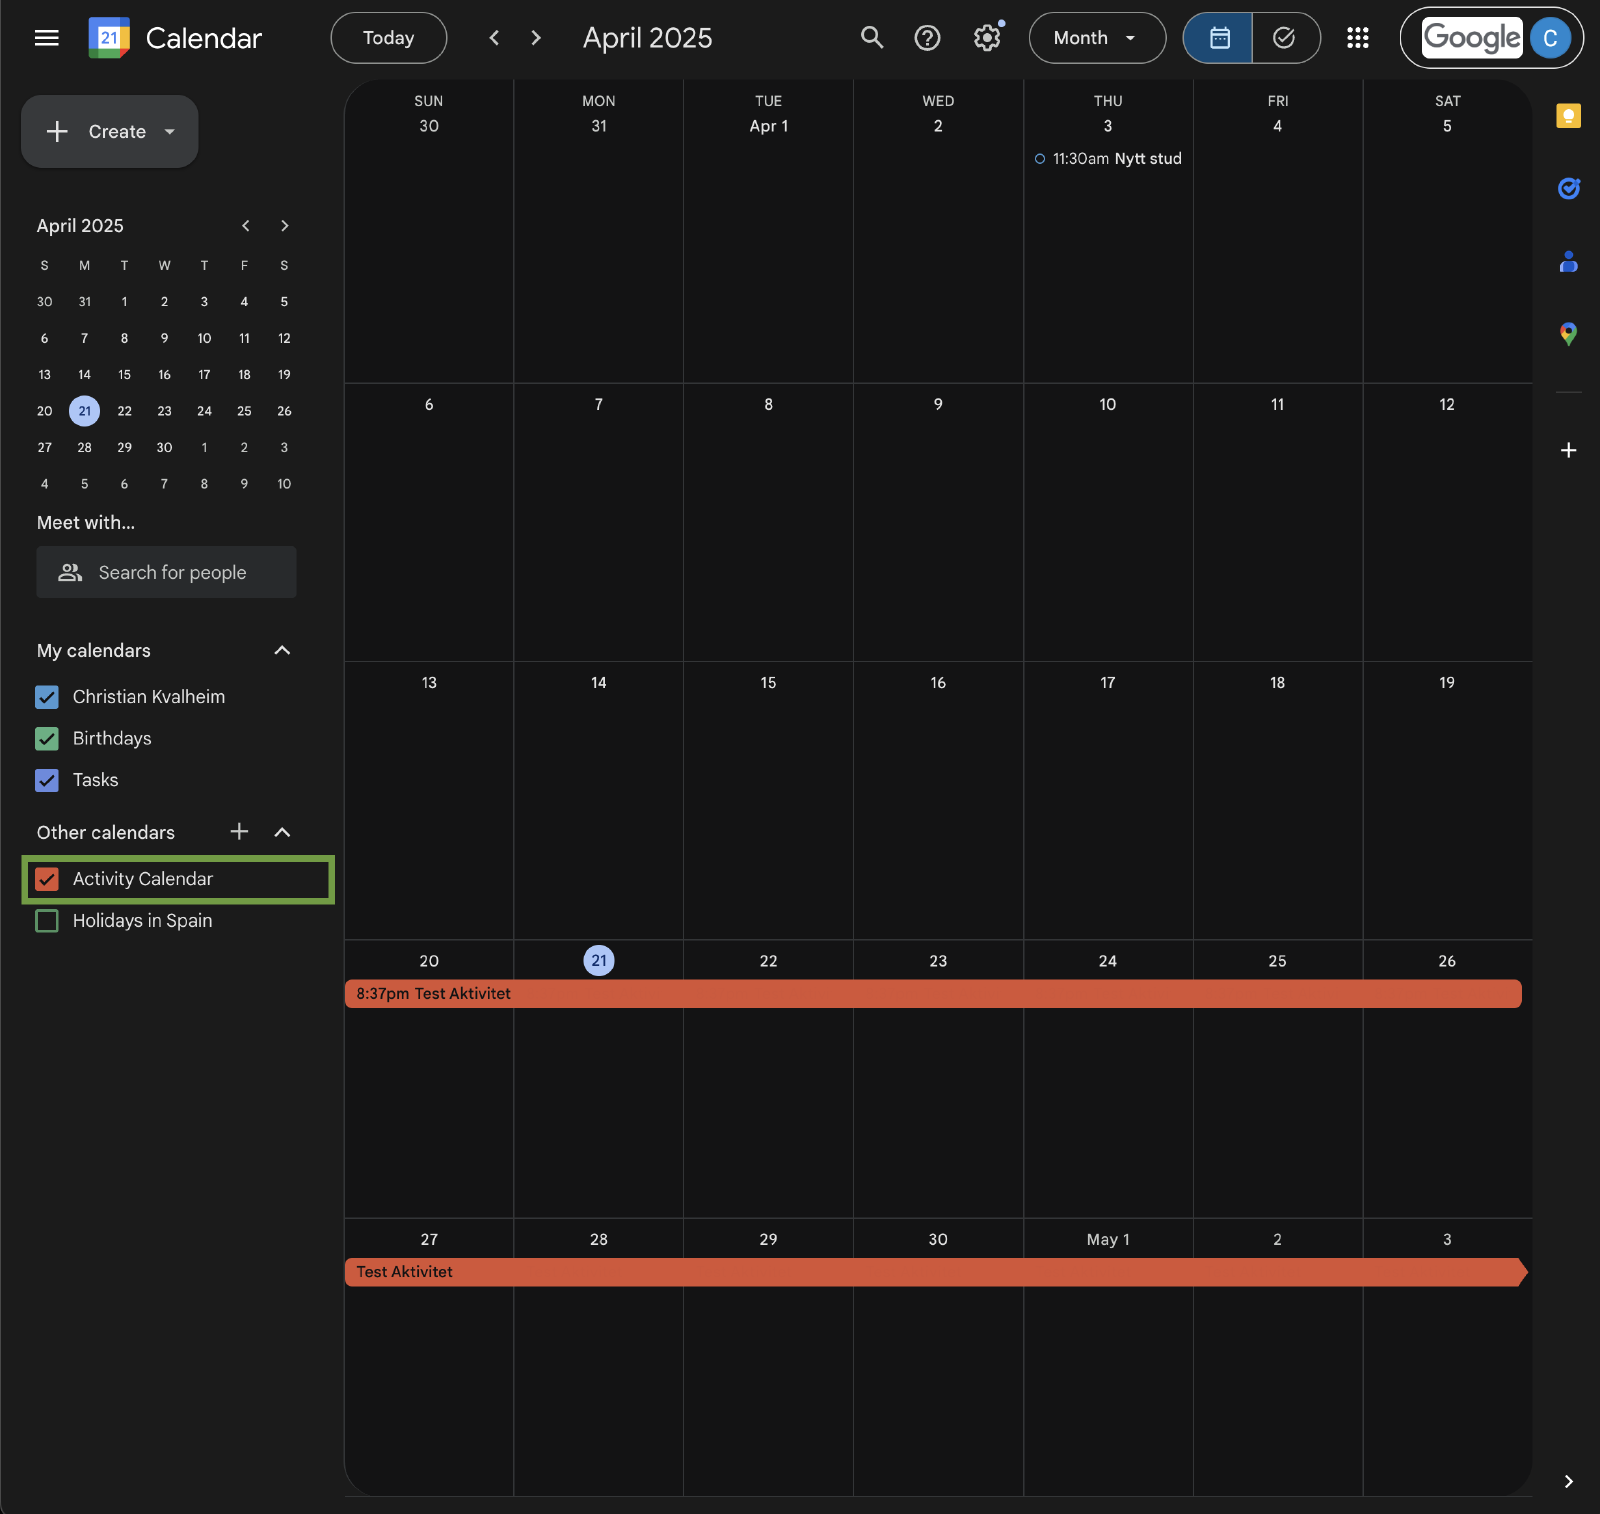
After finishing the import you can now see the calendar in your calendar list. You can also see the calendar events in the calendar view.
Add subscription to Apple Calendar
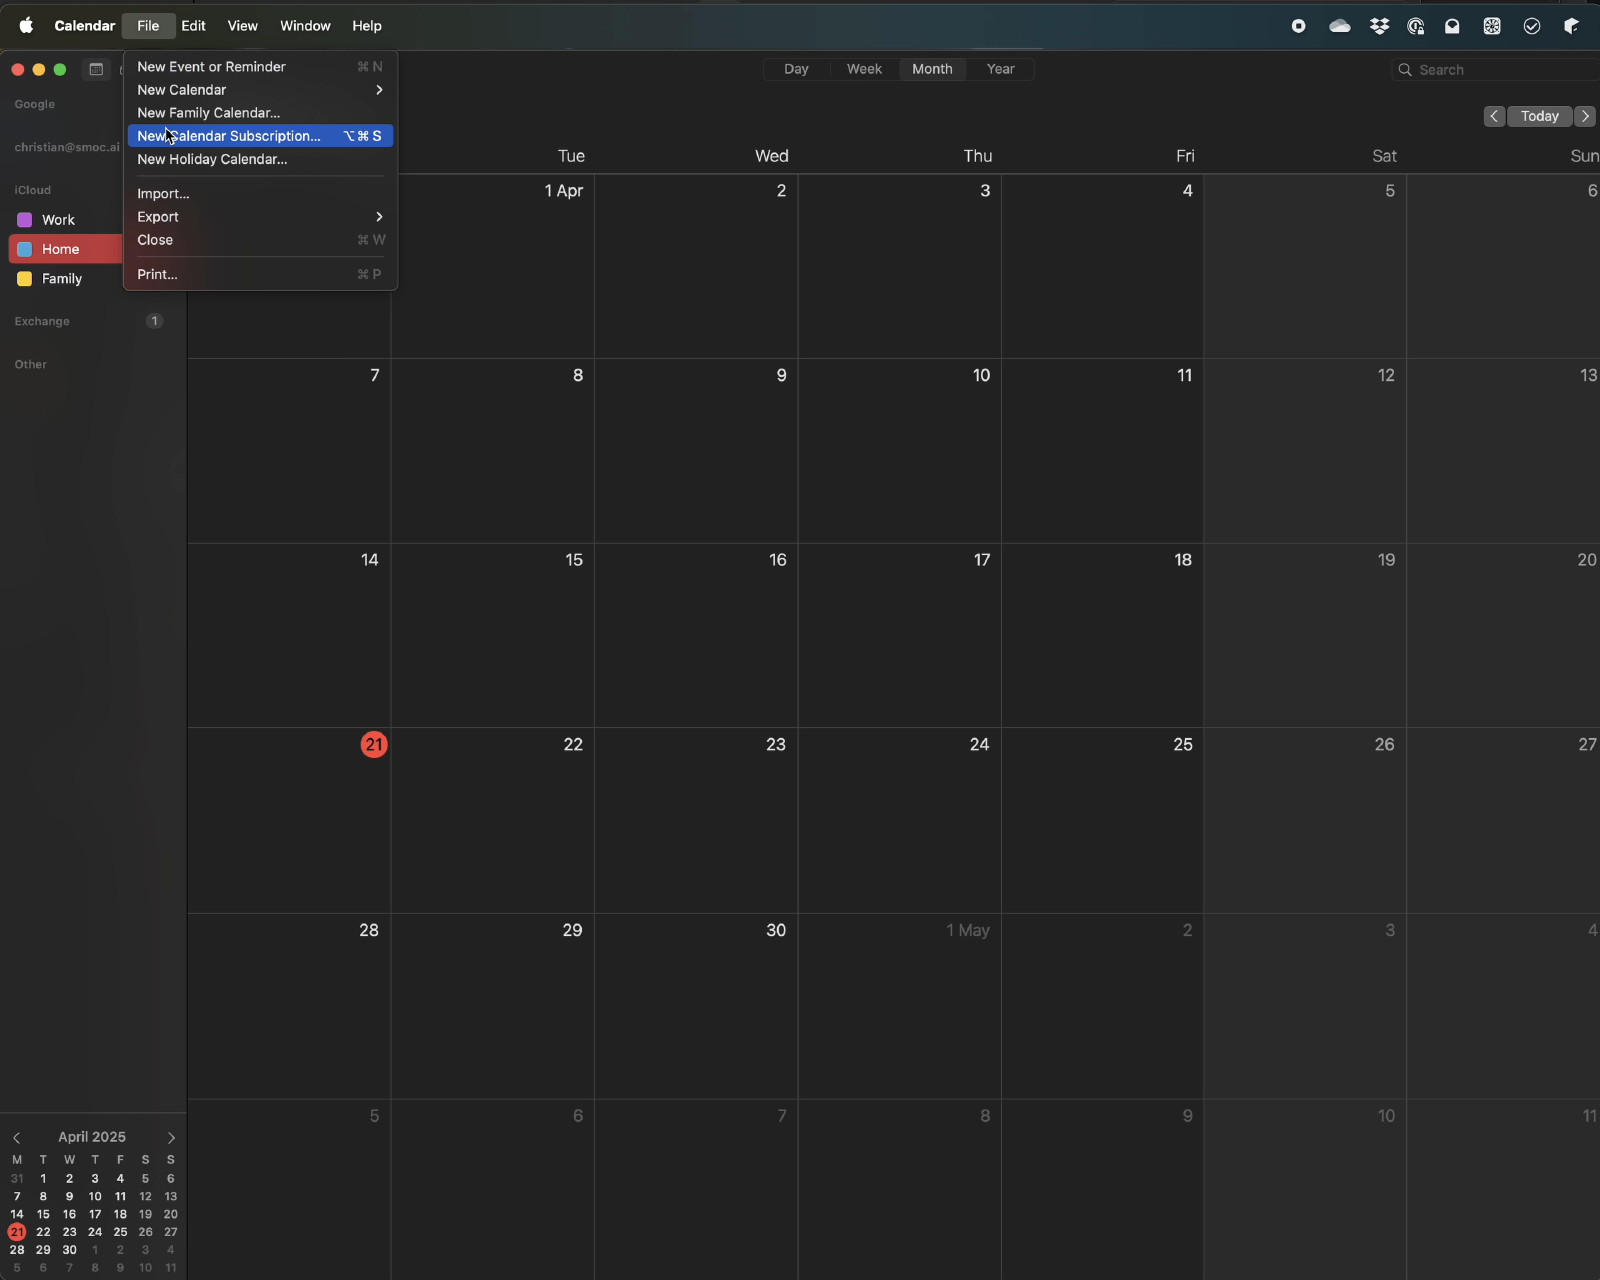
First select the File menu and then select the New Calendar Subscription option.
This will open a dialog that allows you to paste the link you copied from the Activity Calendar subscription link dialog.
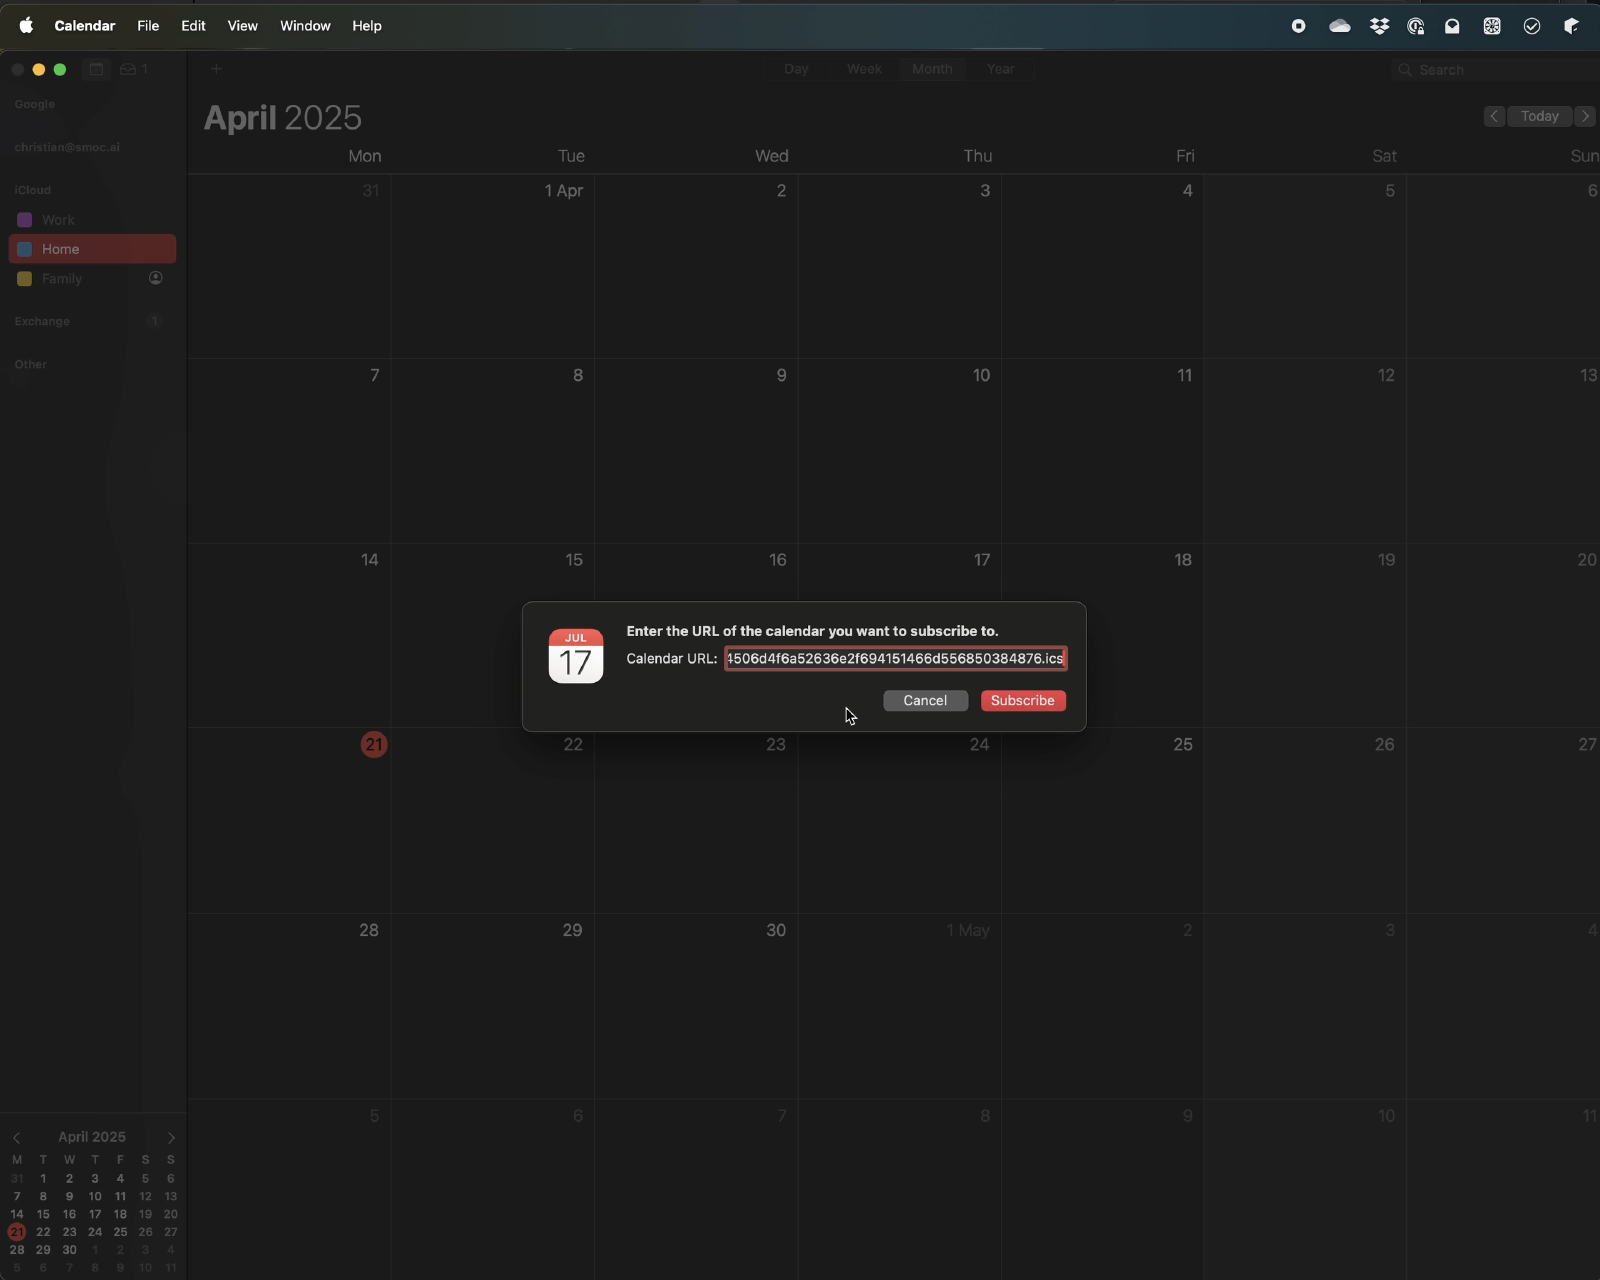
Paste the link into the Calendar URL field and click the Subscribe button. This will open a dialog that allows you to configure the calendar subscription.
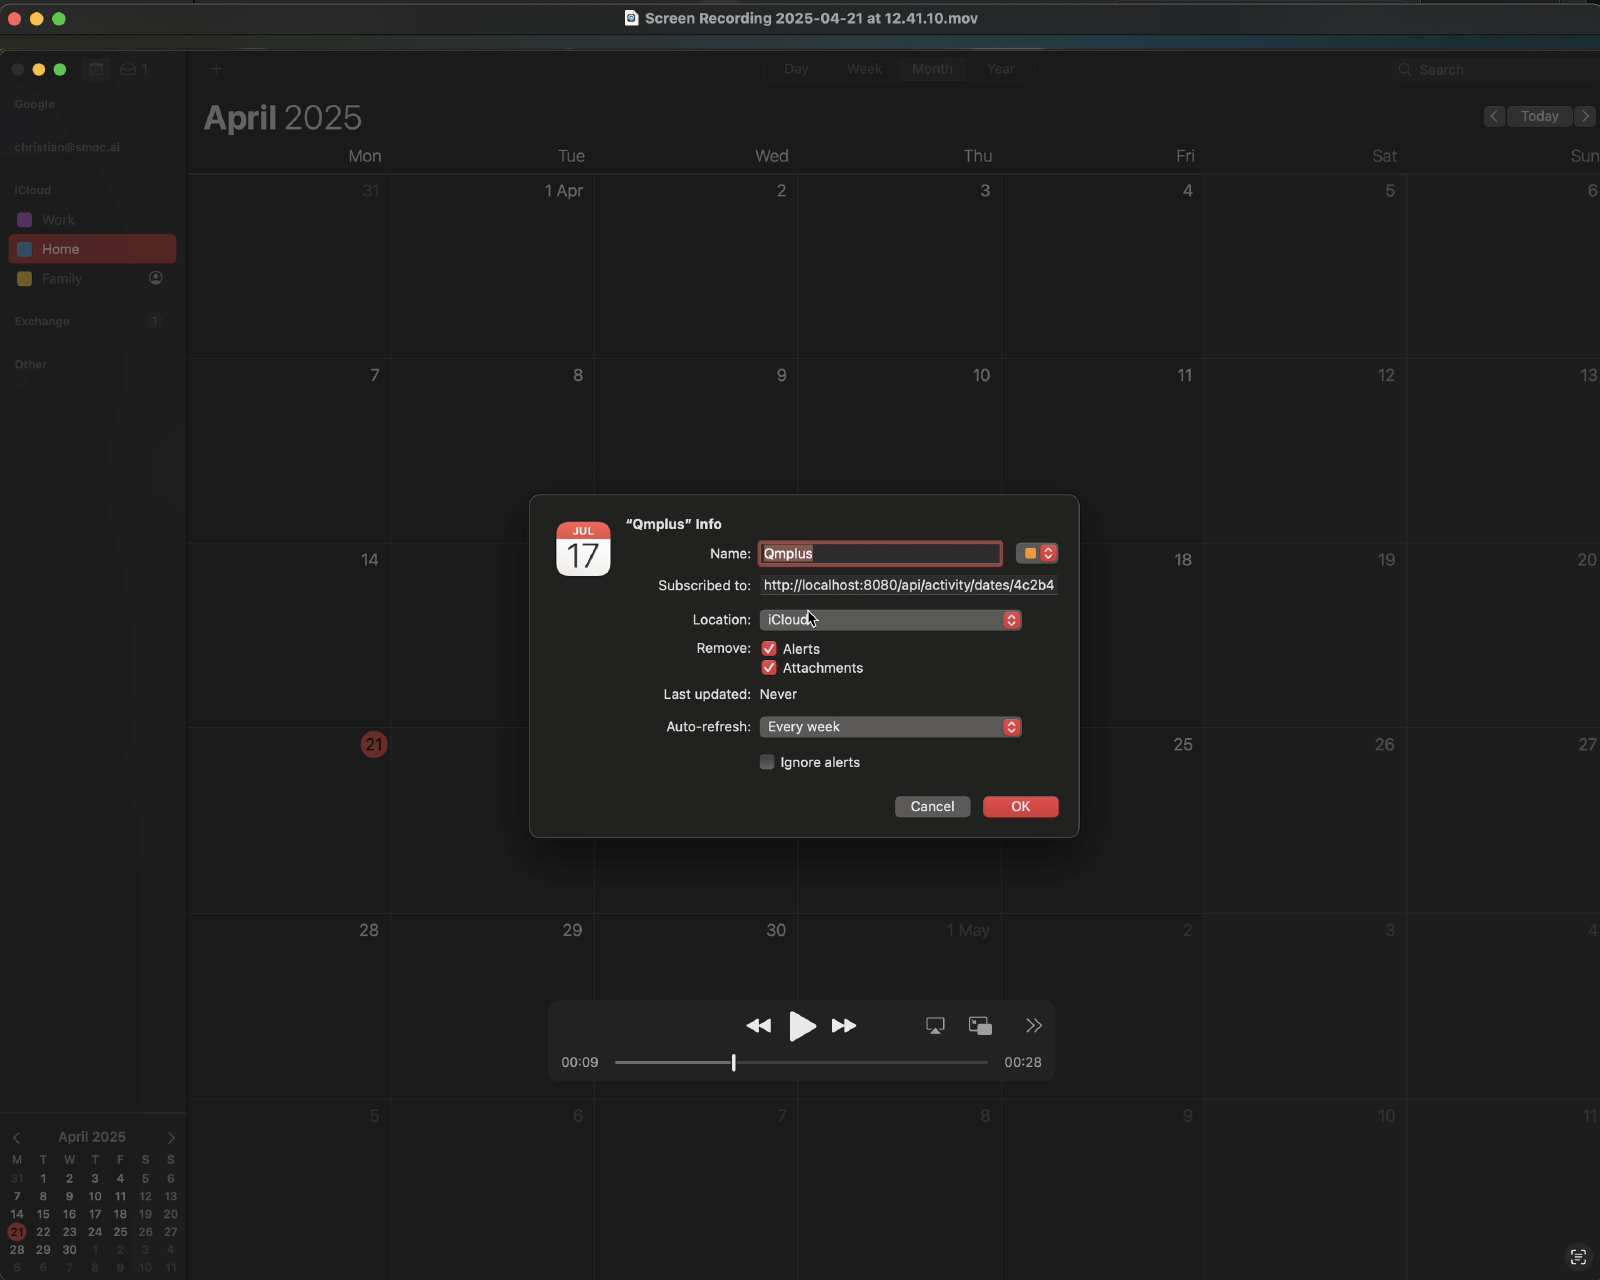
The dialog will allow you to configure the calendar subscription. You can set the name of the calendar, the location of the calendar, the refresh interval and whether to show alerts for the calendar. You can also set the calendar color and whether to show the calendar in the calendar list.
Click the OK button to create the calendar subscription. This will add the calendar subscription to your Apple Calendar. You might need to refresh the calendar to see the events in the calendar. This is typically done by clicking the View menu and selecting the Refresh All Calendars option.
or press ⌘R (Command+R) to refresh all calendars. The calendar will now appear in your calendar list.
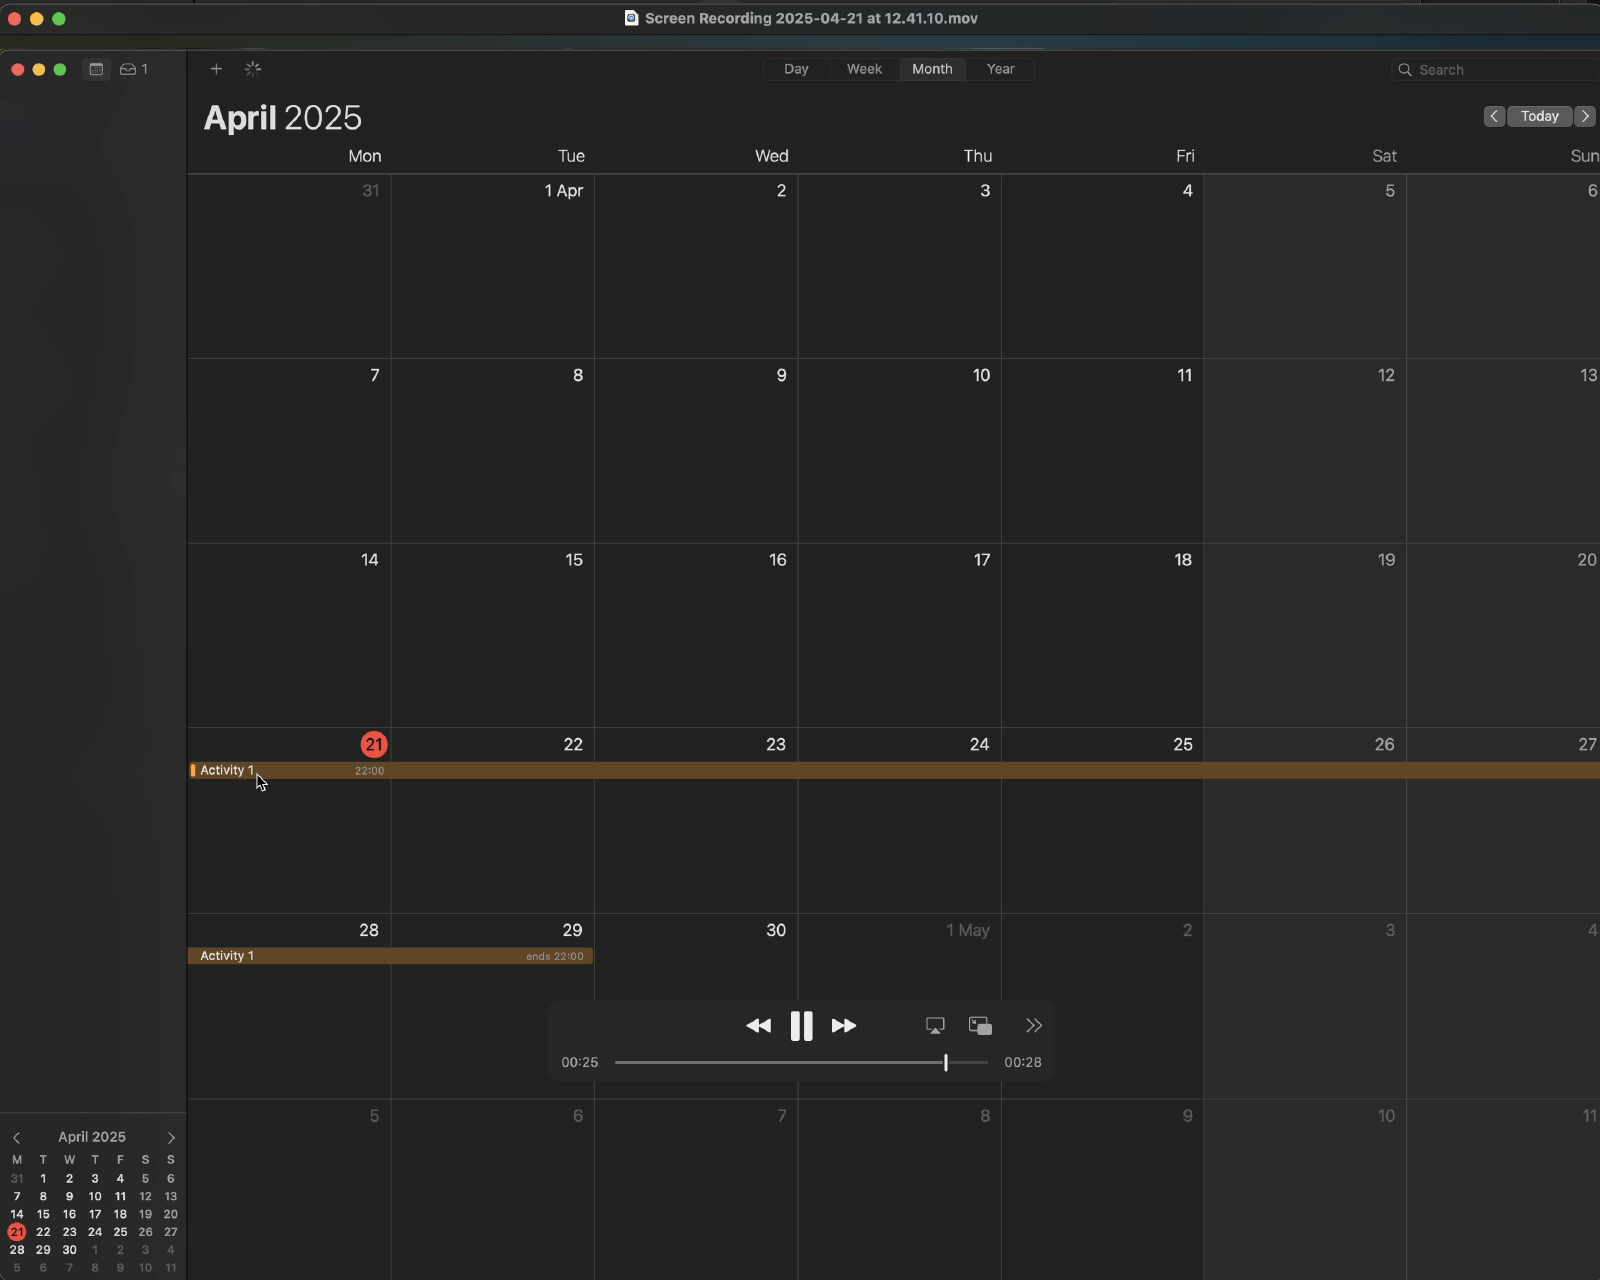
In this case we can see the Activiy 1 we had created in the Qmplus Activity Calendar.