Administrator/Document Administrator
A user guide for working with the document administrator. We cover how to create, update and manage documents.
This section is dedicated to managing documents within the system.
By clicking on Administrator/Document Administrator, you gain access to the document manager.
Document Manager
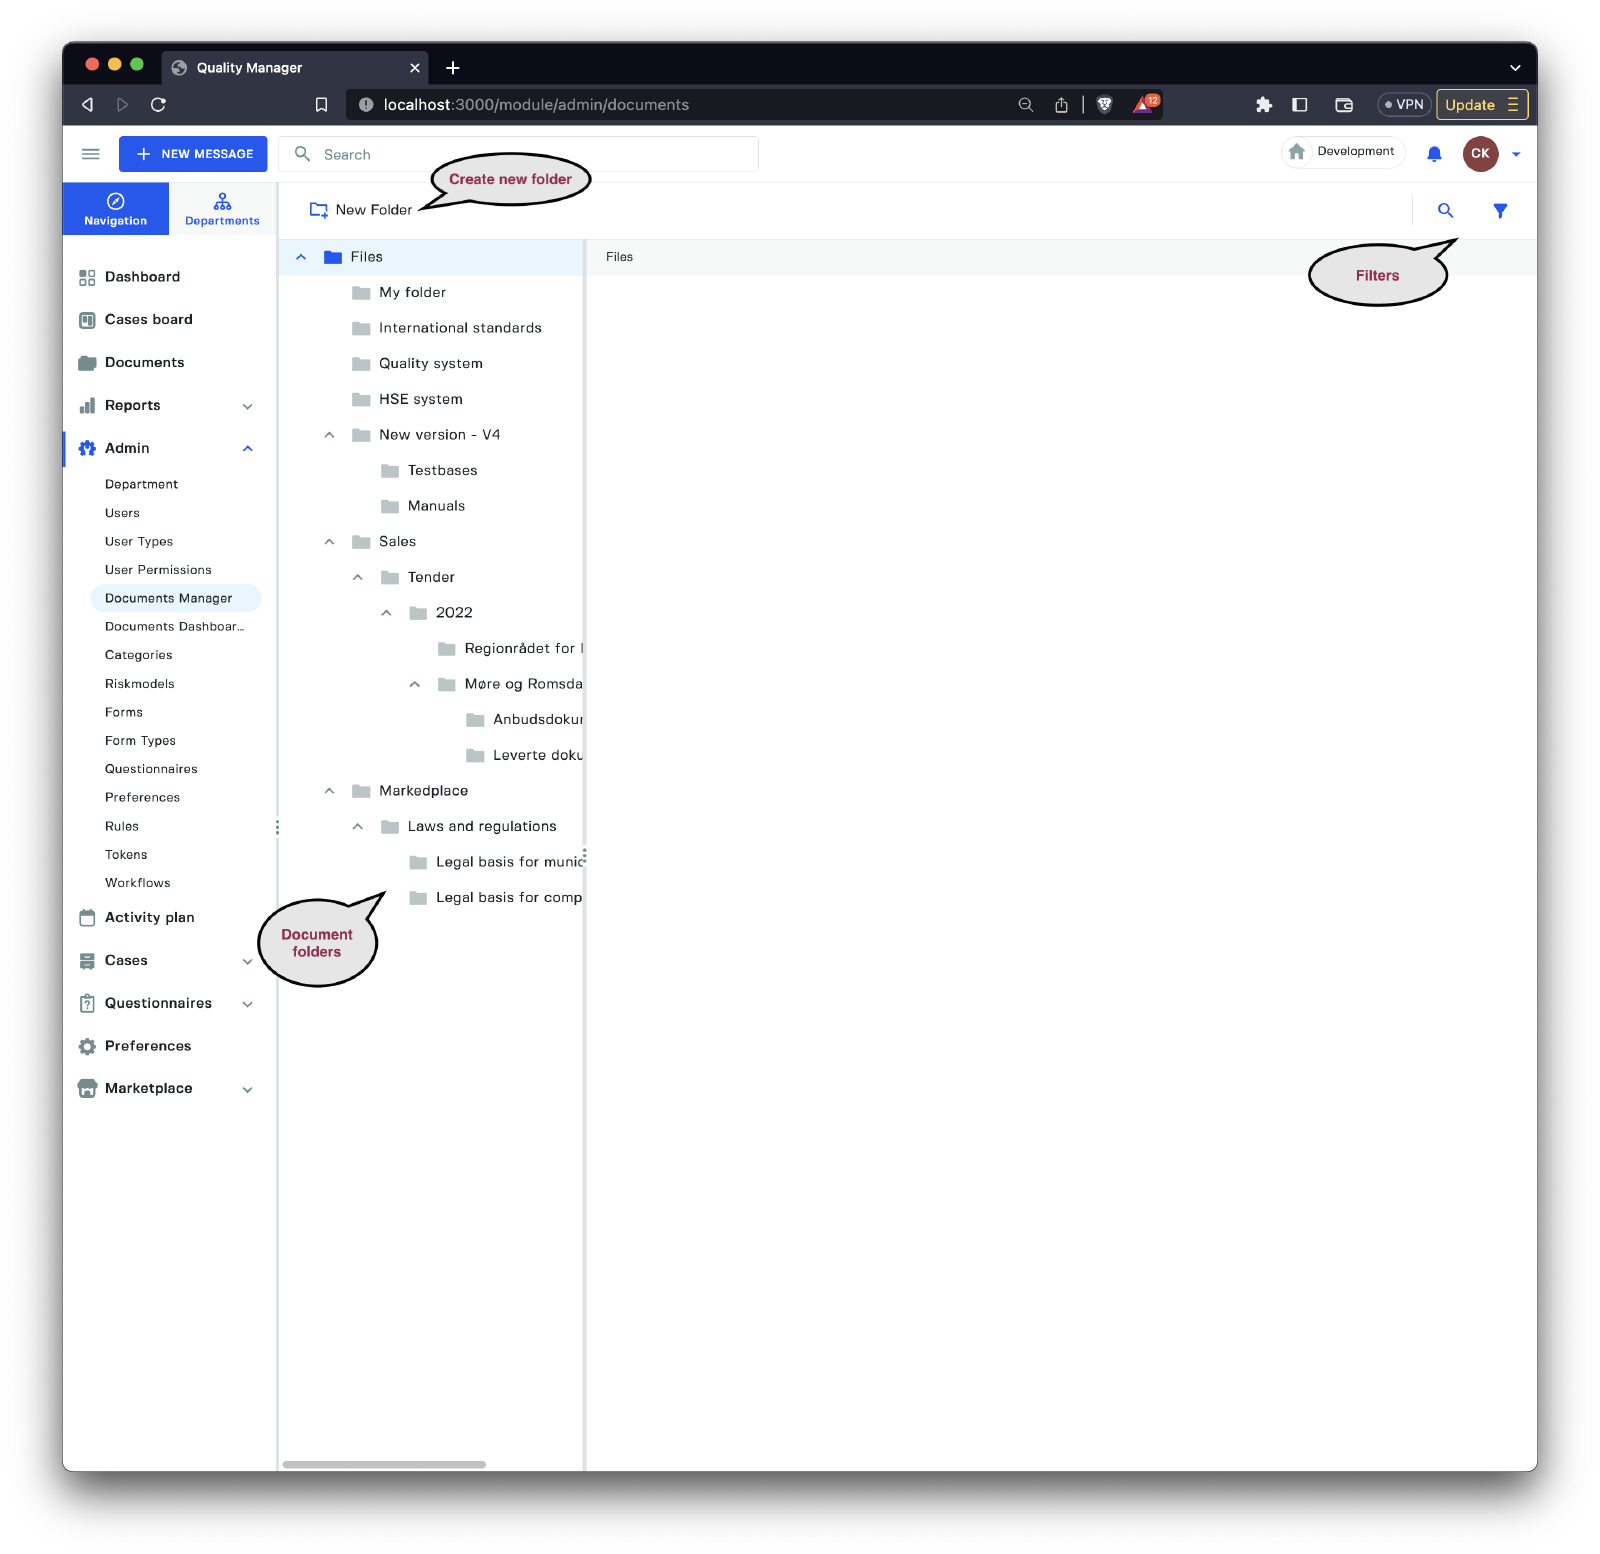
The document manager is the central hub of the document management system. It enables you to organize documents, create new ones, upload existing ones, edit them, or deactivate them.
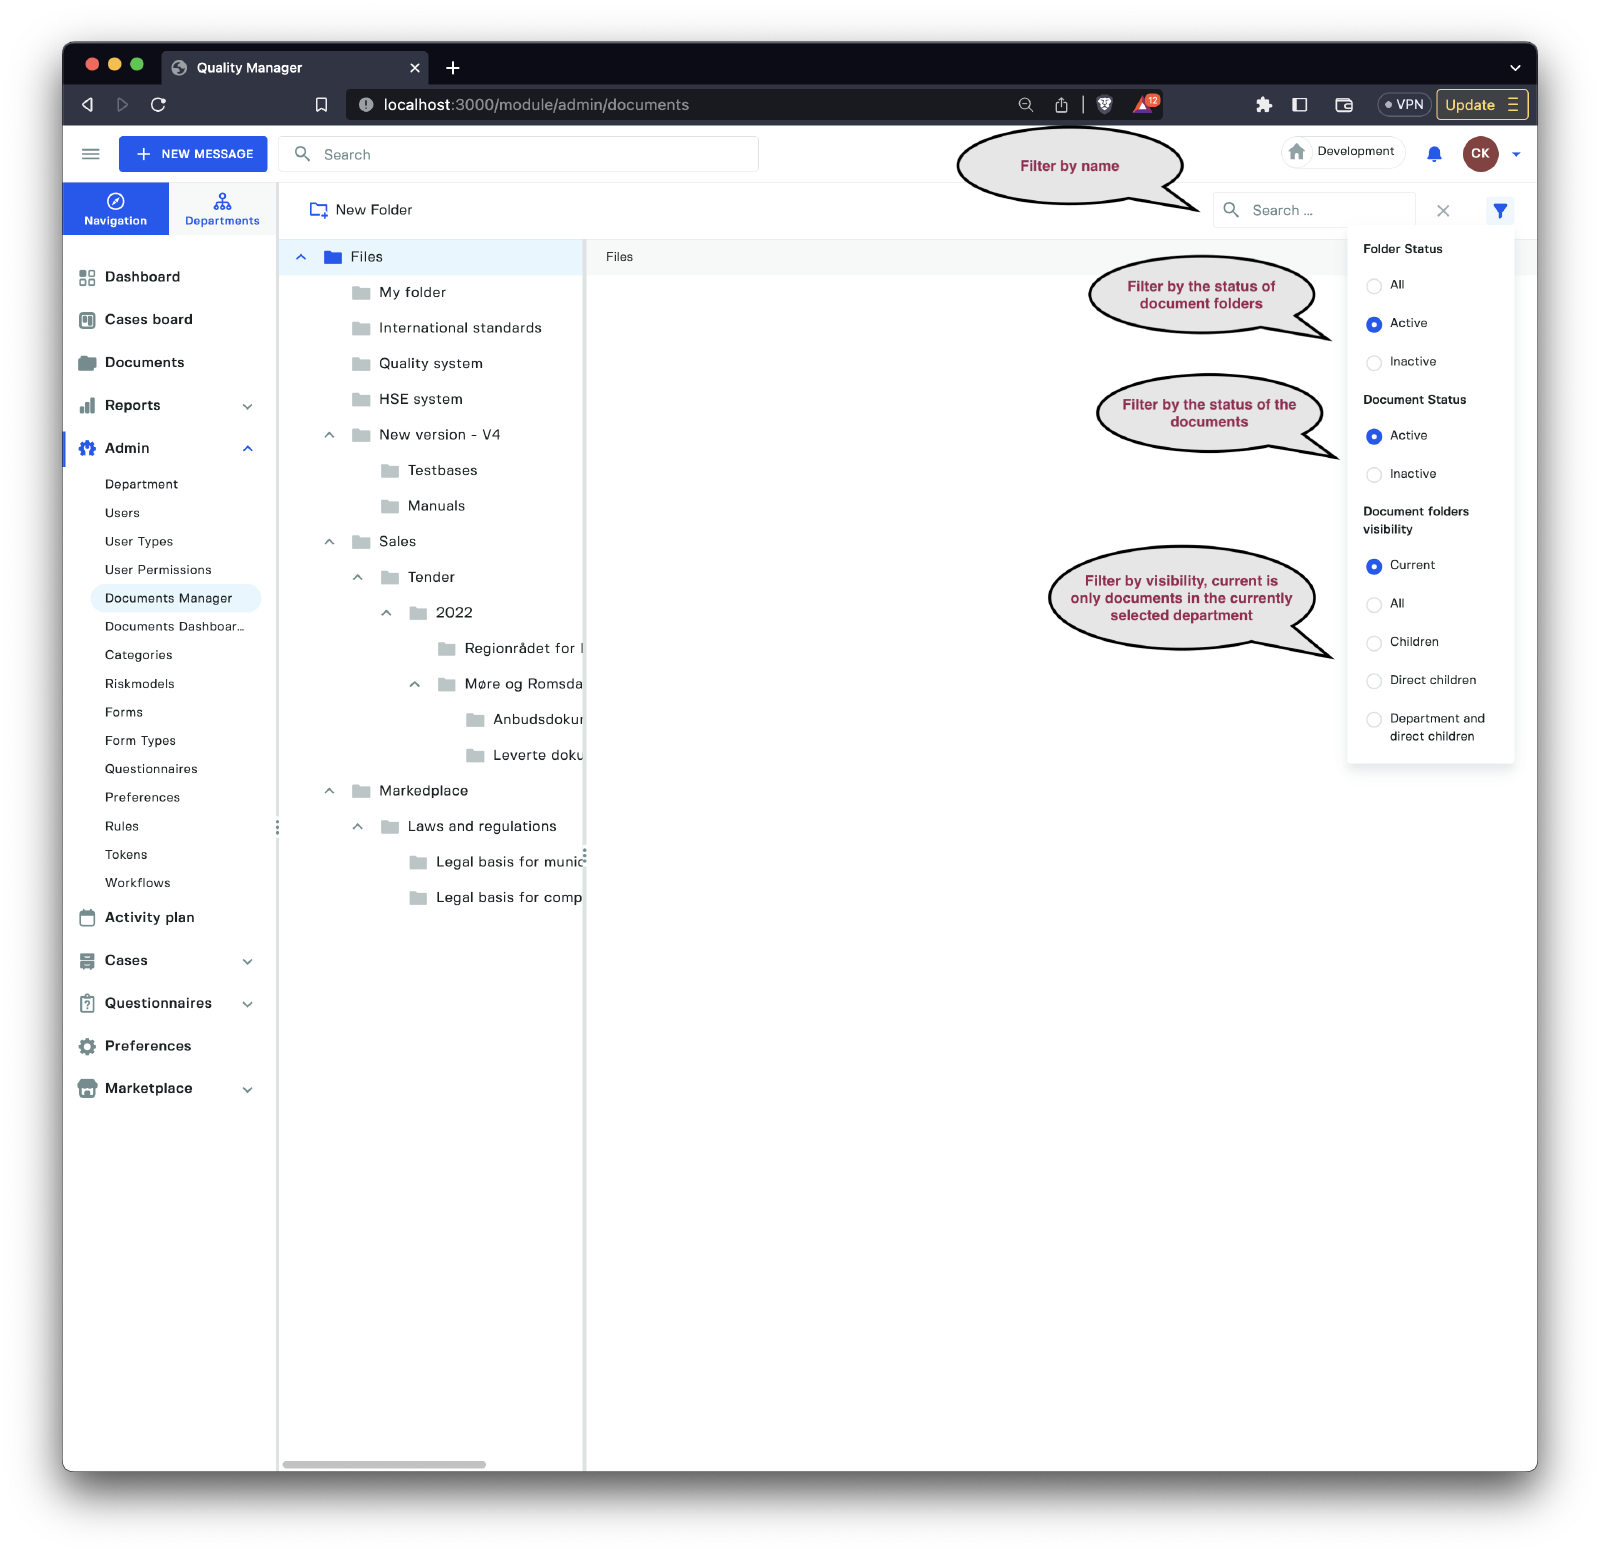
Using the filter, you can refine the documents displayed in the document manager to focus on a specific document.
Keep in mind that all documents are associated with departments. This means that the view of documents in the manager will change as you modify the visibility and the department you are looking at. For example, to see all documents in the child departments, you can choose
AllfromDocument folders visibility.
Create a New Folder

To create a new folder, provide the folder name in multiple languages, if supported.
Document Folder View

When you select a document folder view, you have the following options available:
| Option | Description |
|---|---|
New Folder | Create a new folder under the currently selected document on the left side. |
New Document | Create a new document in this document folder. |
Refresh | Refresh the current document folder view. |
Rename | Rename the current document folder. |
Upload | Upload a document into this document folder. |
You can also upload documents by dragging and dropping them directly into the document folder.

When one or more files are dropped on the document folder, an upload dialog pops up with the following options:
| Options | Description |
|---|---|
Files | The list of documents that will be uploaded when clicking the Upload button. |
Visibility | Set the visibility of the documents uploaded. |
Workflow | Select the workflow all the uploaded documents will be associated with. |
You can also use the
Uploadbutton to upload files instead of dragging and dropping files.
Create a New Document
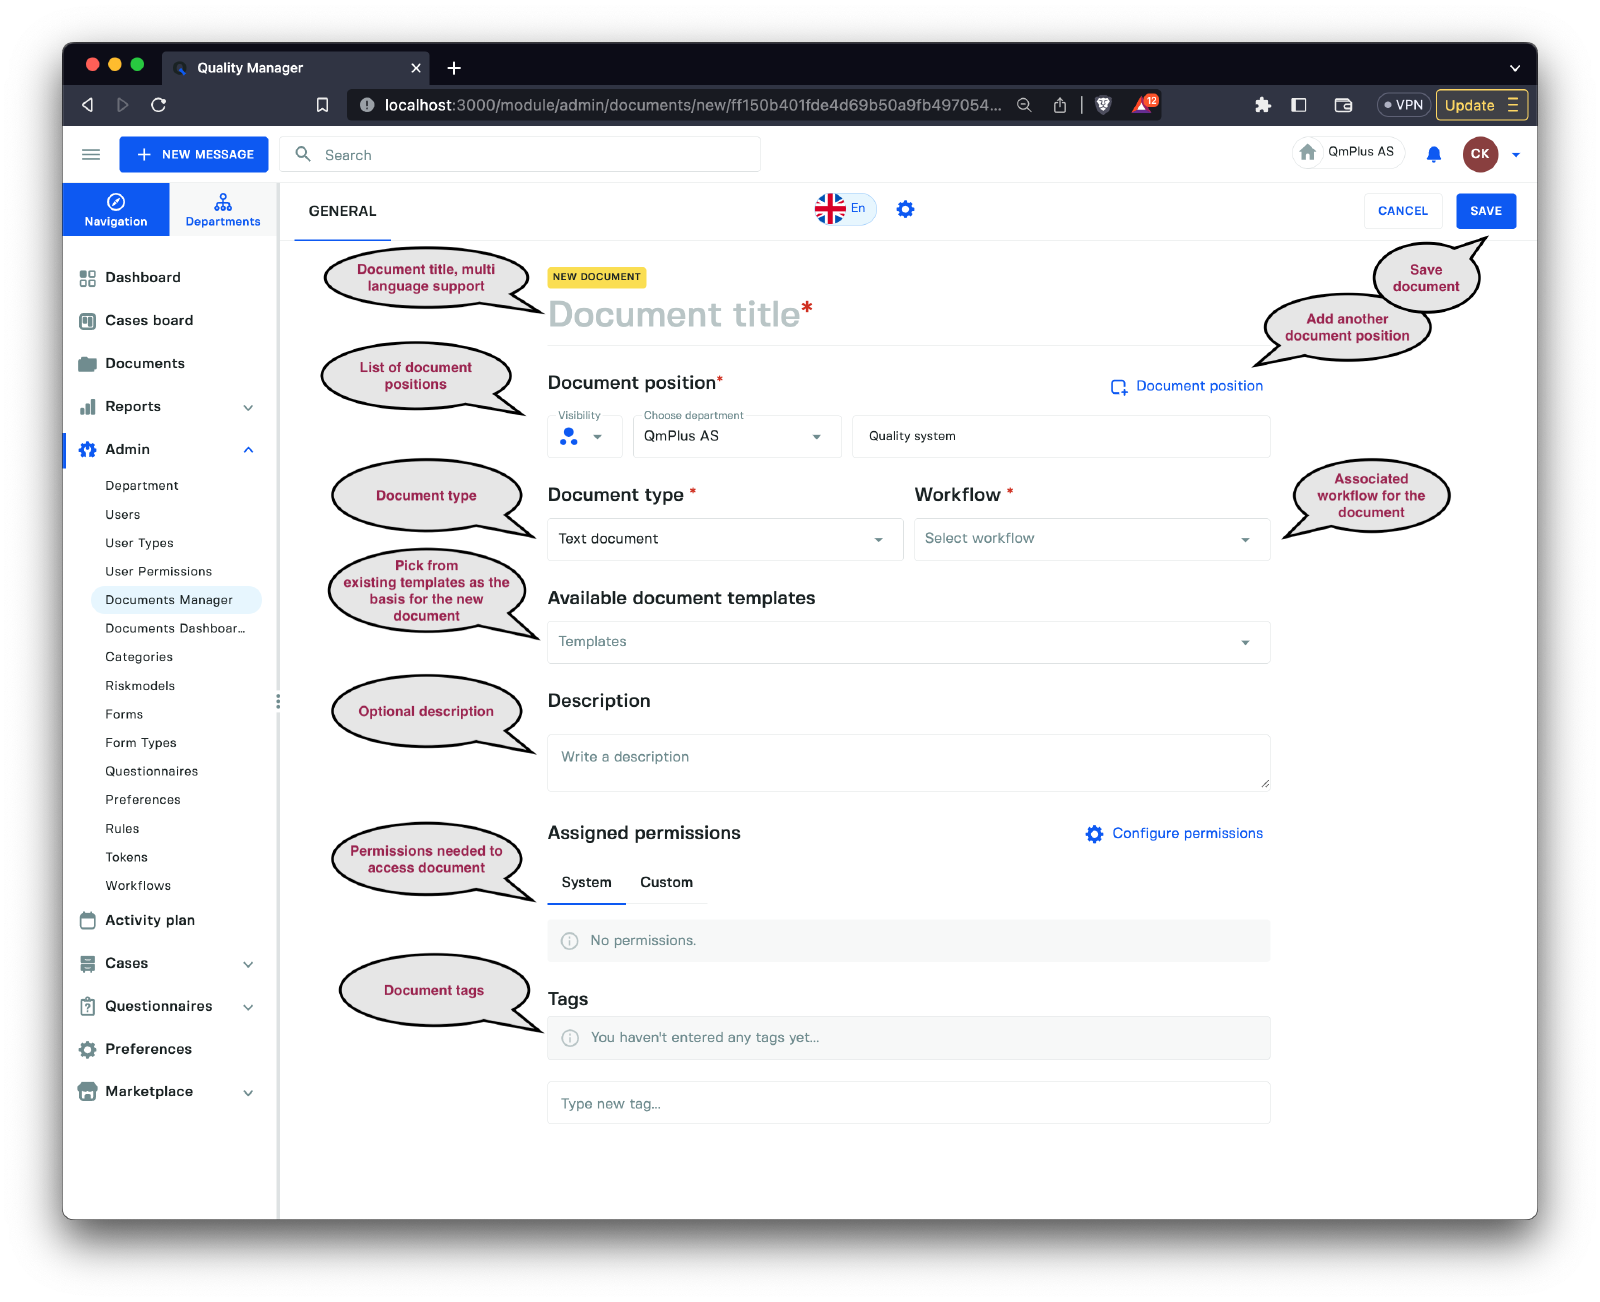
When clicking the New Document button, the new document dialog appears with the following options:
| Option | Description |
|---|---|
Document title | The title of the new document, supports multiple languages. |
Document position | The list of document positions (visibility and department) associated with the new document. |
Document type | The type of document, see the table below. |
Workflow | Select the associated workflow for the new document you are creating. |
Available document templates | Optionally select a template to base the new document on. |
Description | Optional description for the new document. |
Assigned permissions | Assign permissions to limit access to the document. |
Tags | Add tags to group the document with other documents using keywords. |
The supported document types are as follows:
| Document Type | Description |
|---|---|
Link | A document representing an external link from the platform. |
File | An uploaded file such as a Word document, PDF, image, or video. |
Text document | A simple HTML text document (with basic formatting) stored in the system. |
Process chart | A process diagram (similar to a simplified Visio) to draw process charts for use within the application. |
Richtext | A rich word processor document (similar to a simplified Microsoft Word) allowing for more complex document entry. |
Spreadsheet | A basic spreadsheet document, with a minimum set of functionality. |
Create a new File document
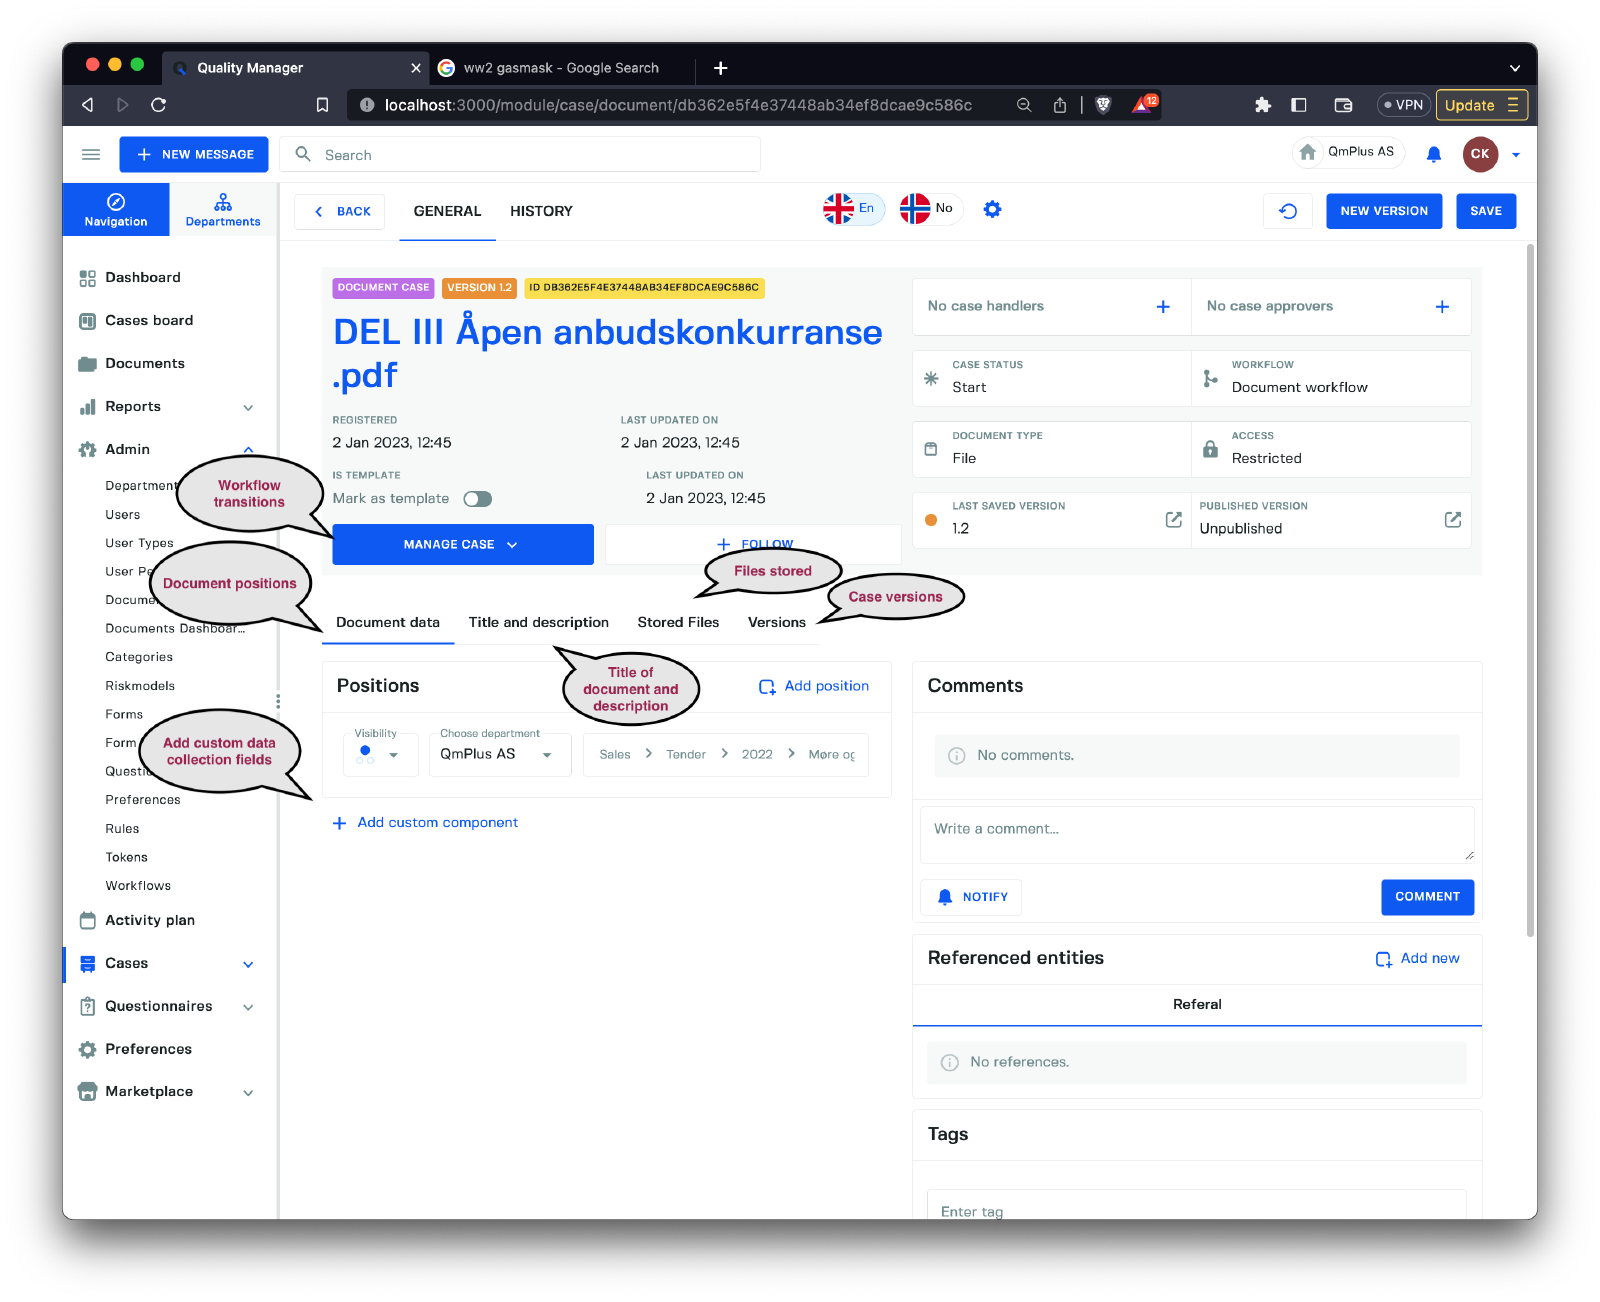
The main aspects unique to the document case include:
| Tab | Description |
|---|---|
Document data | Contains the document’s location and allows adding additional data elements if more information needs to be captured for the document case. |
Title and description | Title and description of the document case. |
Stored Files | Files stored for this document case. |
Versions | All the versions of this document case. |
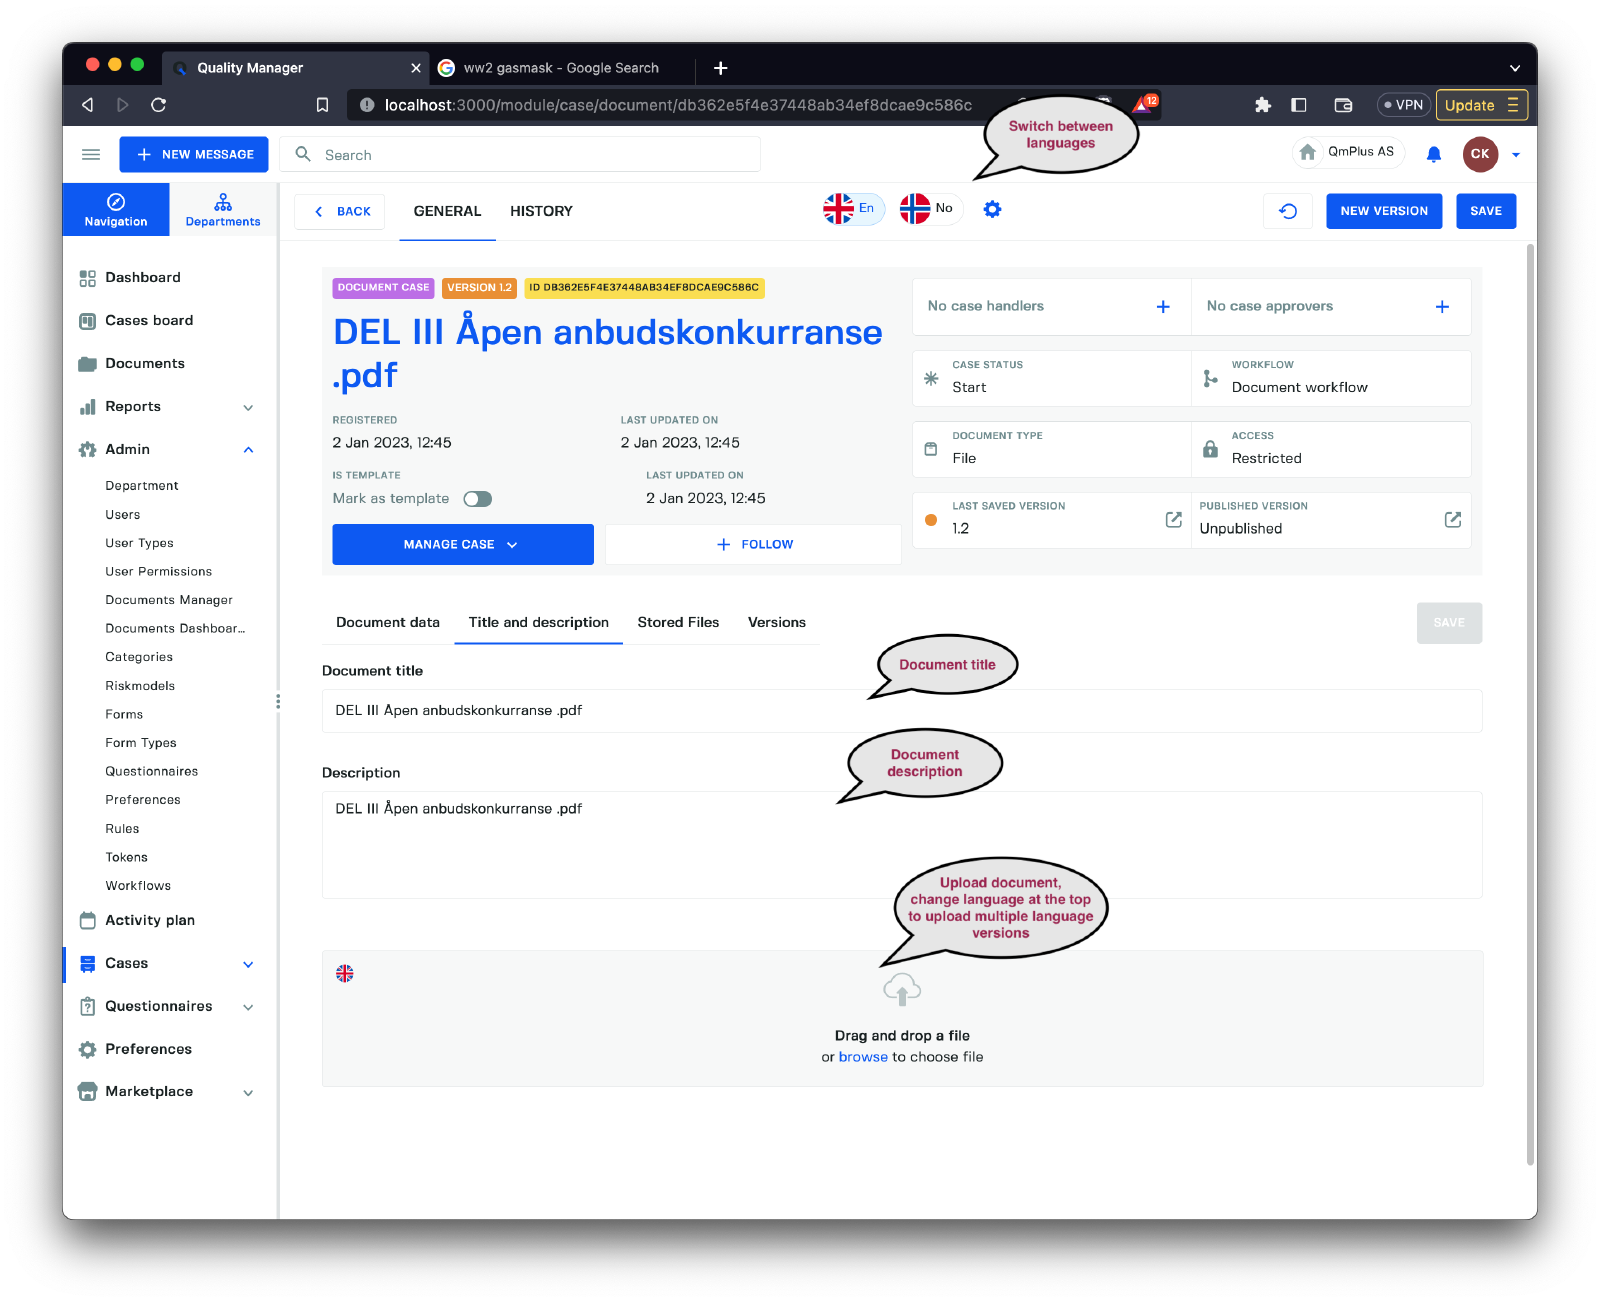
On the Title and description tab, you can change the title, description for all languages. You can also upload new versions of the file or new files for different languages.
All documents in the platform support multiple languages, allowing you to keep all language versions of a procedure bundled into one manageable case. For example, you might have a production process that needs to be available in Norwegian and English.
Create a new Text document
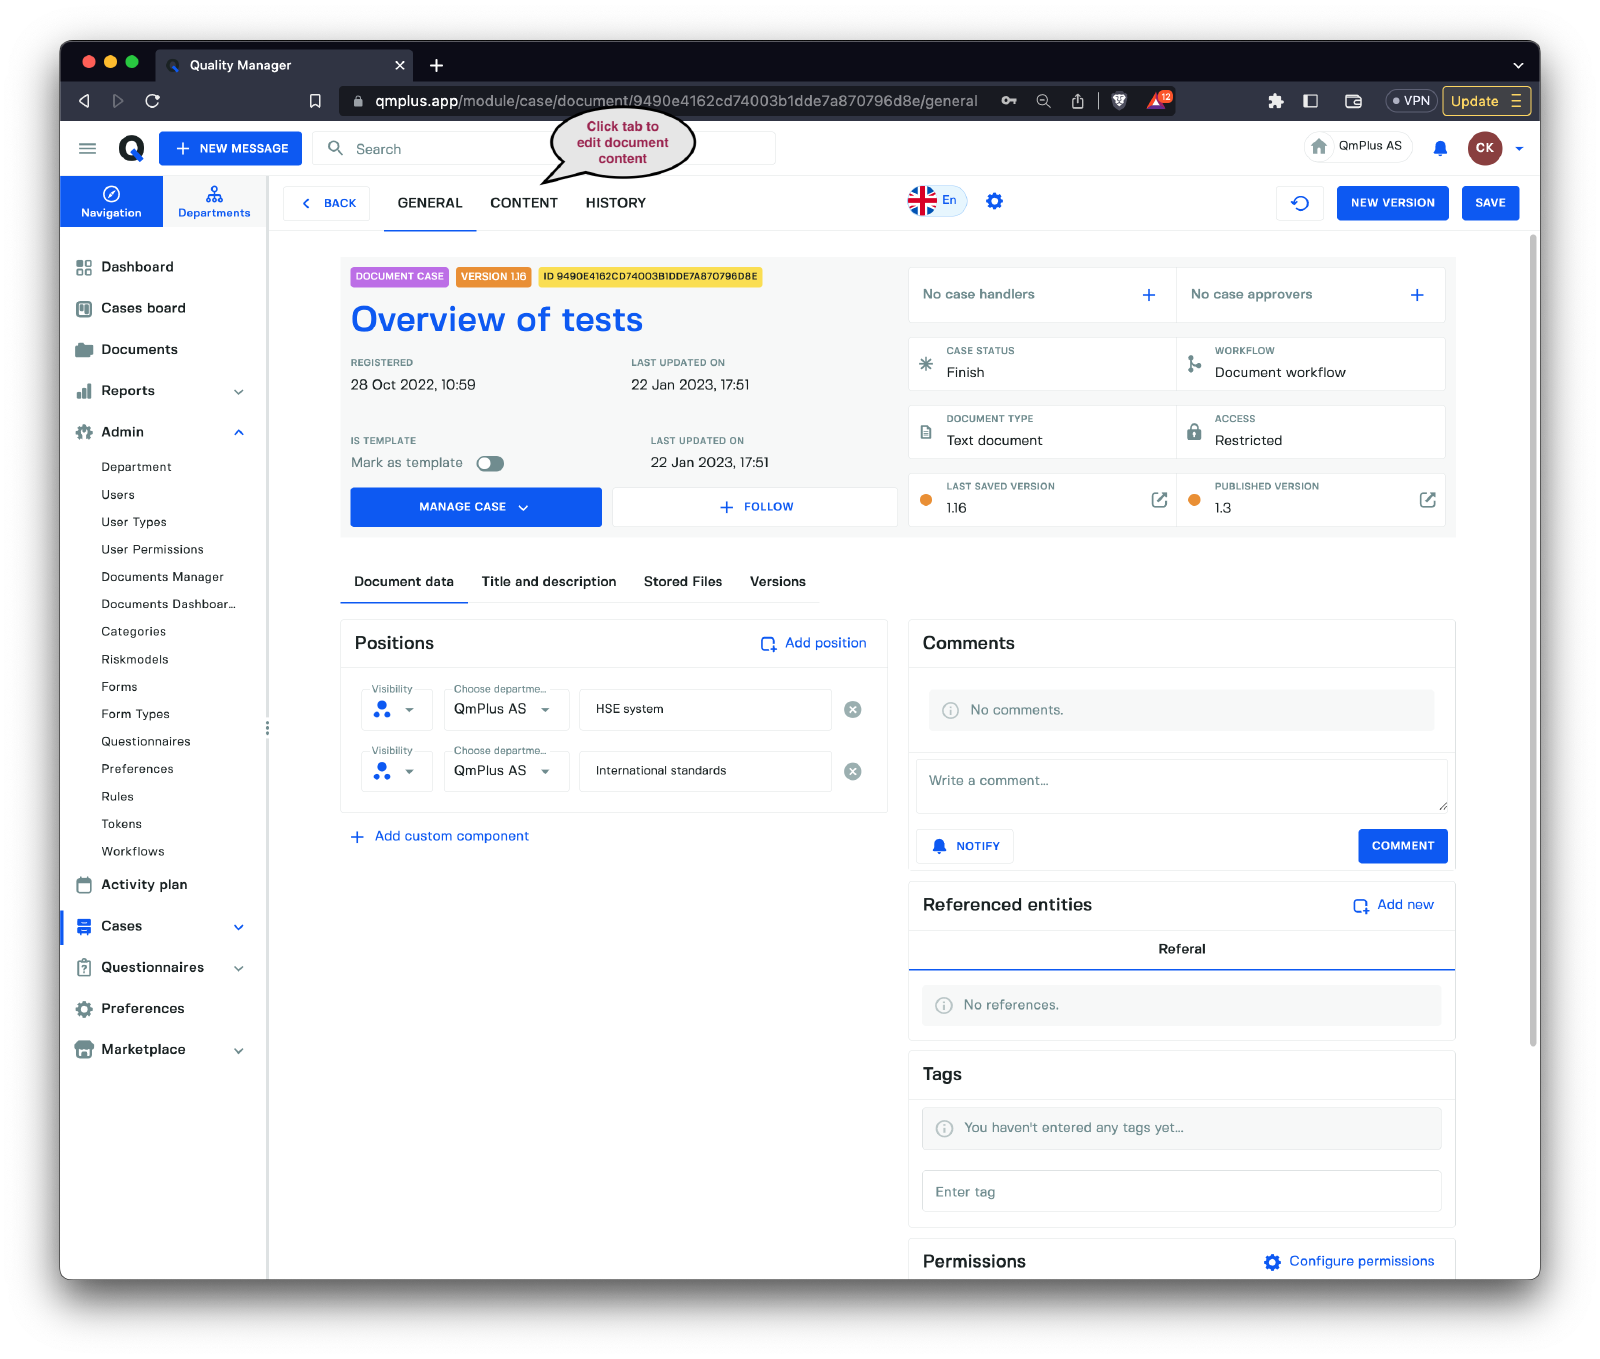
The Text document has a Content tab that allows you to edit the document.
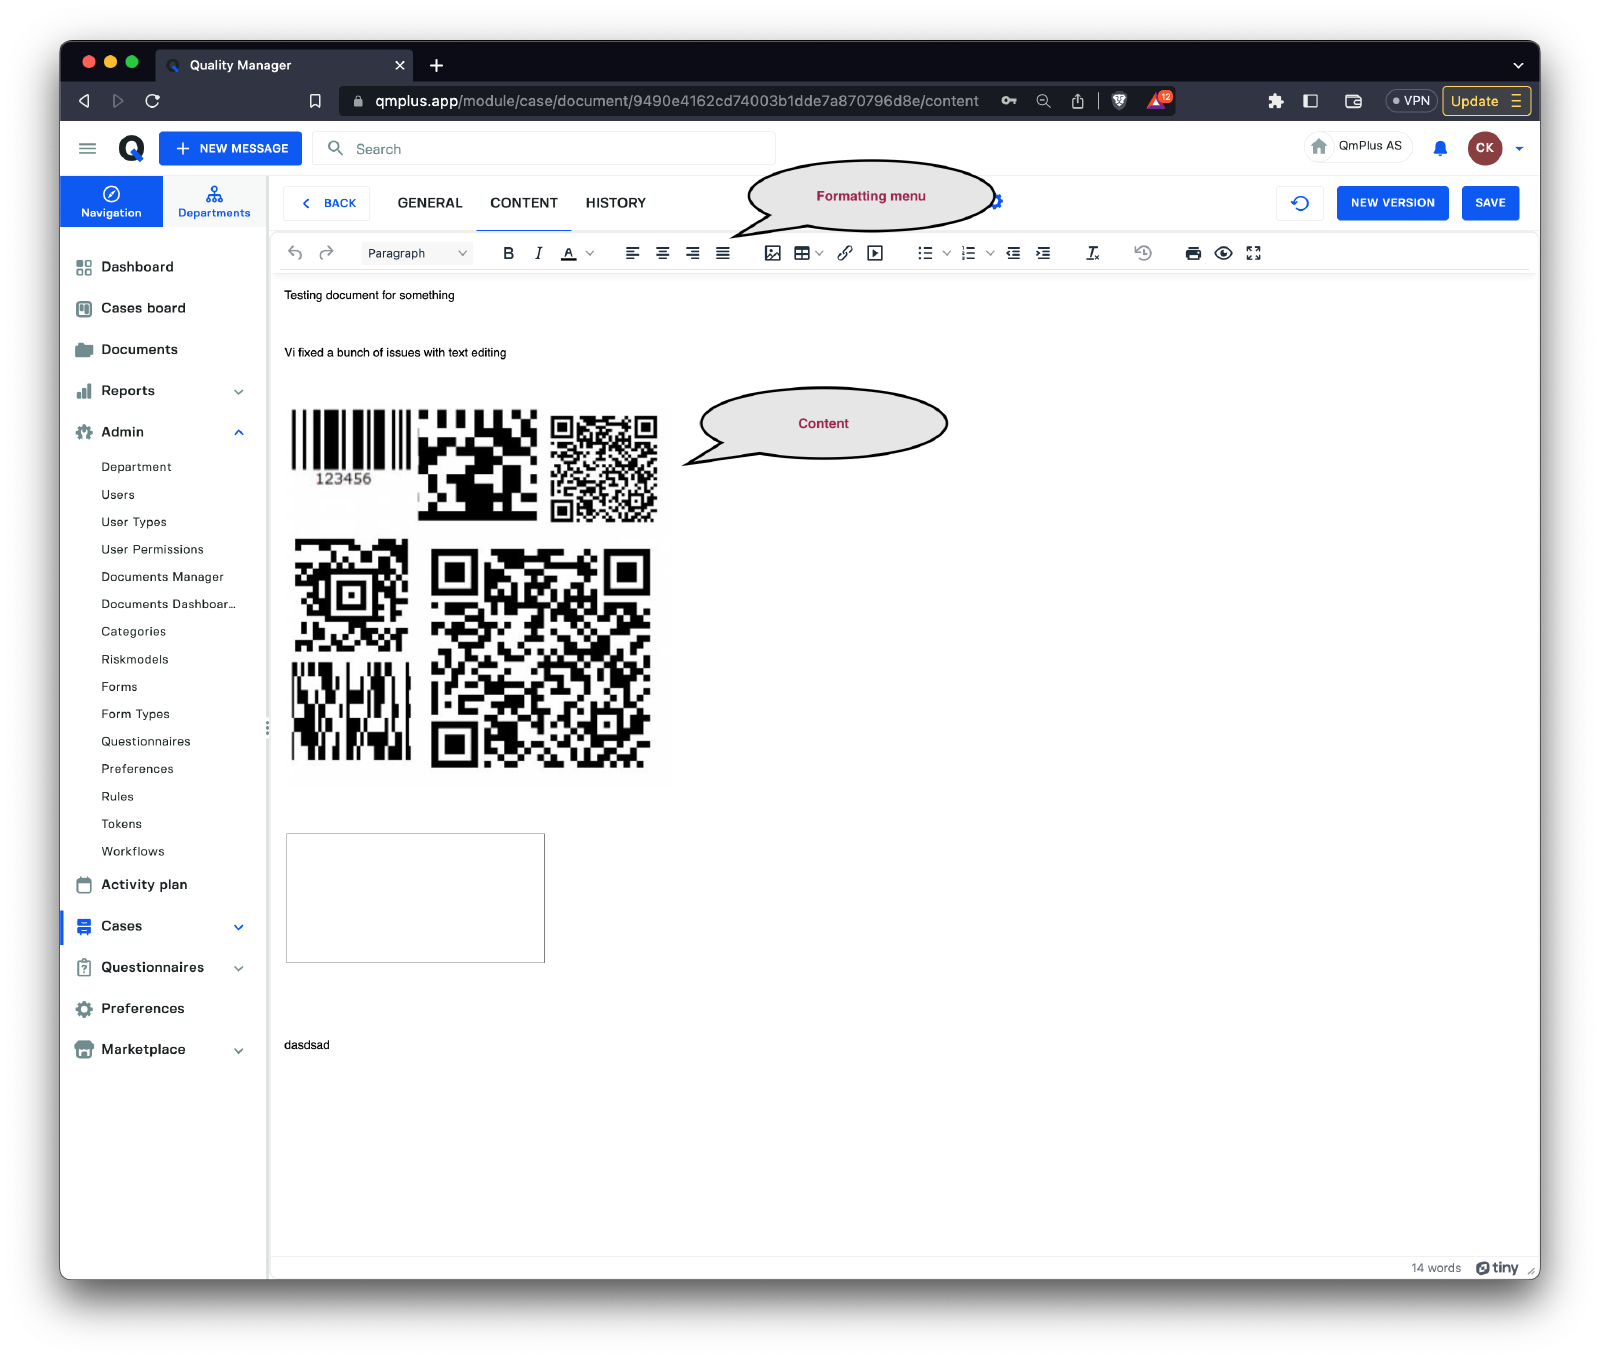
The content editor enables you to edit HTML-like content with a basic set of formatting options.
Create a new Link document
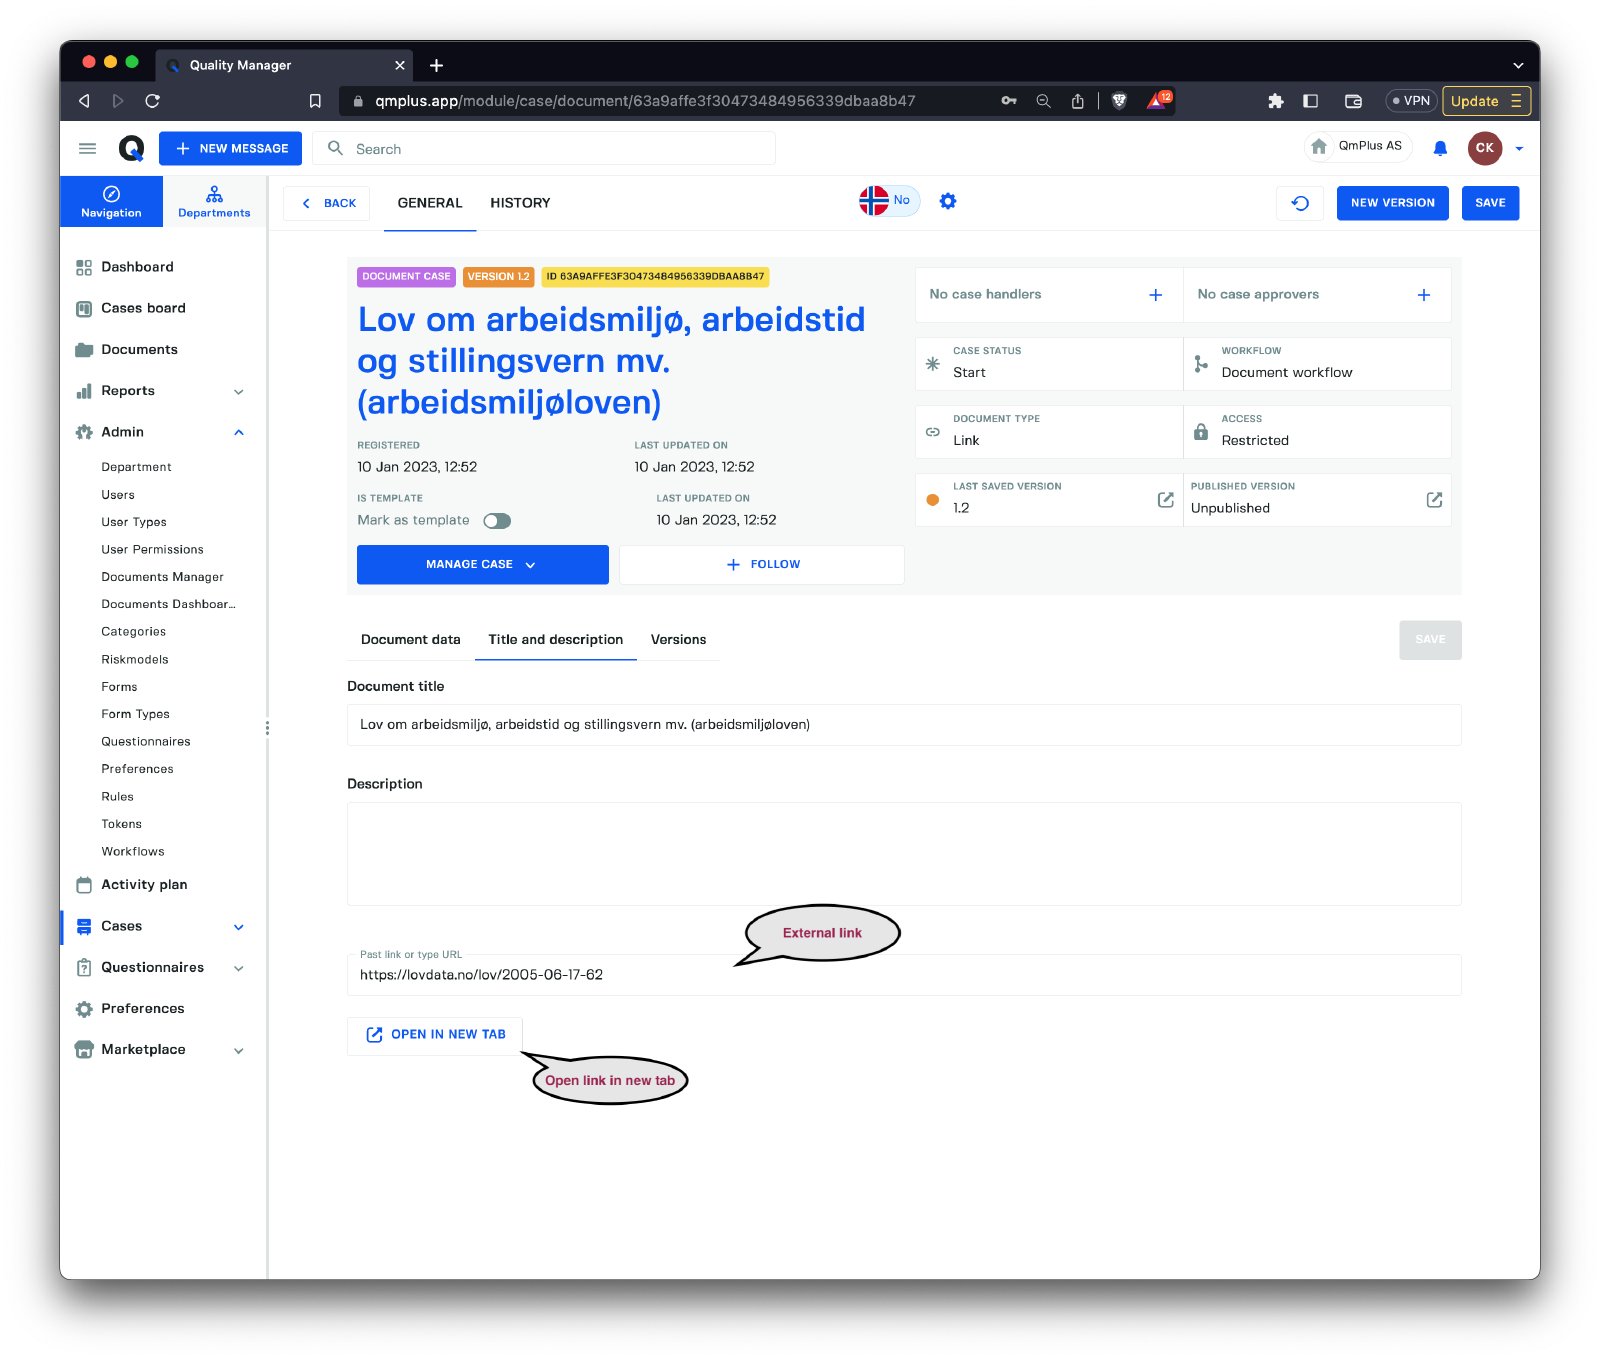
The unique area for a Link document is under the Title and description tab, where you can set the external link associated with this document.
It’s possible to provide multiple links in the same document case, one for each language.
Create a new Process chart document

The process chart tool allows you to create simple process charts that you can store as documents, embed in dashboards, or link to other documents, creating clickable maps.
Create a new Richtext document
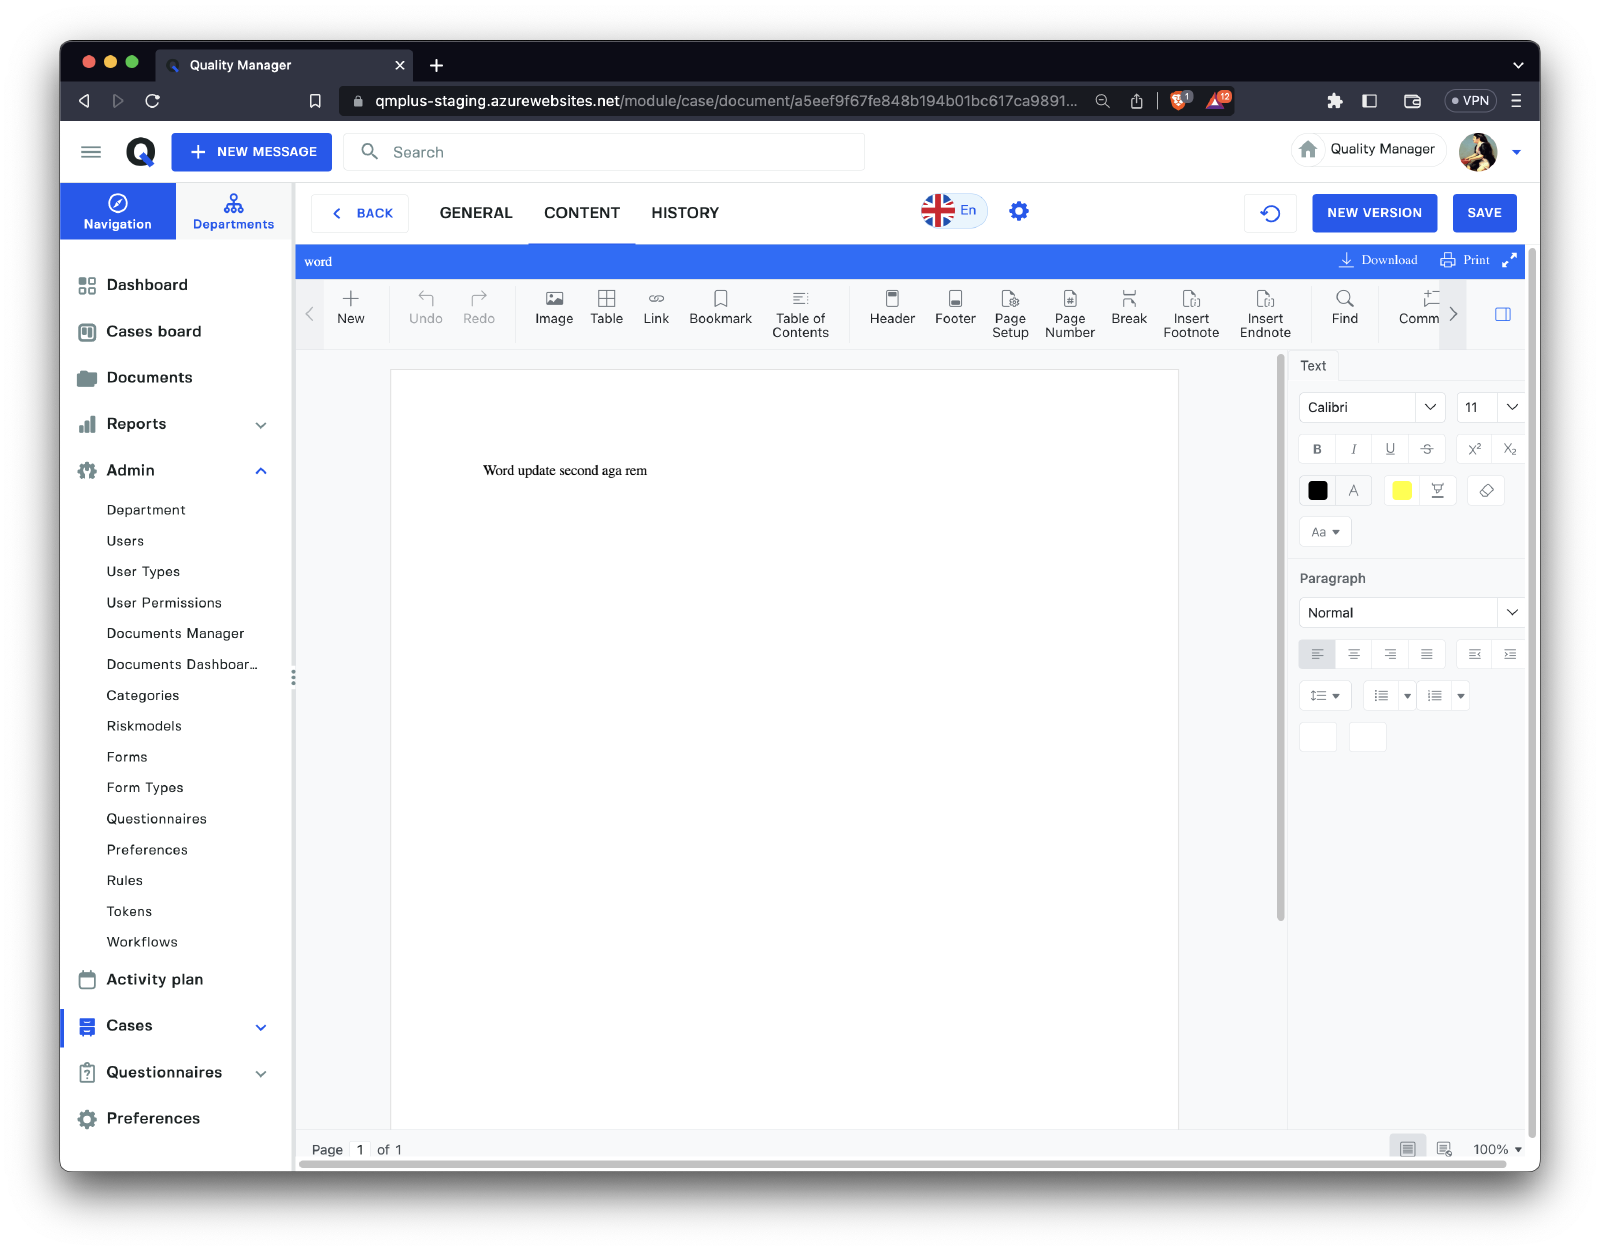
A more Microsoft Word-like interface for richer documents.
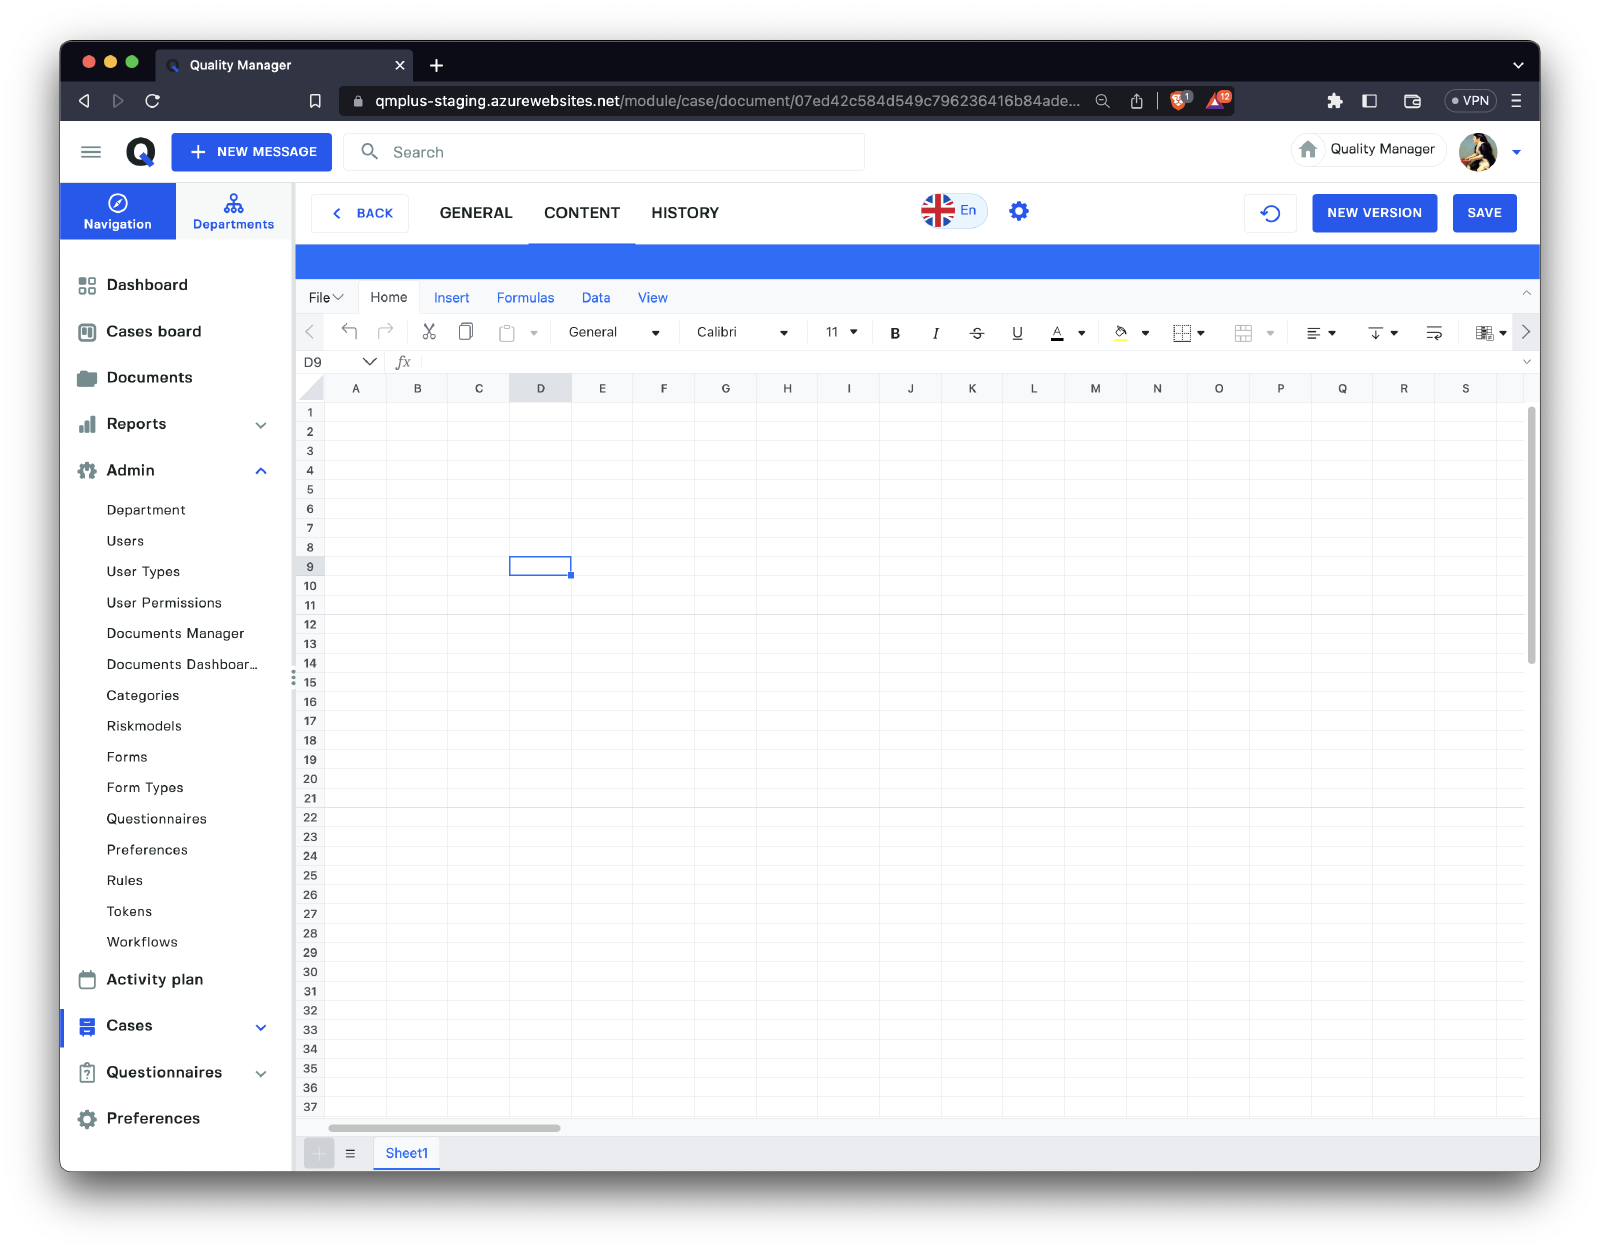
Create a new Spreadsheet document
A basic Excel-like interface for more sophisticated spreadsheets.
Editing an existing Document
When working with documents, it’s important to understand that there are two main states documents exist in:
| State | Description |
|---|---|
Draft | While you are working on a document and making changes, clicking the Save button will save a draft version that is not visible to end users. To make the changes visible, you must explicitly publish the document. |
Published | A published document is visible to end users. This allows you to make changes to a document privately and only publish when ready. |
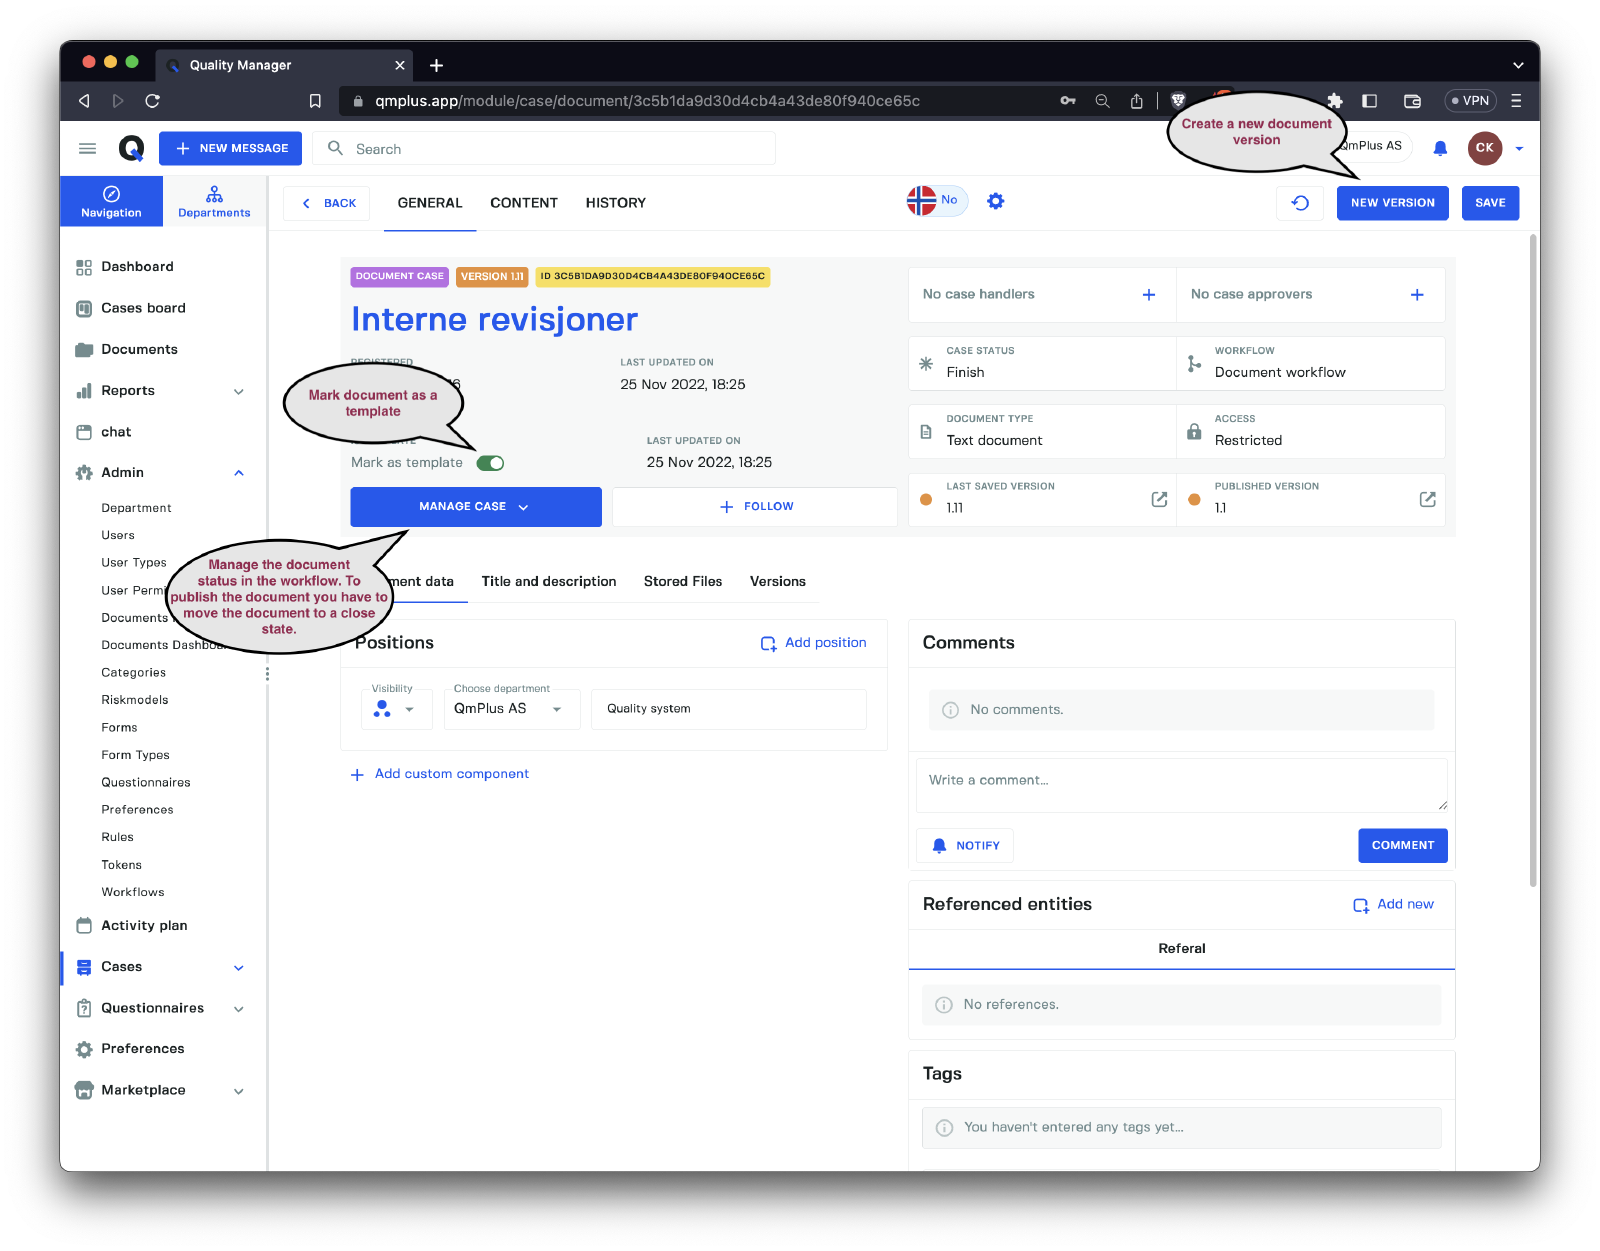
A document can also be marked as a Template, enabling you to use it as a basis for a new document. When creating a new document from a Template, it will be created from the latest Published version.
To create a new version, click the
New Versionbutton. This button is only enabled when the current document is in aclosedstate, and it will reset the workflow to the beginning, allowing you to start another version of the document.
Copy Document to Another Directory
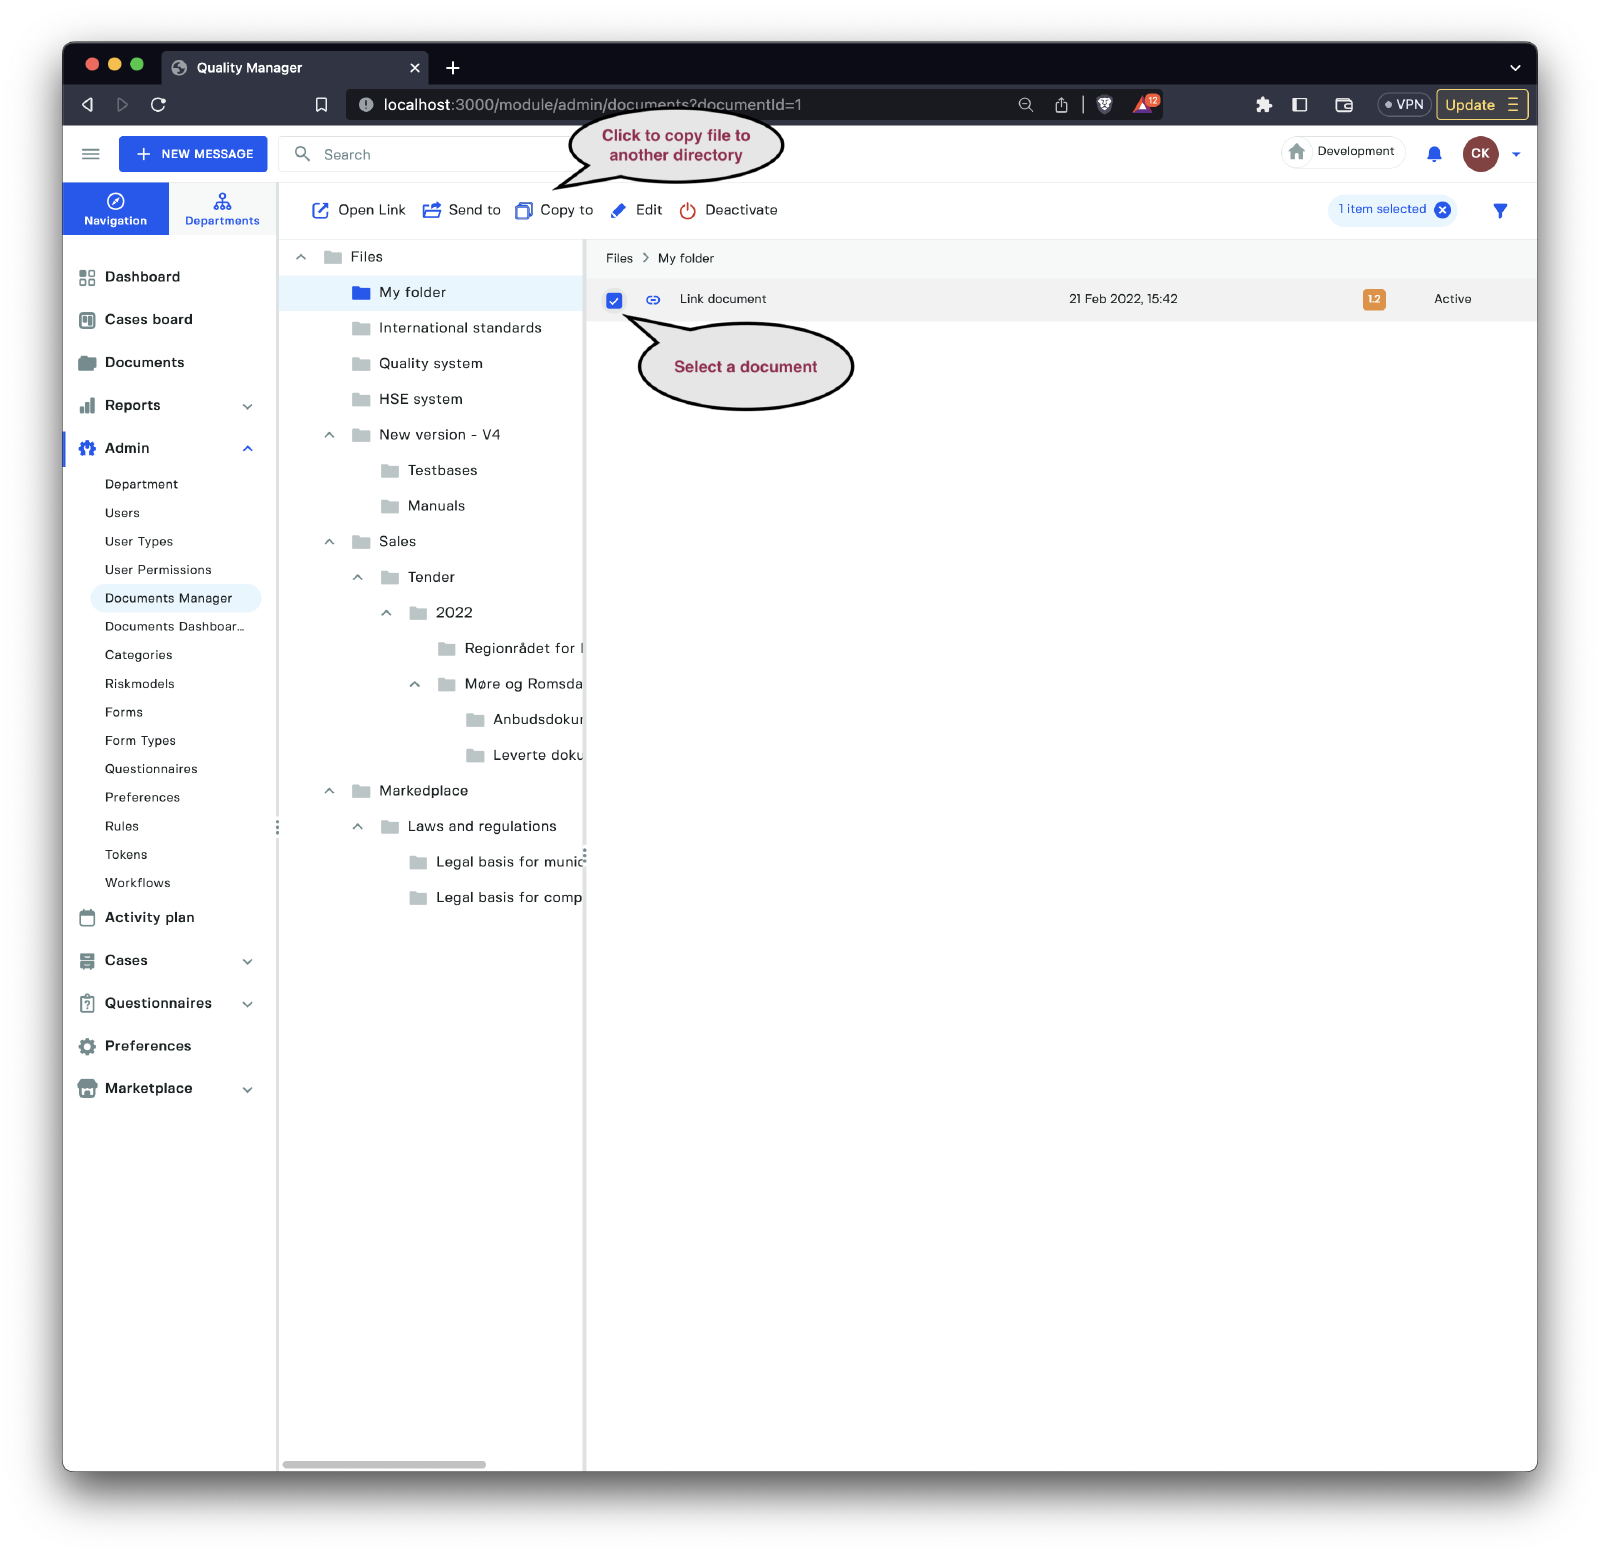
Select a document. Once a document is selected, the toolbar changes, allowing you to click the Copy to button.

Select a target directory and click the Select button to make a copy of the document in another folder.
Move Document to Another Directory

To move a document to a new folder, click on the Send to button and then select a destination folder for the file.
Import Documents from SharePoint
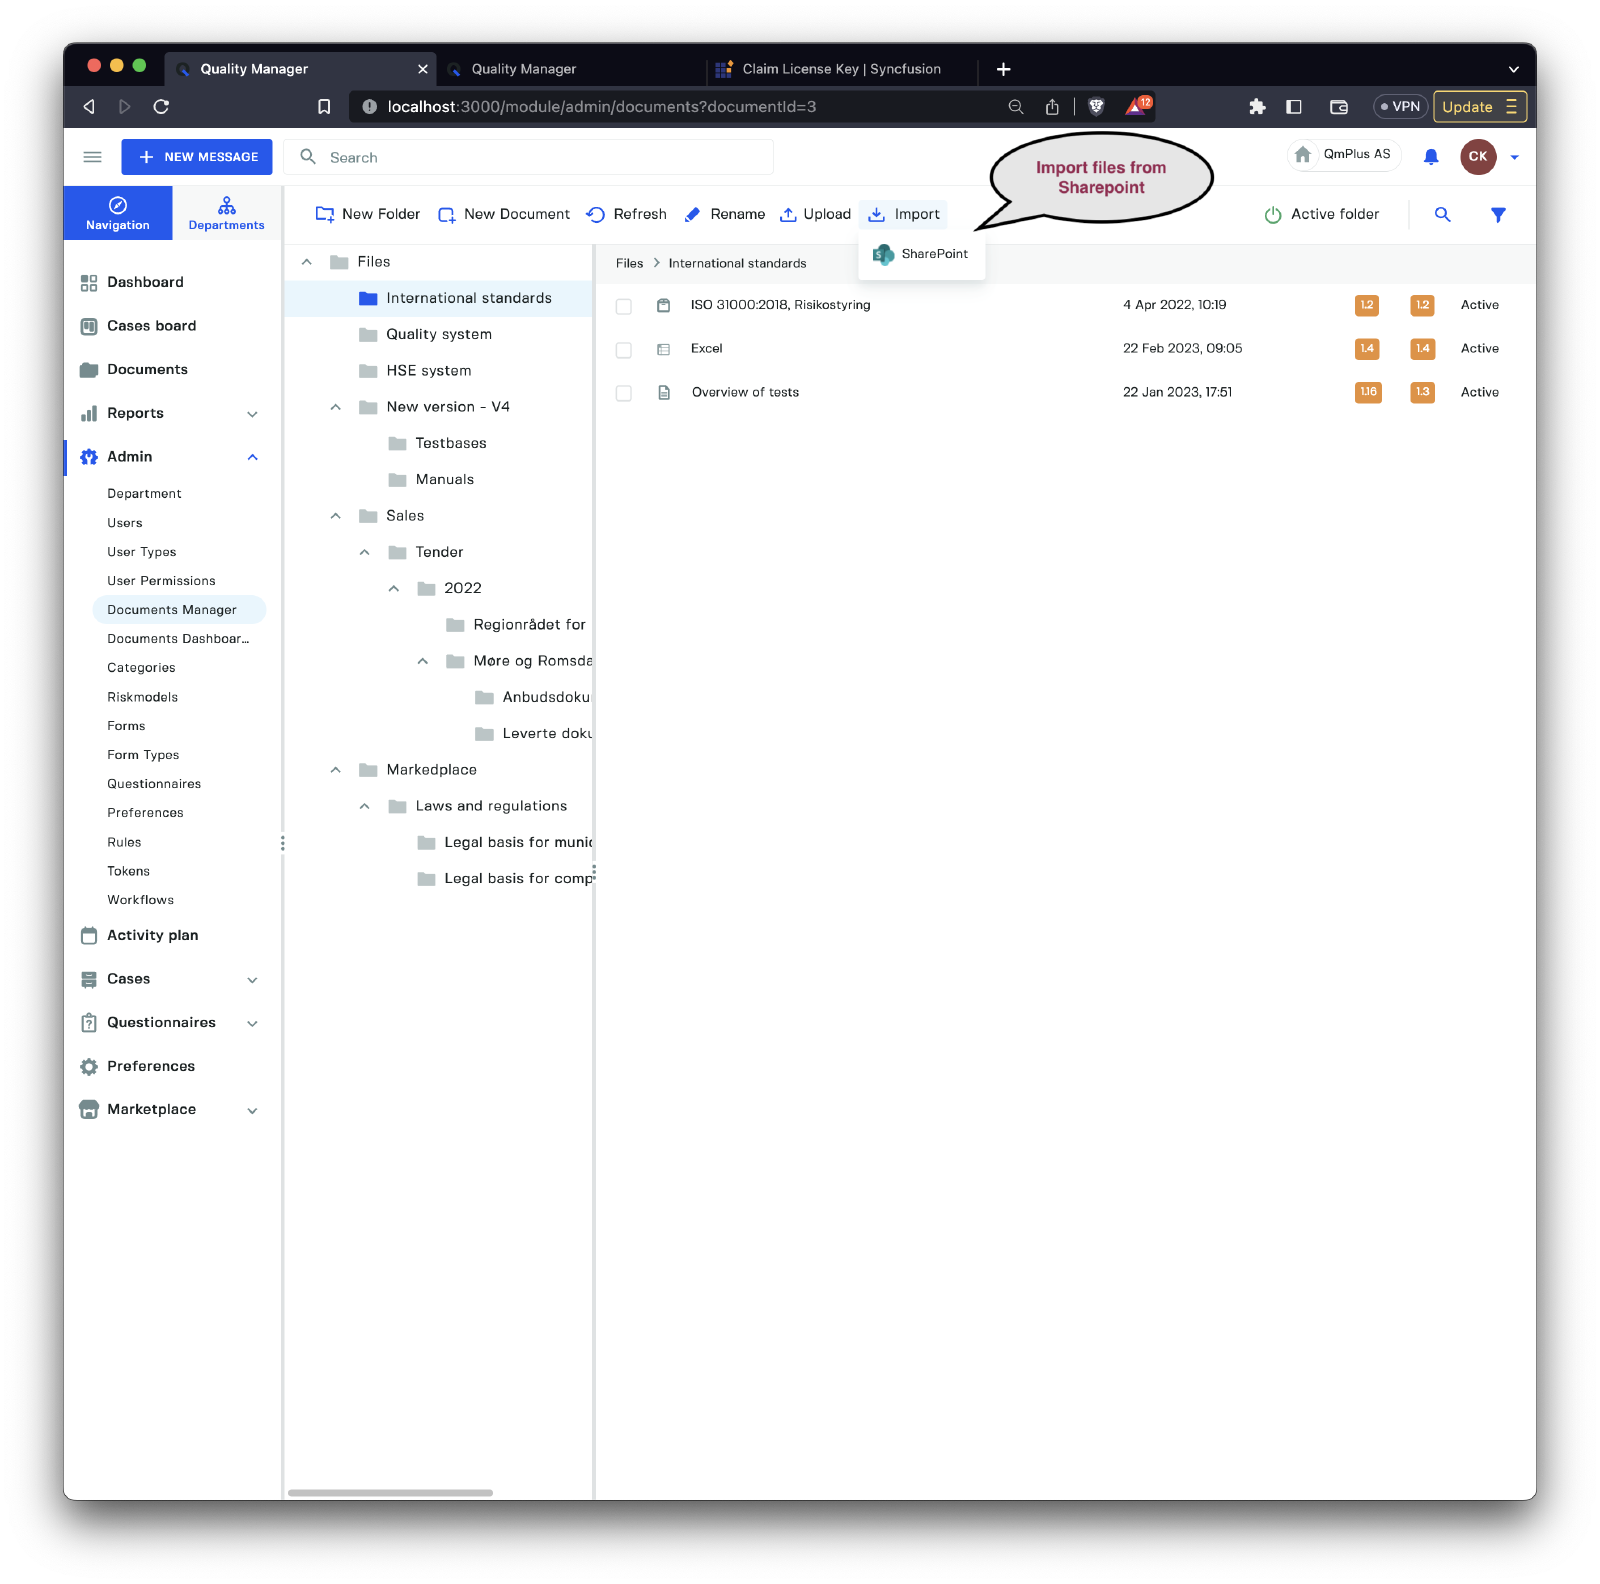
If SharePoint is enabled as an integration point for your organization, you’ll have access to an Import button that allows you to import documents from configured SharePoint shares.
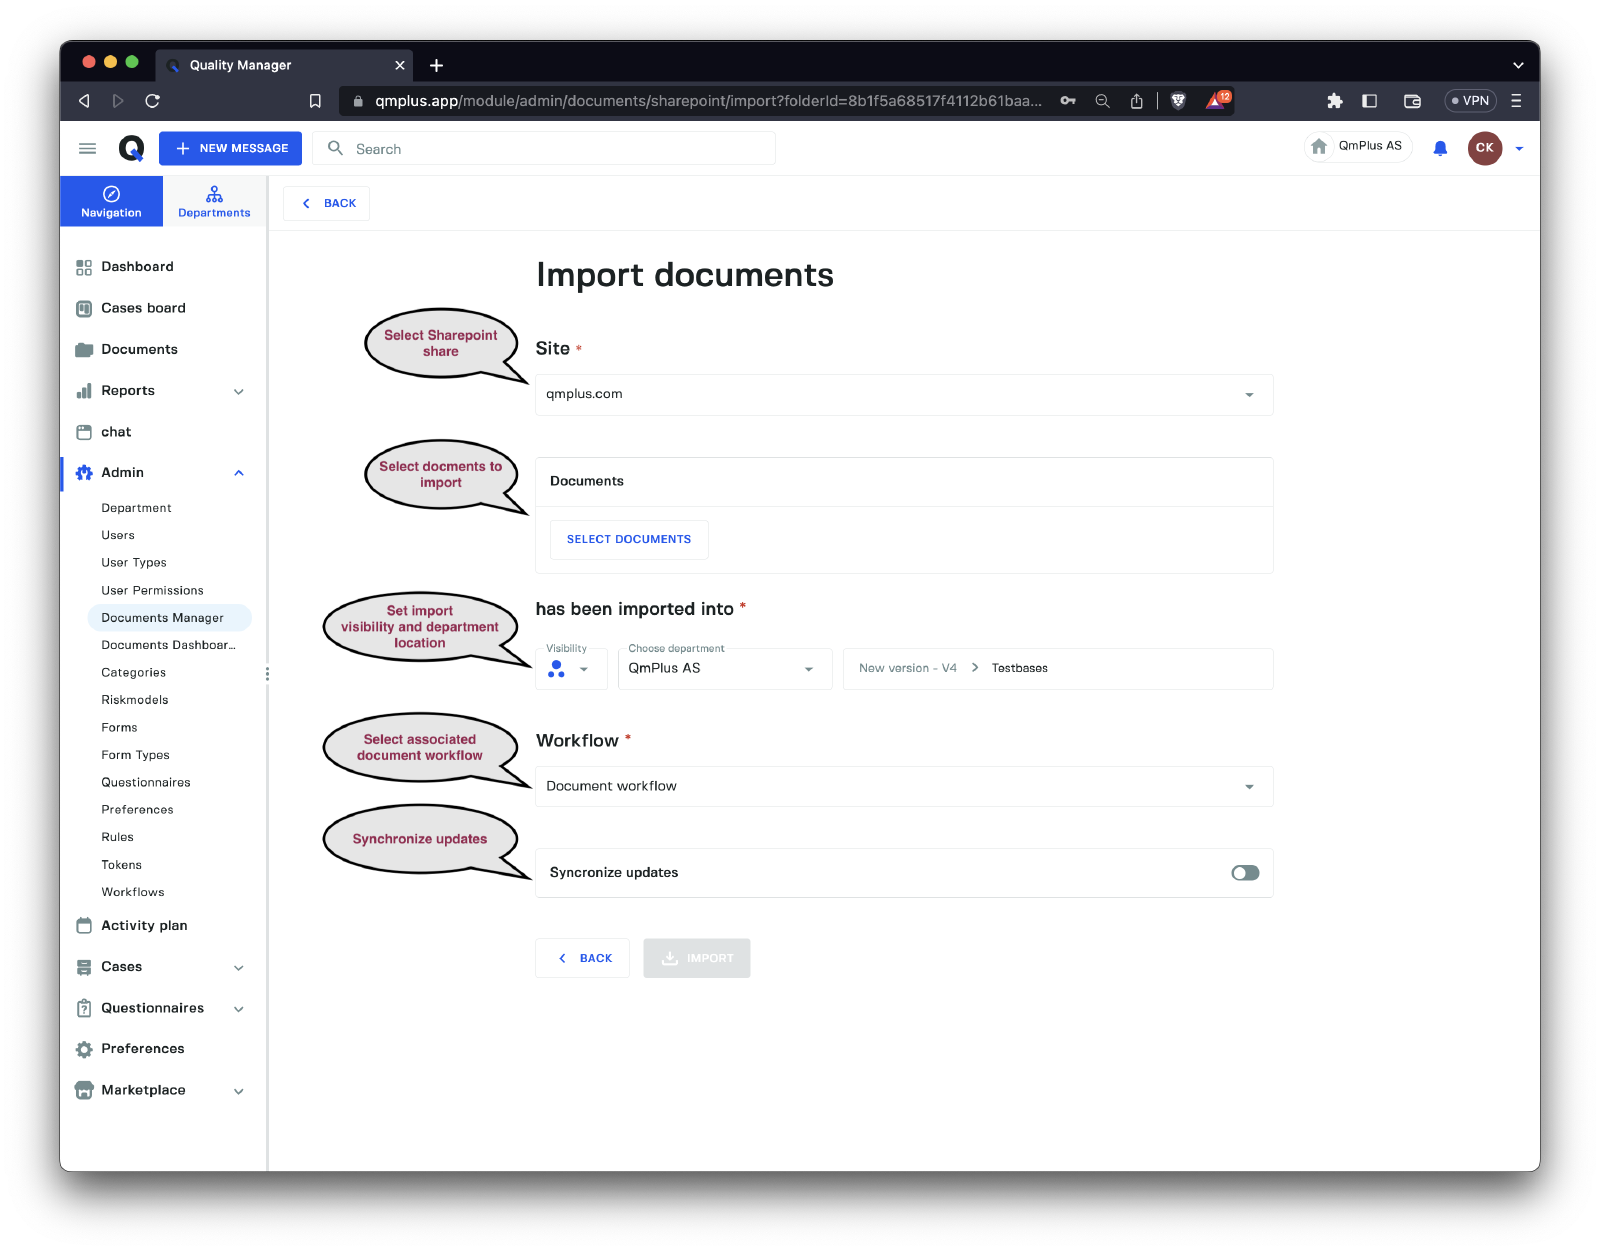
When importing documents from SharePoint, you need to enter several fields as outlined below:
| Field | Description |
|---|---|
Site | Select the SharePoint site (share) to import documents from. |
Documents | Brings up the document navigator, allowing you to select the SharePoint documents to import. |
Import to | Set the visibility, department, and document folder for all the imported documents. |
Workflow | Set the associated document workflow to use with all the imported documents. |
Synchronize updates | Specify if the platform will intermittently query SharePoint to check if there are new versions of the documents and import the updated documents automatically. |
Clicking the Document button will bring up a file manager, allowing you to select documents from the specified SharePoint Site.
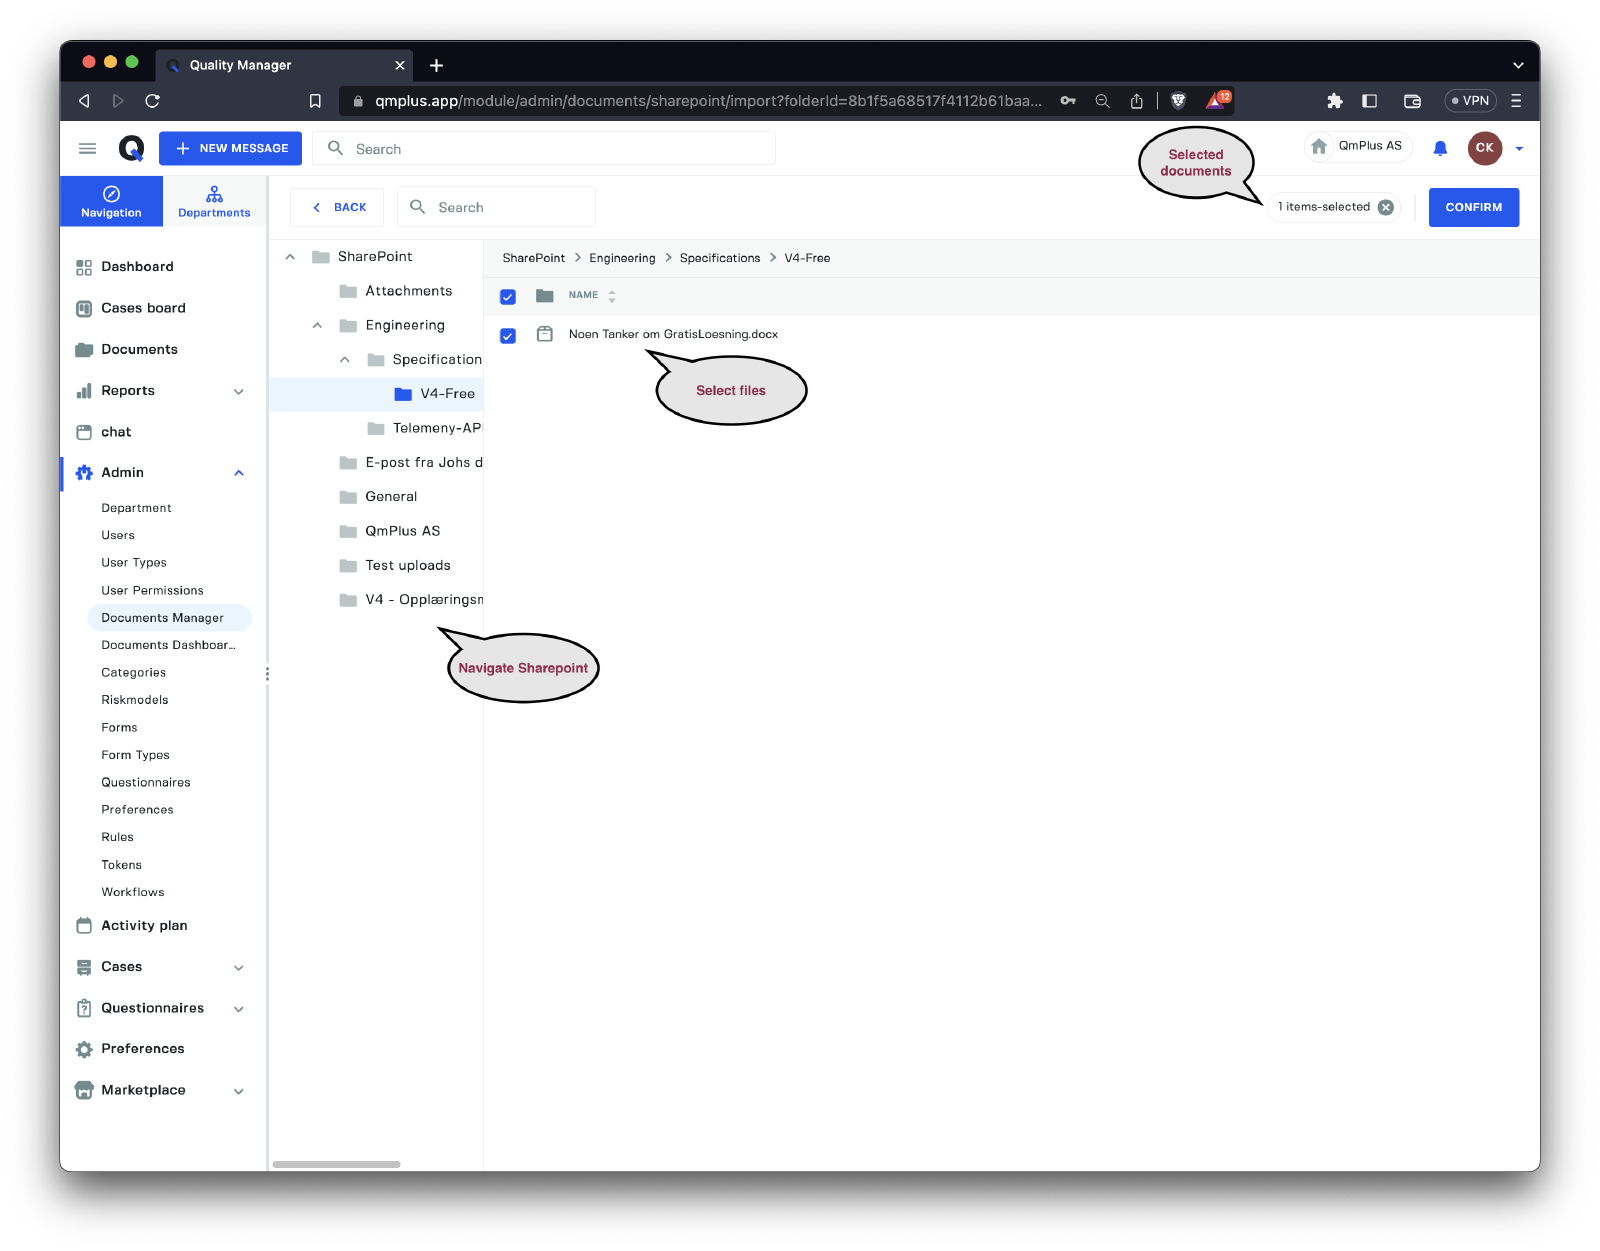
Once you’ve selected the files you wish to import, click the Confirm button to return to the Import from SharePoint dialog.

To complete the import process, click the Import button.

As you can see, the imported files from SharePoint have a SharePoint logo and a symbol indicating that they were imported from SharePoint.
Export Documents to SharePoint
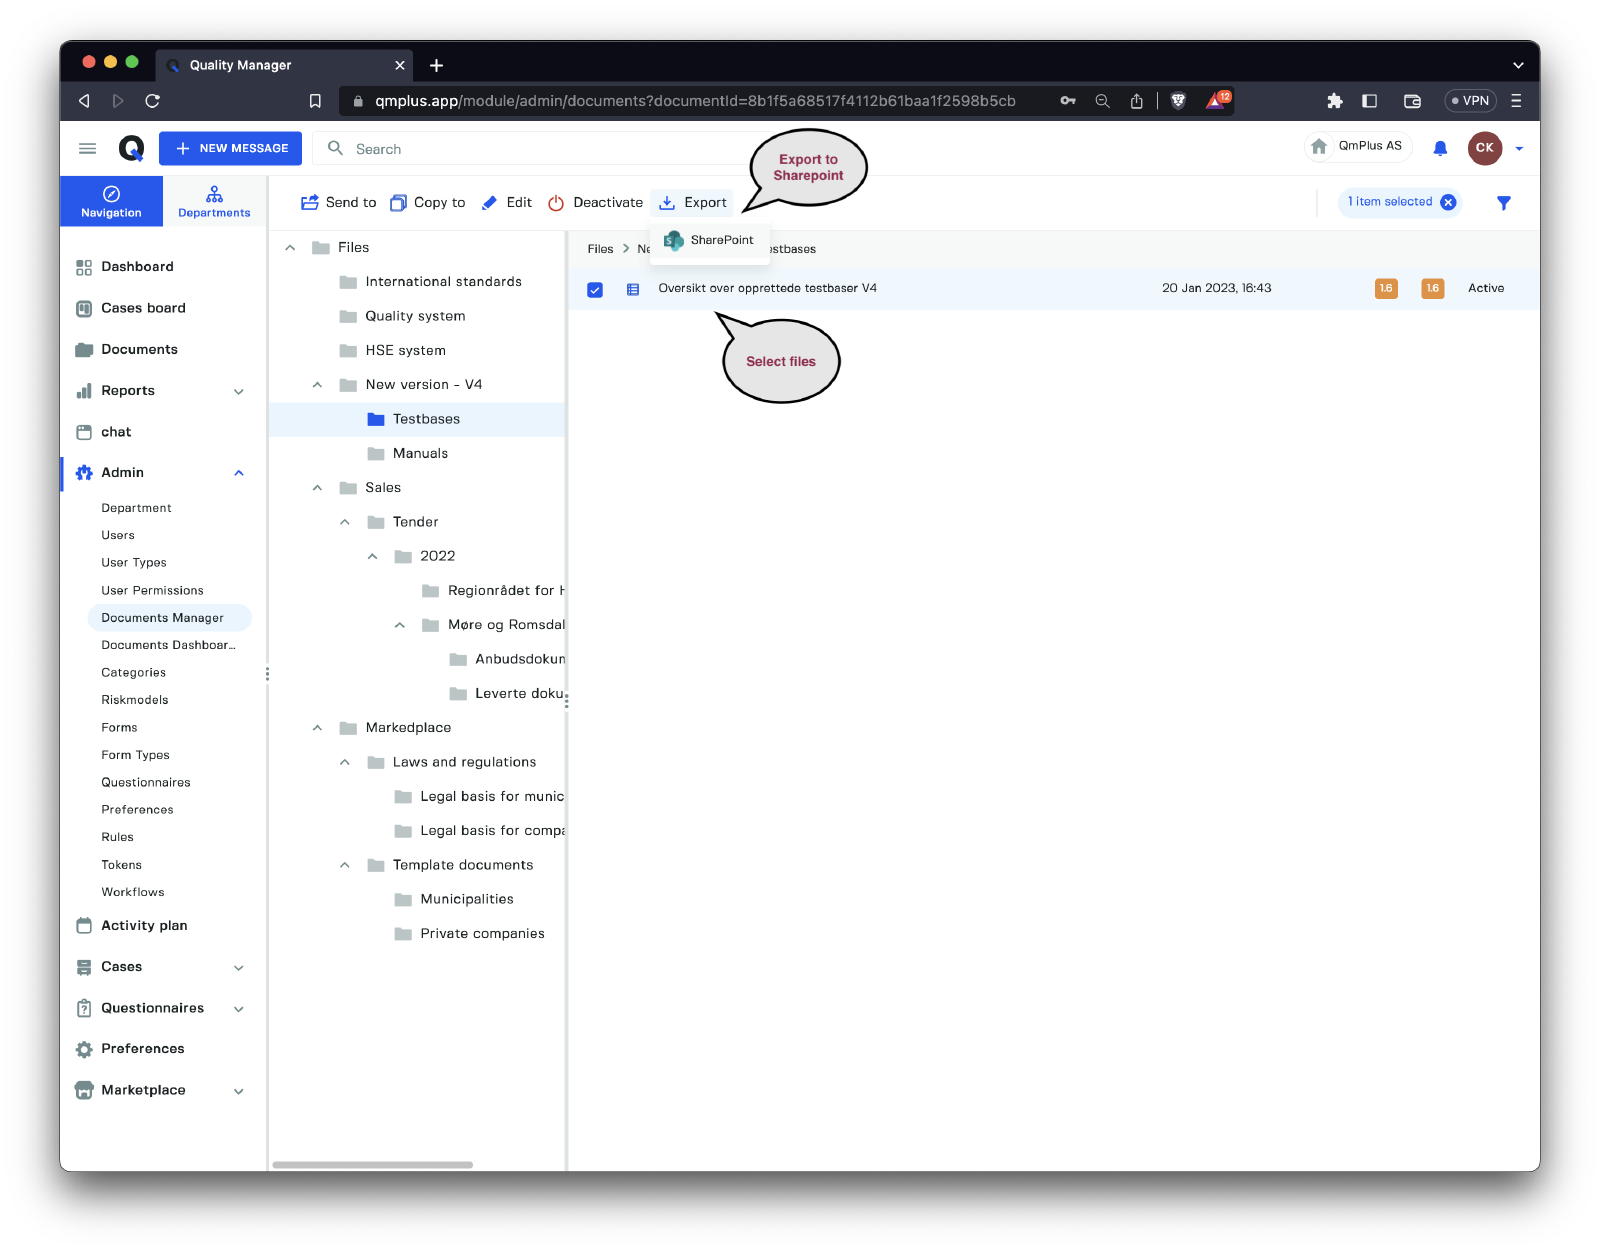
Select one or more files, and if your organization has SharePoint enabled, users will see an Export button allowing them to export the selected documents to SharePoint.
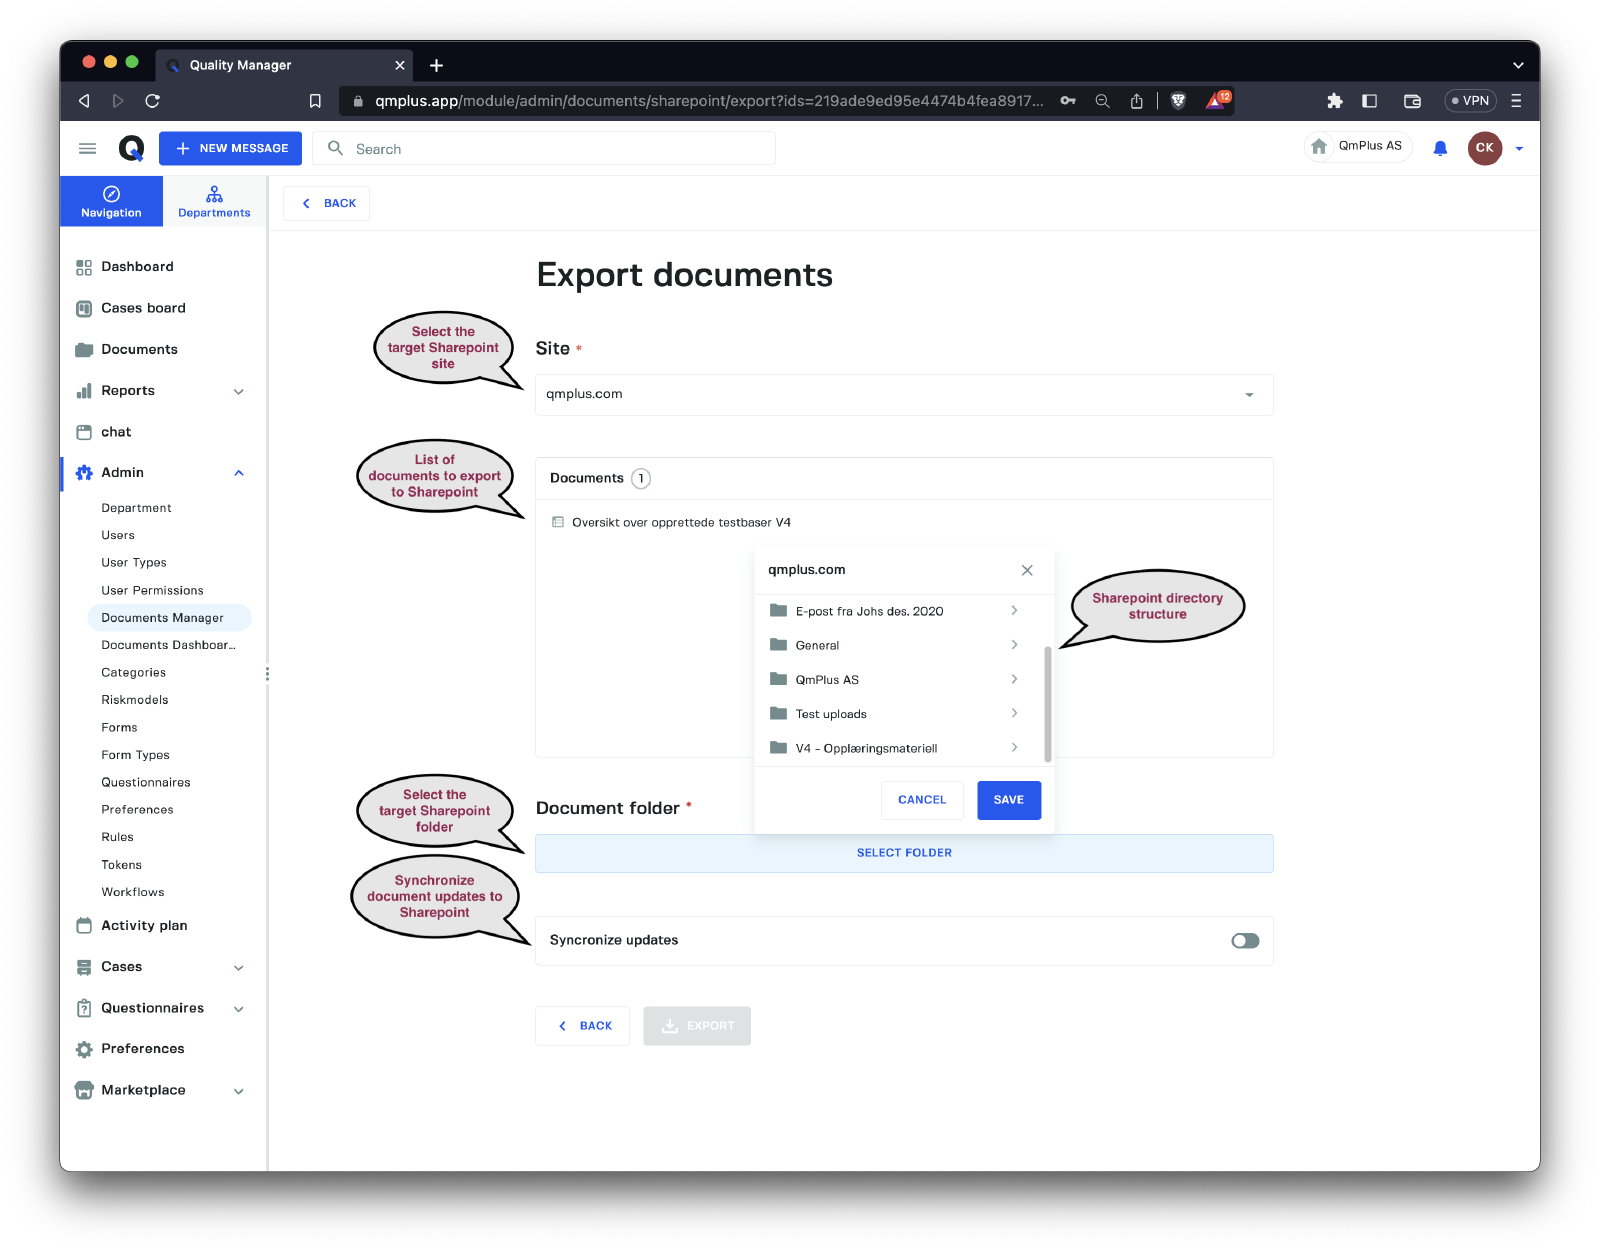
When exporting documents to SharePoint, you need to enter several fields outlined below:
| Field | Description |
|---|---|
Site | Select the SharePoint site (share) to export documents to. |
Documents | The list of documents being exported to SharePoint. |
Document folder | The target SharePoint folder for the exported documents. |
Synchronize updates | When checked, the platform will automatically update documents to SharePoint, keeping them in sync. |
Finally, click on the Export button to finalize the export of documents to SharePoint.
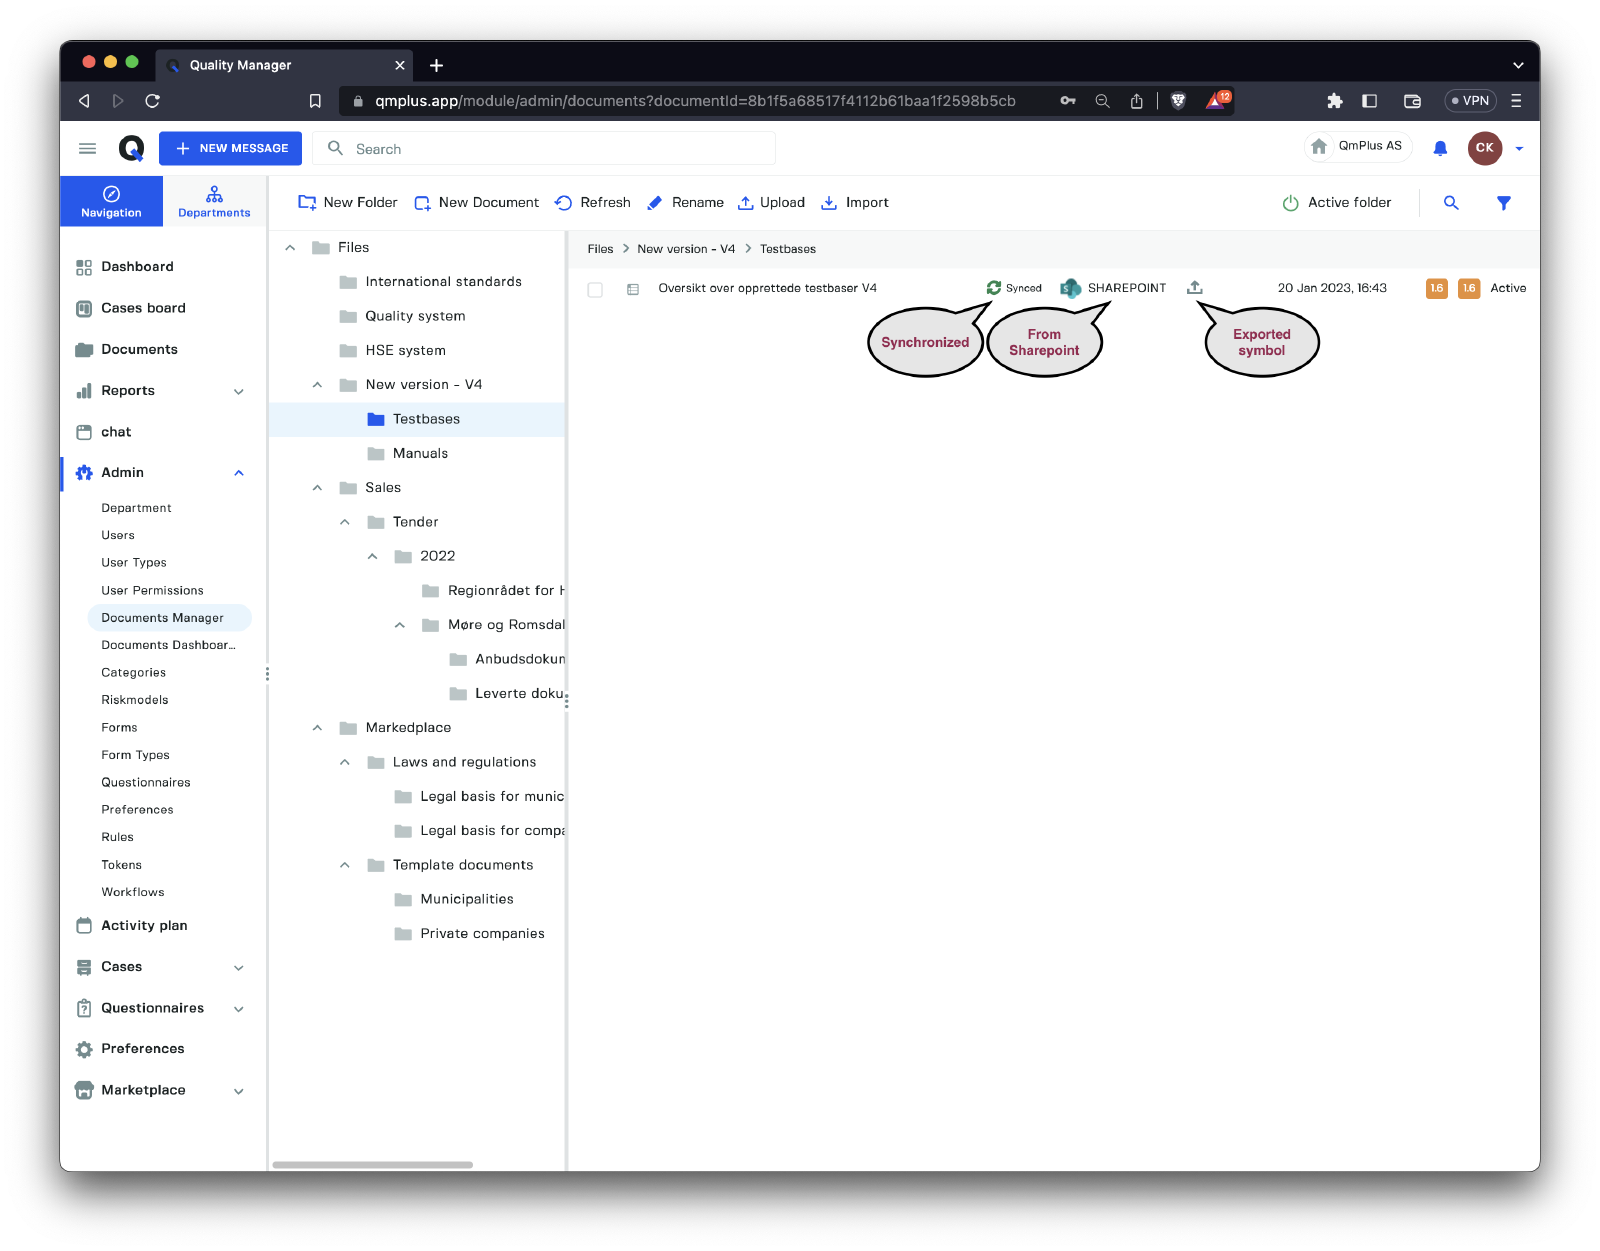
Once you’ve exported the documents, they will be visible in the document manager with a SharePoint symbol and an Export symbol.