Administrator/Tokens
A user guide for working with tokens. We cover how to create and modify tokens.
This section is concerned with managing tokens within the system.
Clicking on the Administrator/Tokens grants access to the list of tokens.
Token Listing
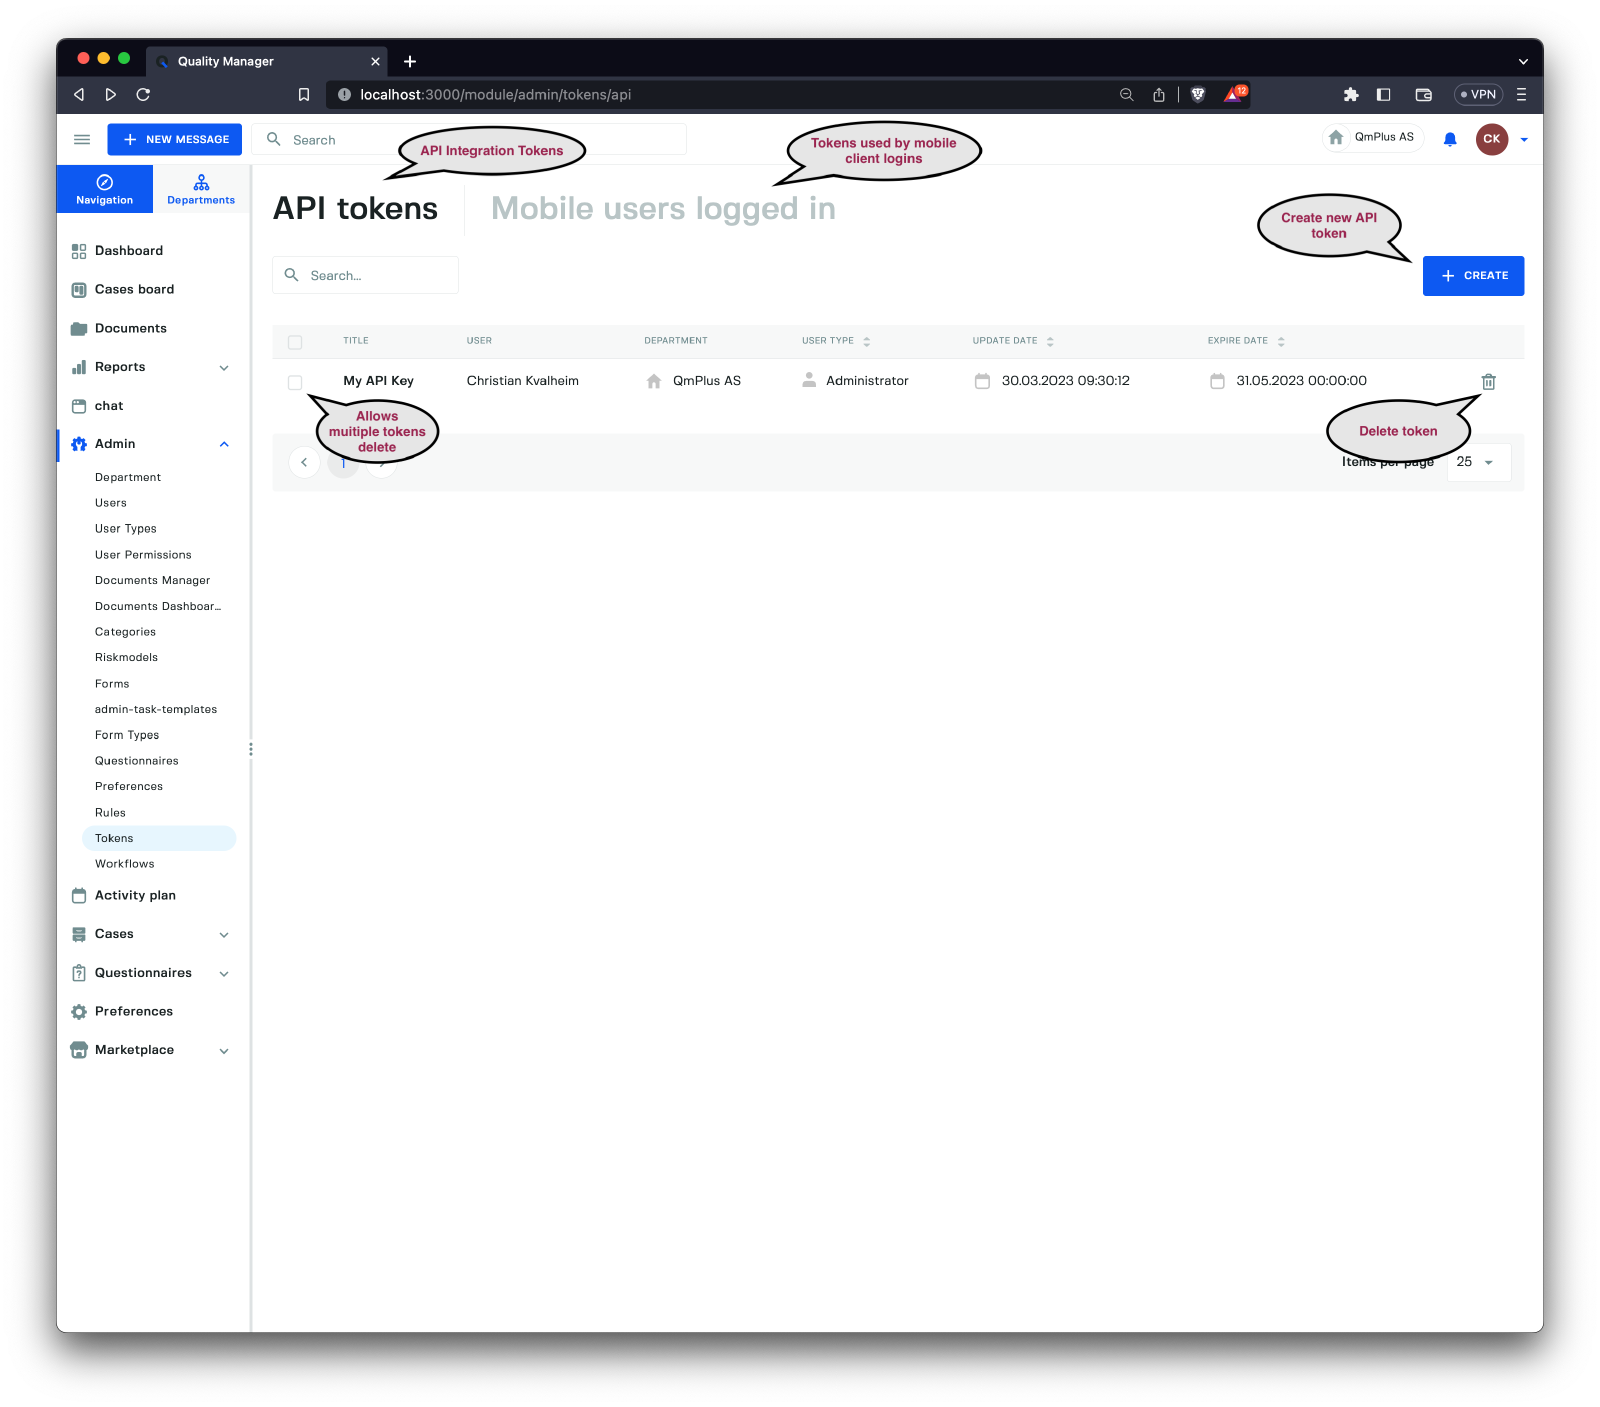

There are two primary types of tokens in the system.
| Token Type | Description |
|---|---|
API Tokens | Tokens utilized for integrating with the system using external applications or code. |
Mobile Users Logged In | Provides an overview of Mobile Application tokens, which allows you to view the users of the Mobile App and revoke access if necessary. |
Tokens are associated with a
UserandUser Type. This enables you to exercise finer control over access by using permissions to restrict access. For instance, you could create a token that only permits access to Department A and does not have access to operate on users.
Deleting Tokens
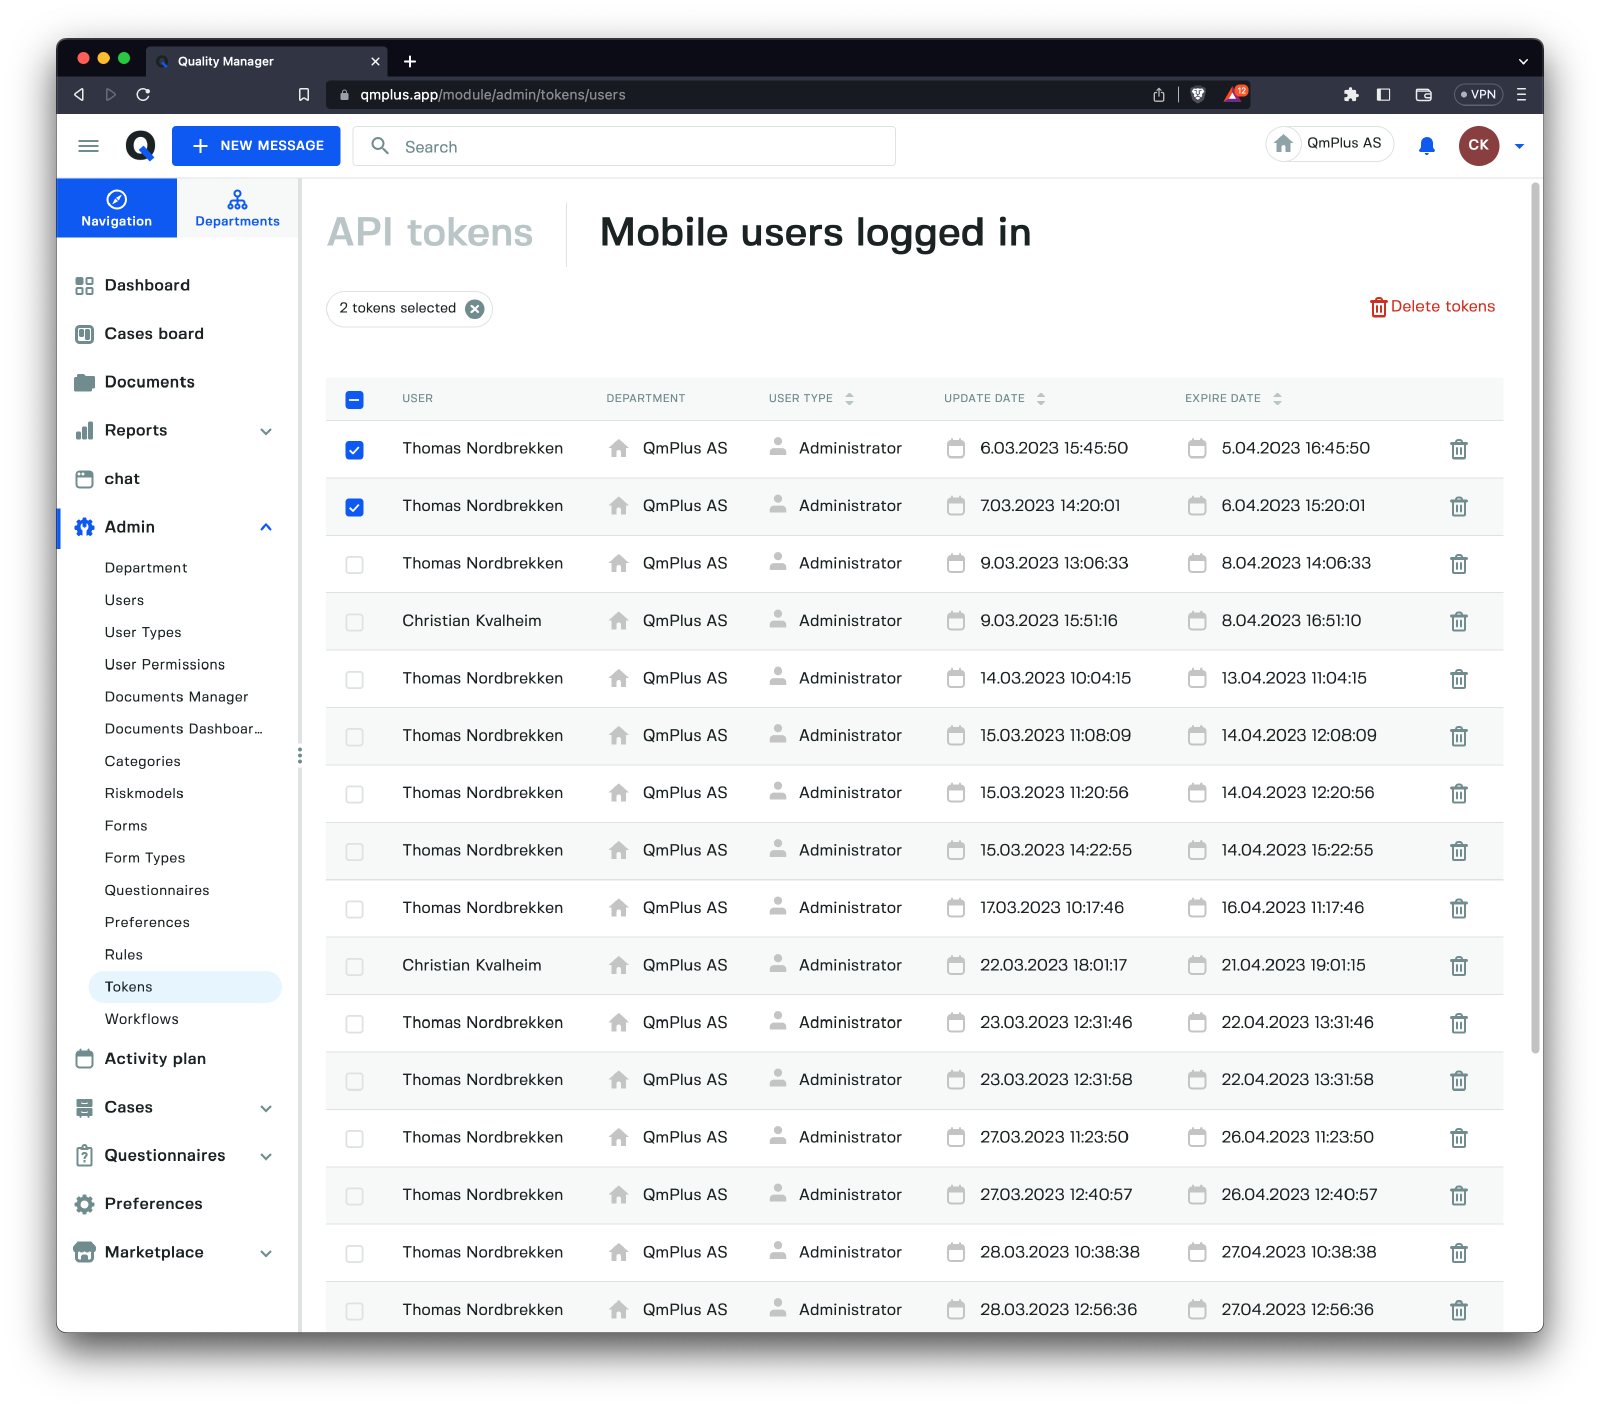
Tokens can also be deleted to revoke access for both API Tokens and Mobile Users Logged In. You can delete them individually or use the checkbox on the left side to select multiple entries to delete simultaneously.
Inspecting a Token
Clicking on a Token displays information about the token. This screen differs depending on whether it’s an API Token or Mobile Users Logged In Token.
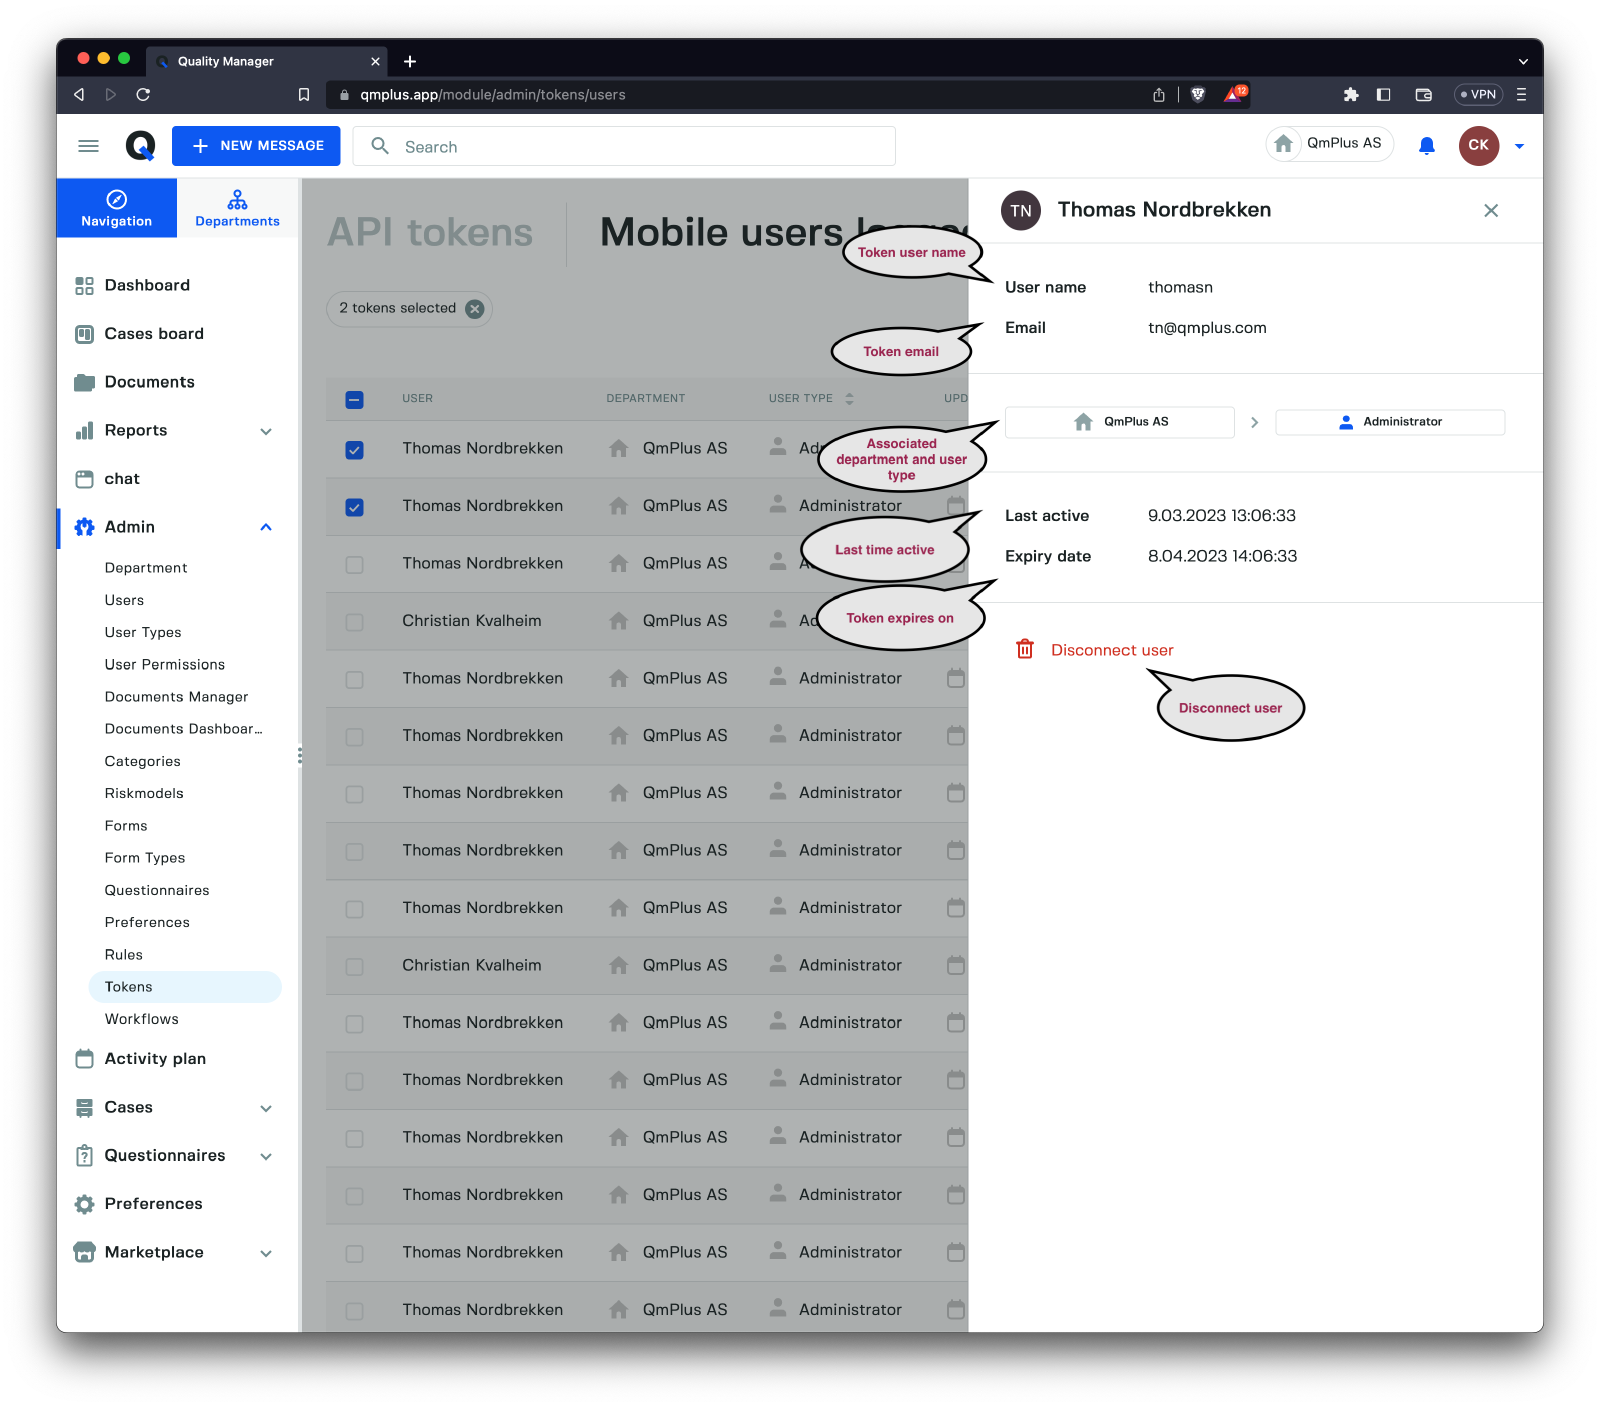
When selecting a Mobile User Token, the following information is displayed.
| Field | Description |
|---|---|
User Name | The username associated with the token. |
Email | The email associated with the token. |
Department | The department the token is associated with. |
User Type | The user type the token is associated with. |
Last Active | The last time the user was active. |
Expiry Date | The current expiry date for the token. |
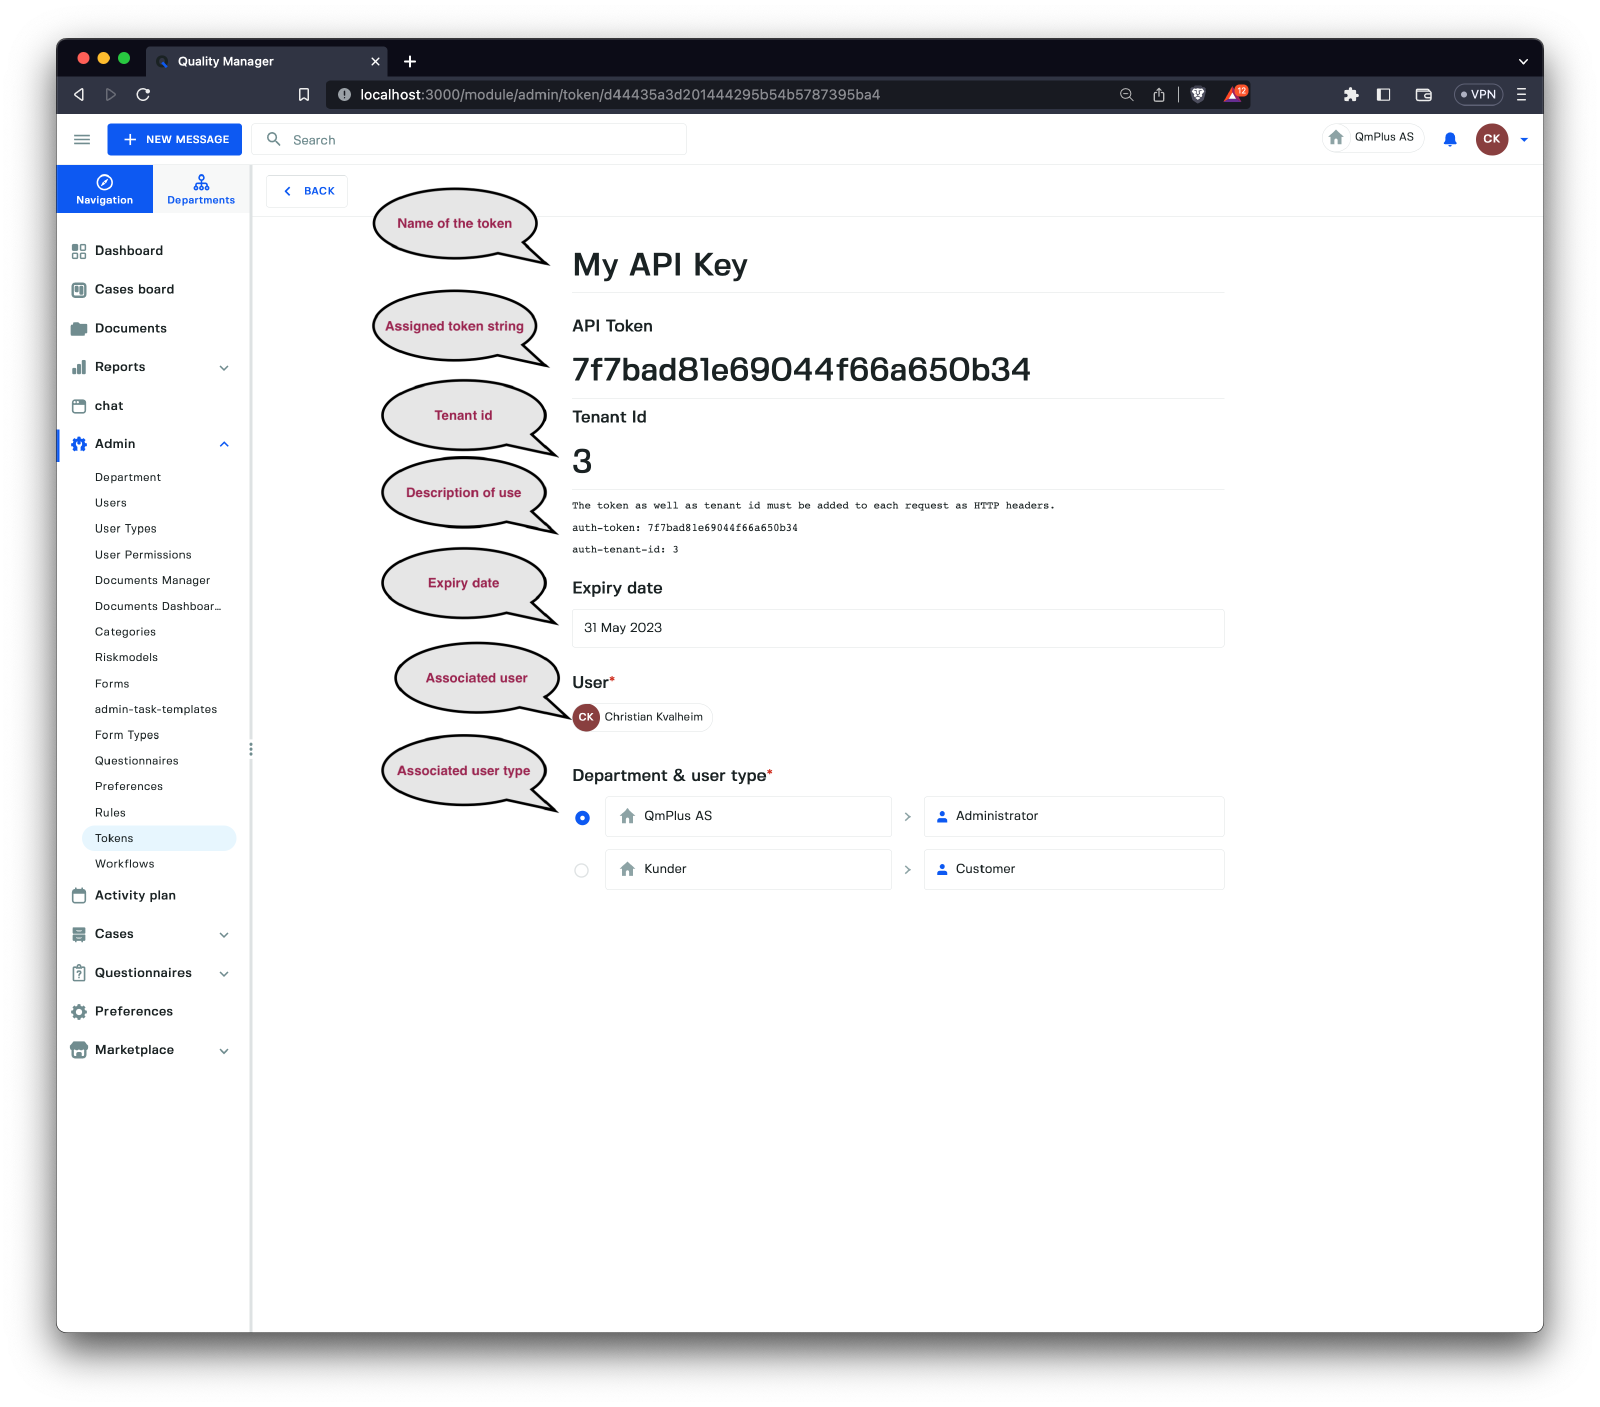
The API Token view differs slightly, as it is expected that you will require access to the actual token.
| Field | Description |
|---|---|
Token Name | The name entered when creating the token. |
API Token | The token string used to call the REST API. |
Tenant Id | Application customer ID. |
Description of Use | Basic text explaining how to use the token to call the REST API endpoints. |
Expiry Date | The entered expiry date for this API token. |
Associated User | The user used to establish permissions when using the API. |
Department and User Type | The combination controls access to data in the system by Department and User Type. |
Creating a New API Token
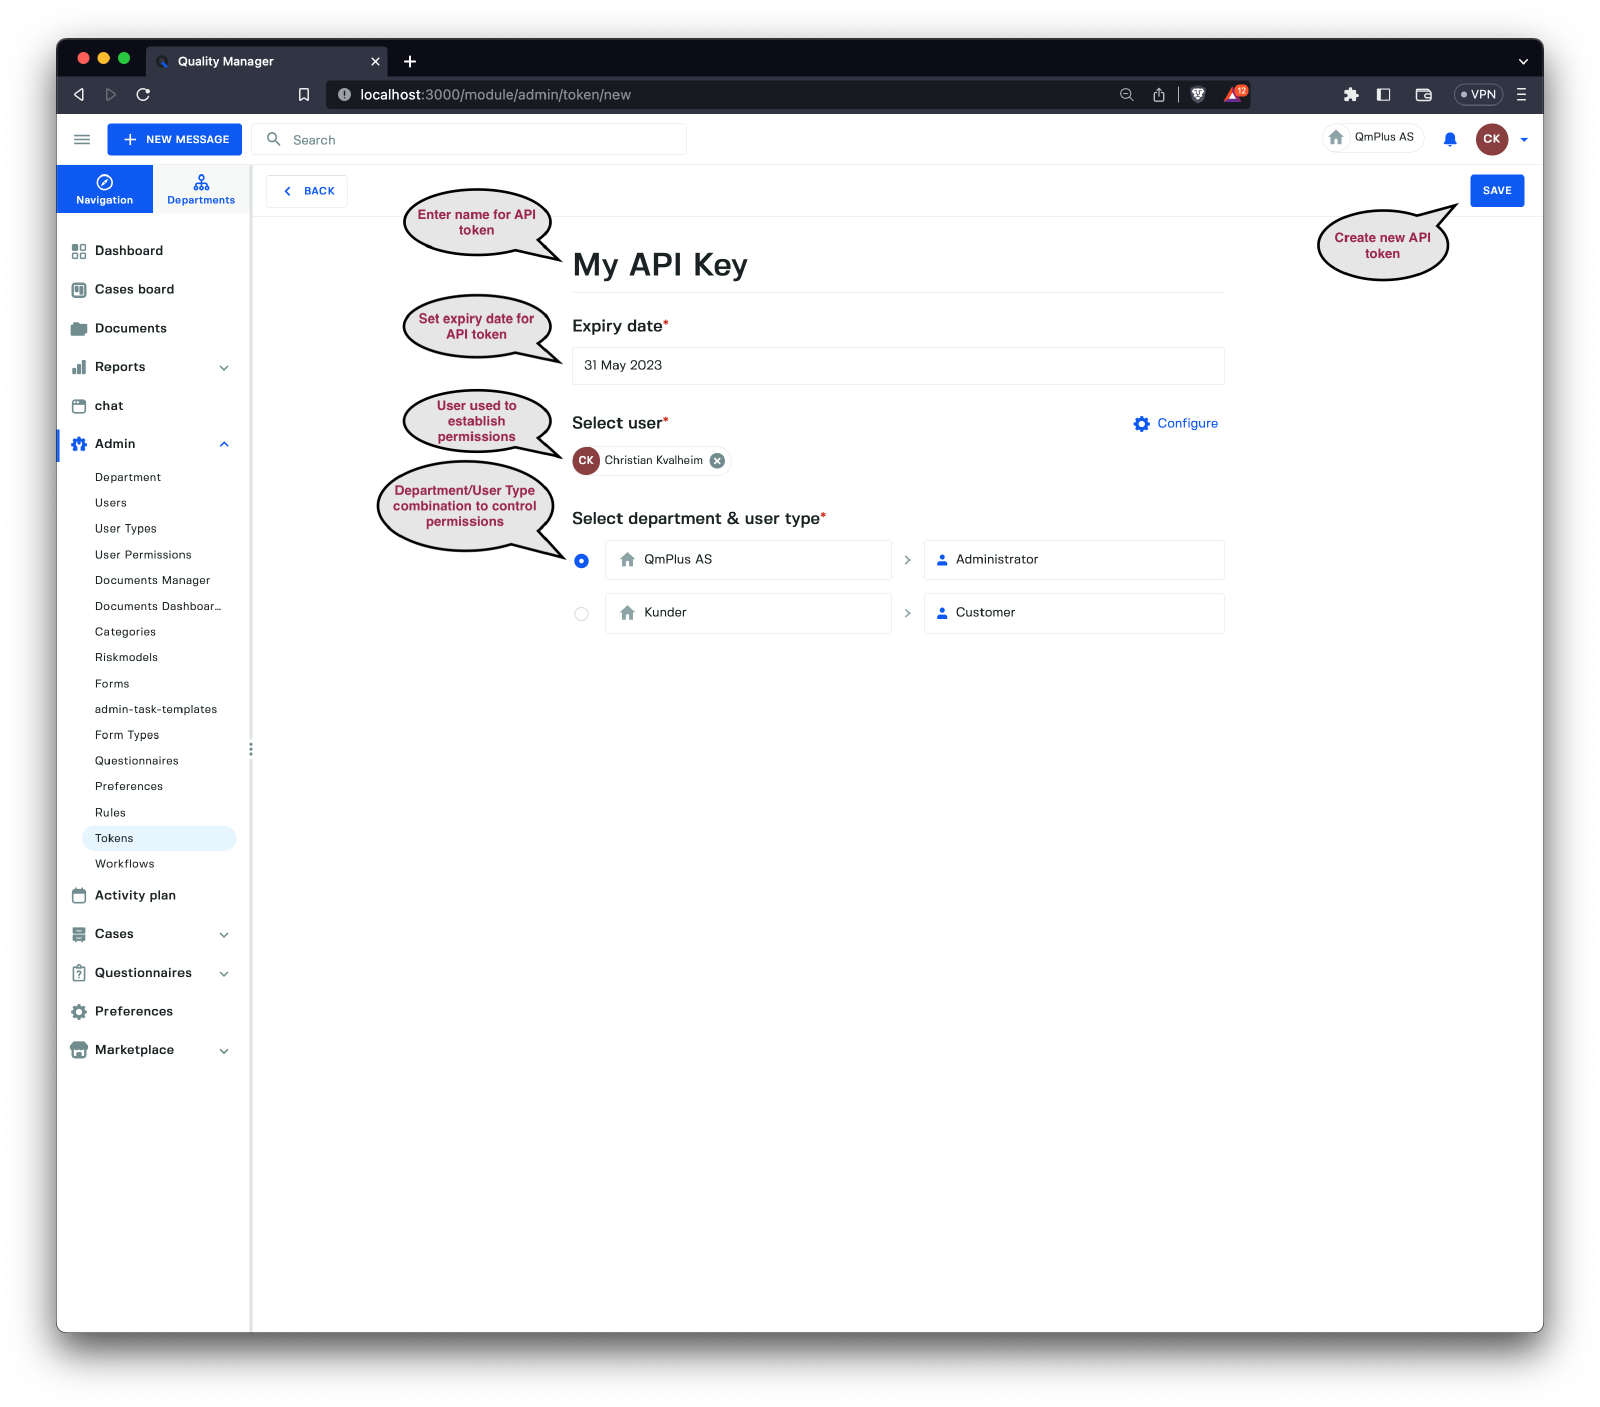
You can create new API Tokens for integration. The following fields must be provided.
| Field | Description |
|---|---|
Token Name | The name entered when creating the token. |
Expiry Date | Set the expiry date of the token, with a suggested duration of no longer than 12 months for any single token. |
Select User | Choose the user who will be utilized for permissions verification. |
Select Department & User Type | Choose the Department and User Type associated with this token. |
Once you click “Save,” a new API token with a randomly generated token string will be created. You can then click on that token to view the specifics of the token.
To guarantee data security, make sure to grant the token only the minimal amount of permissions necessary for integration.