
User guide
Administrator/User
A user guide for working with users. We cover how to create and modify users.
This section deals with managing users in the system.
Clicking on the Administrator/User gives access to the list of users.
User List
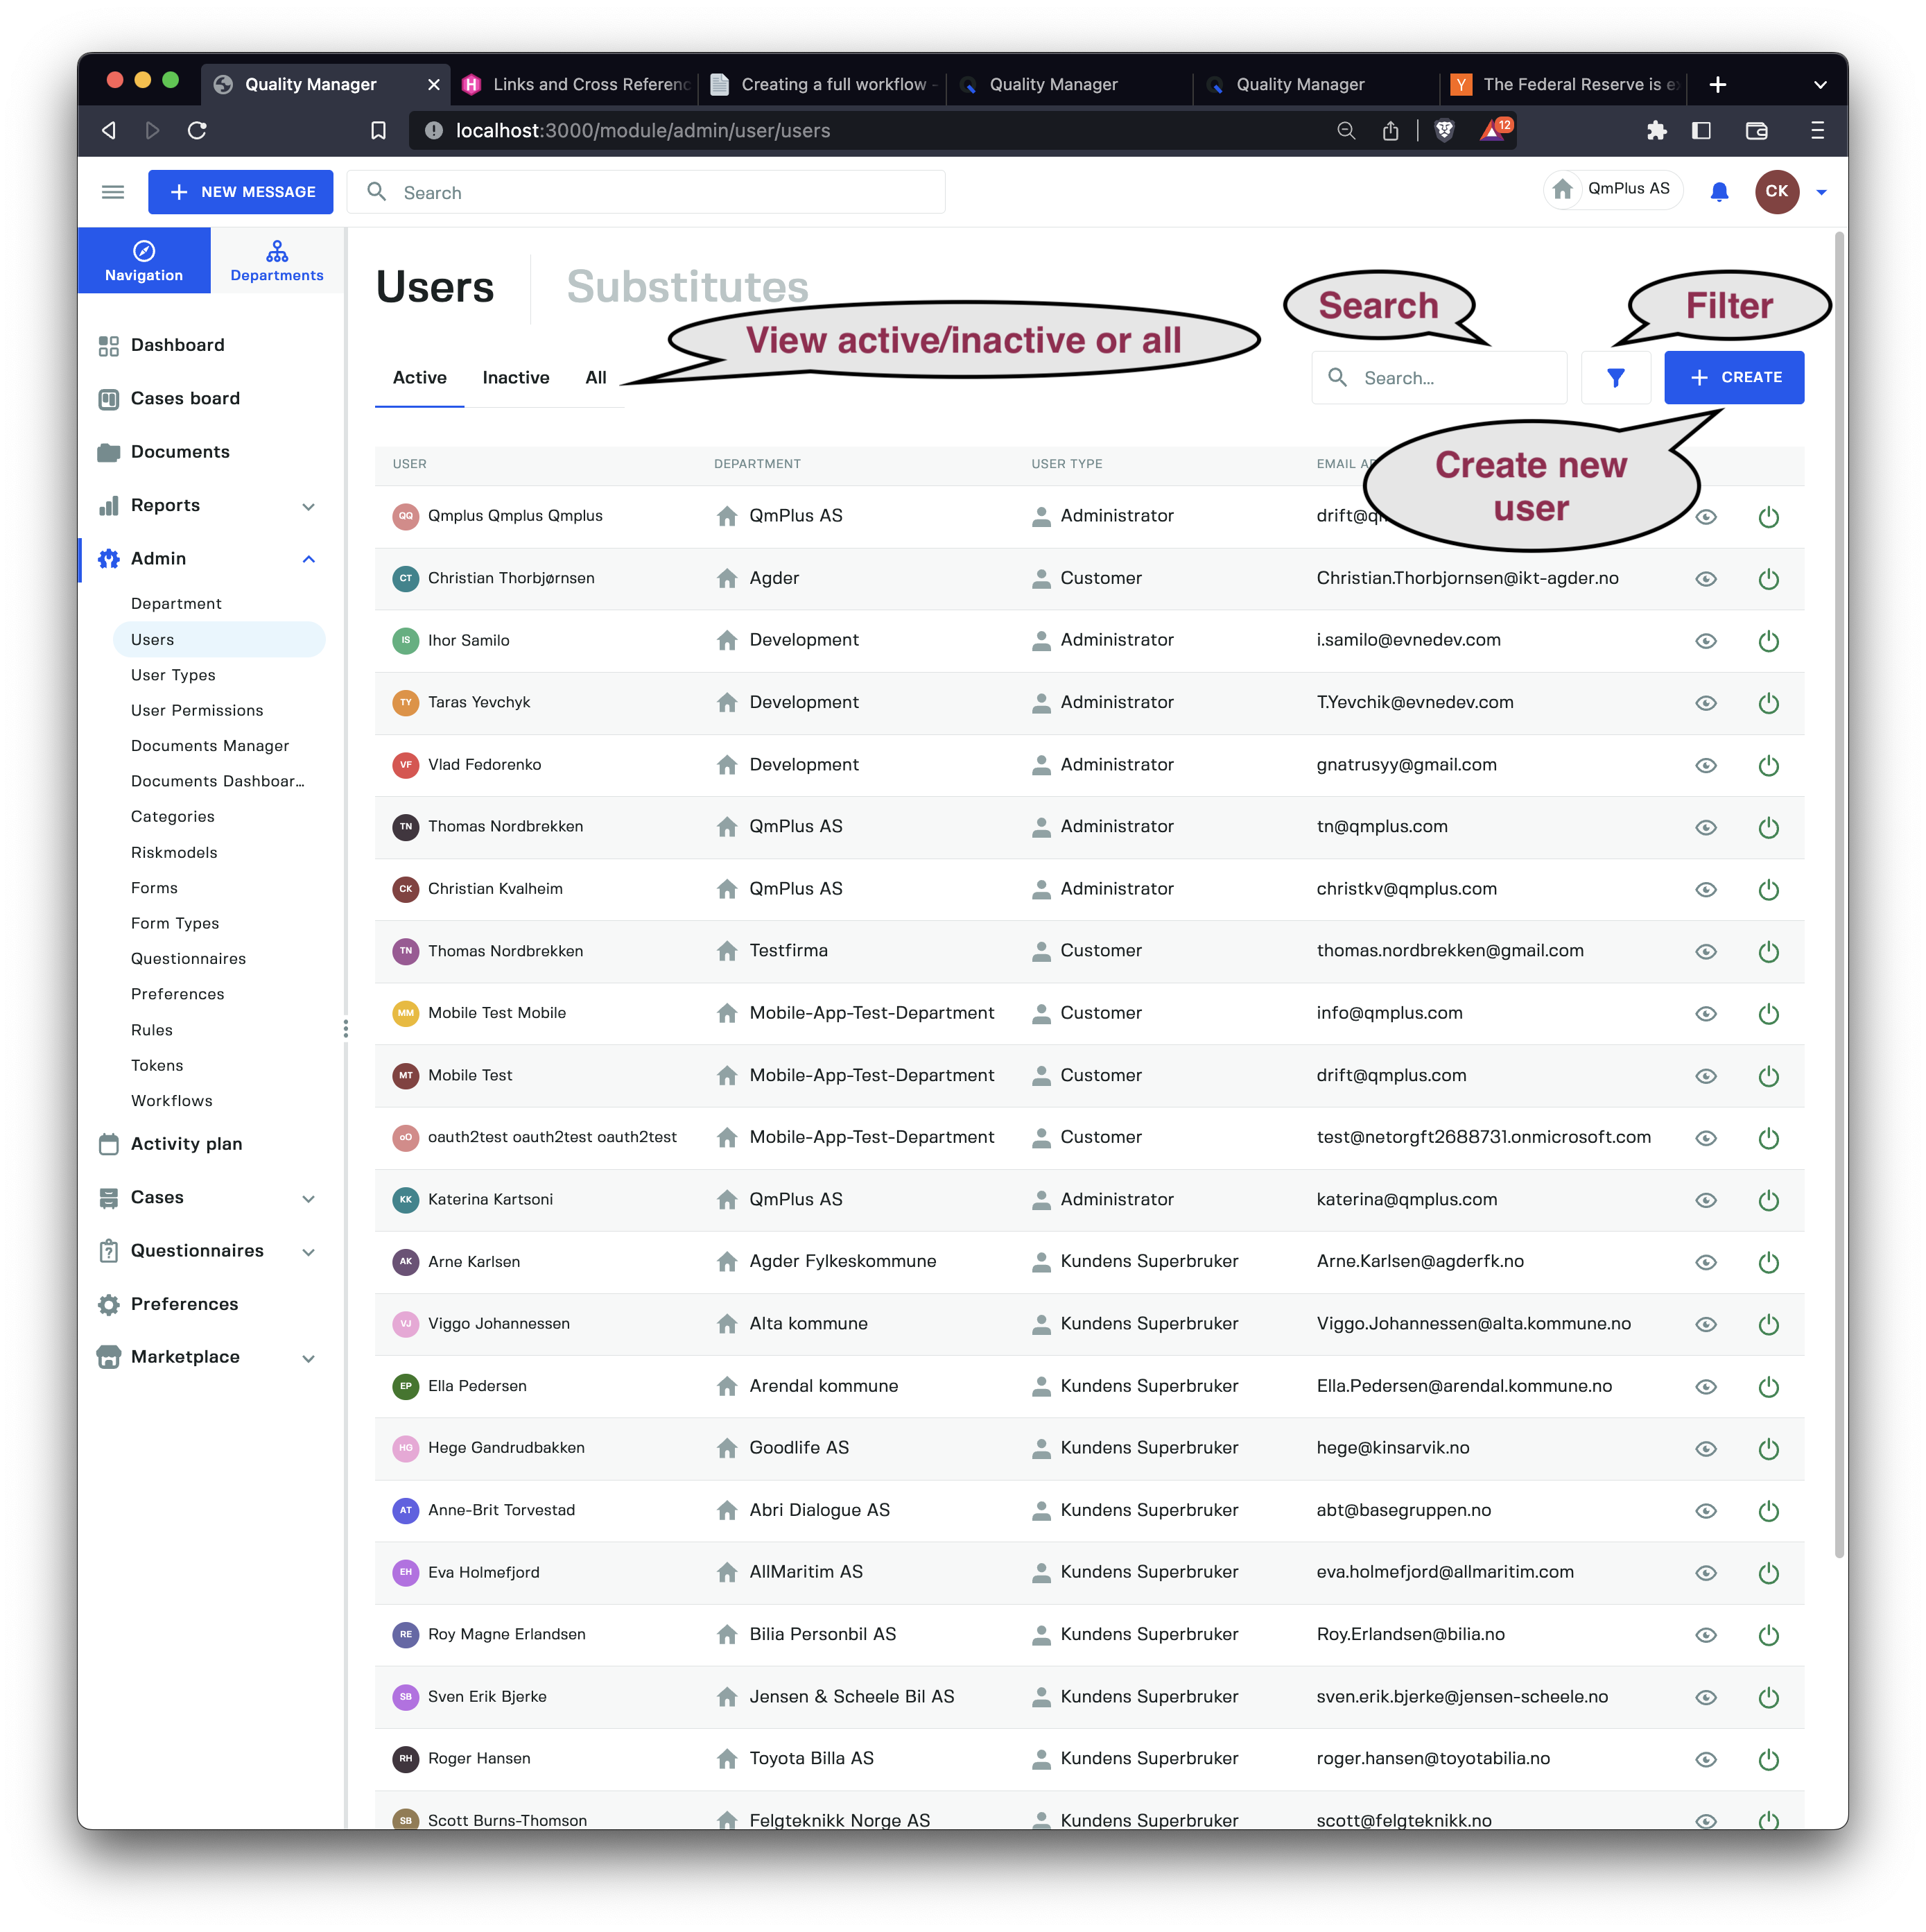
The user list shows you all the available users in the system. In this view, you can choose between seeing the Active, Inactive, and All users.
The search field allows you to perform a free-text search to filter the users you currently see by first, middle, or last name, as well as email and phone number.
Clicking the filter button lets you narrow the search even more, as shown below.
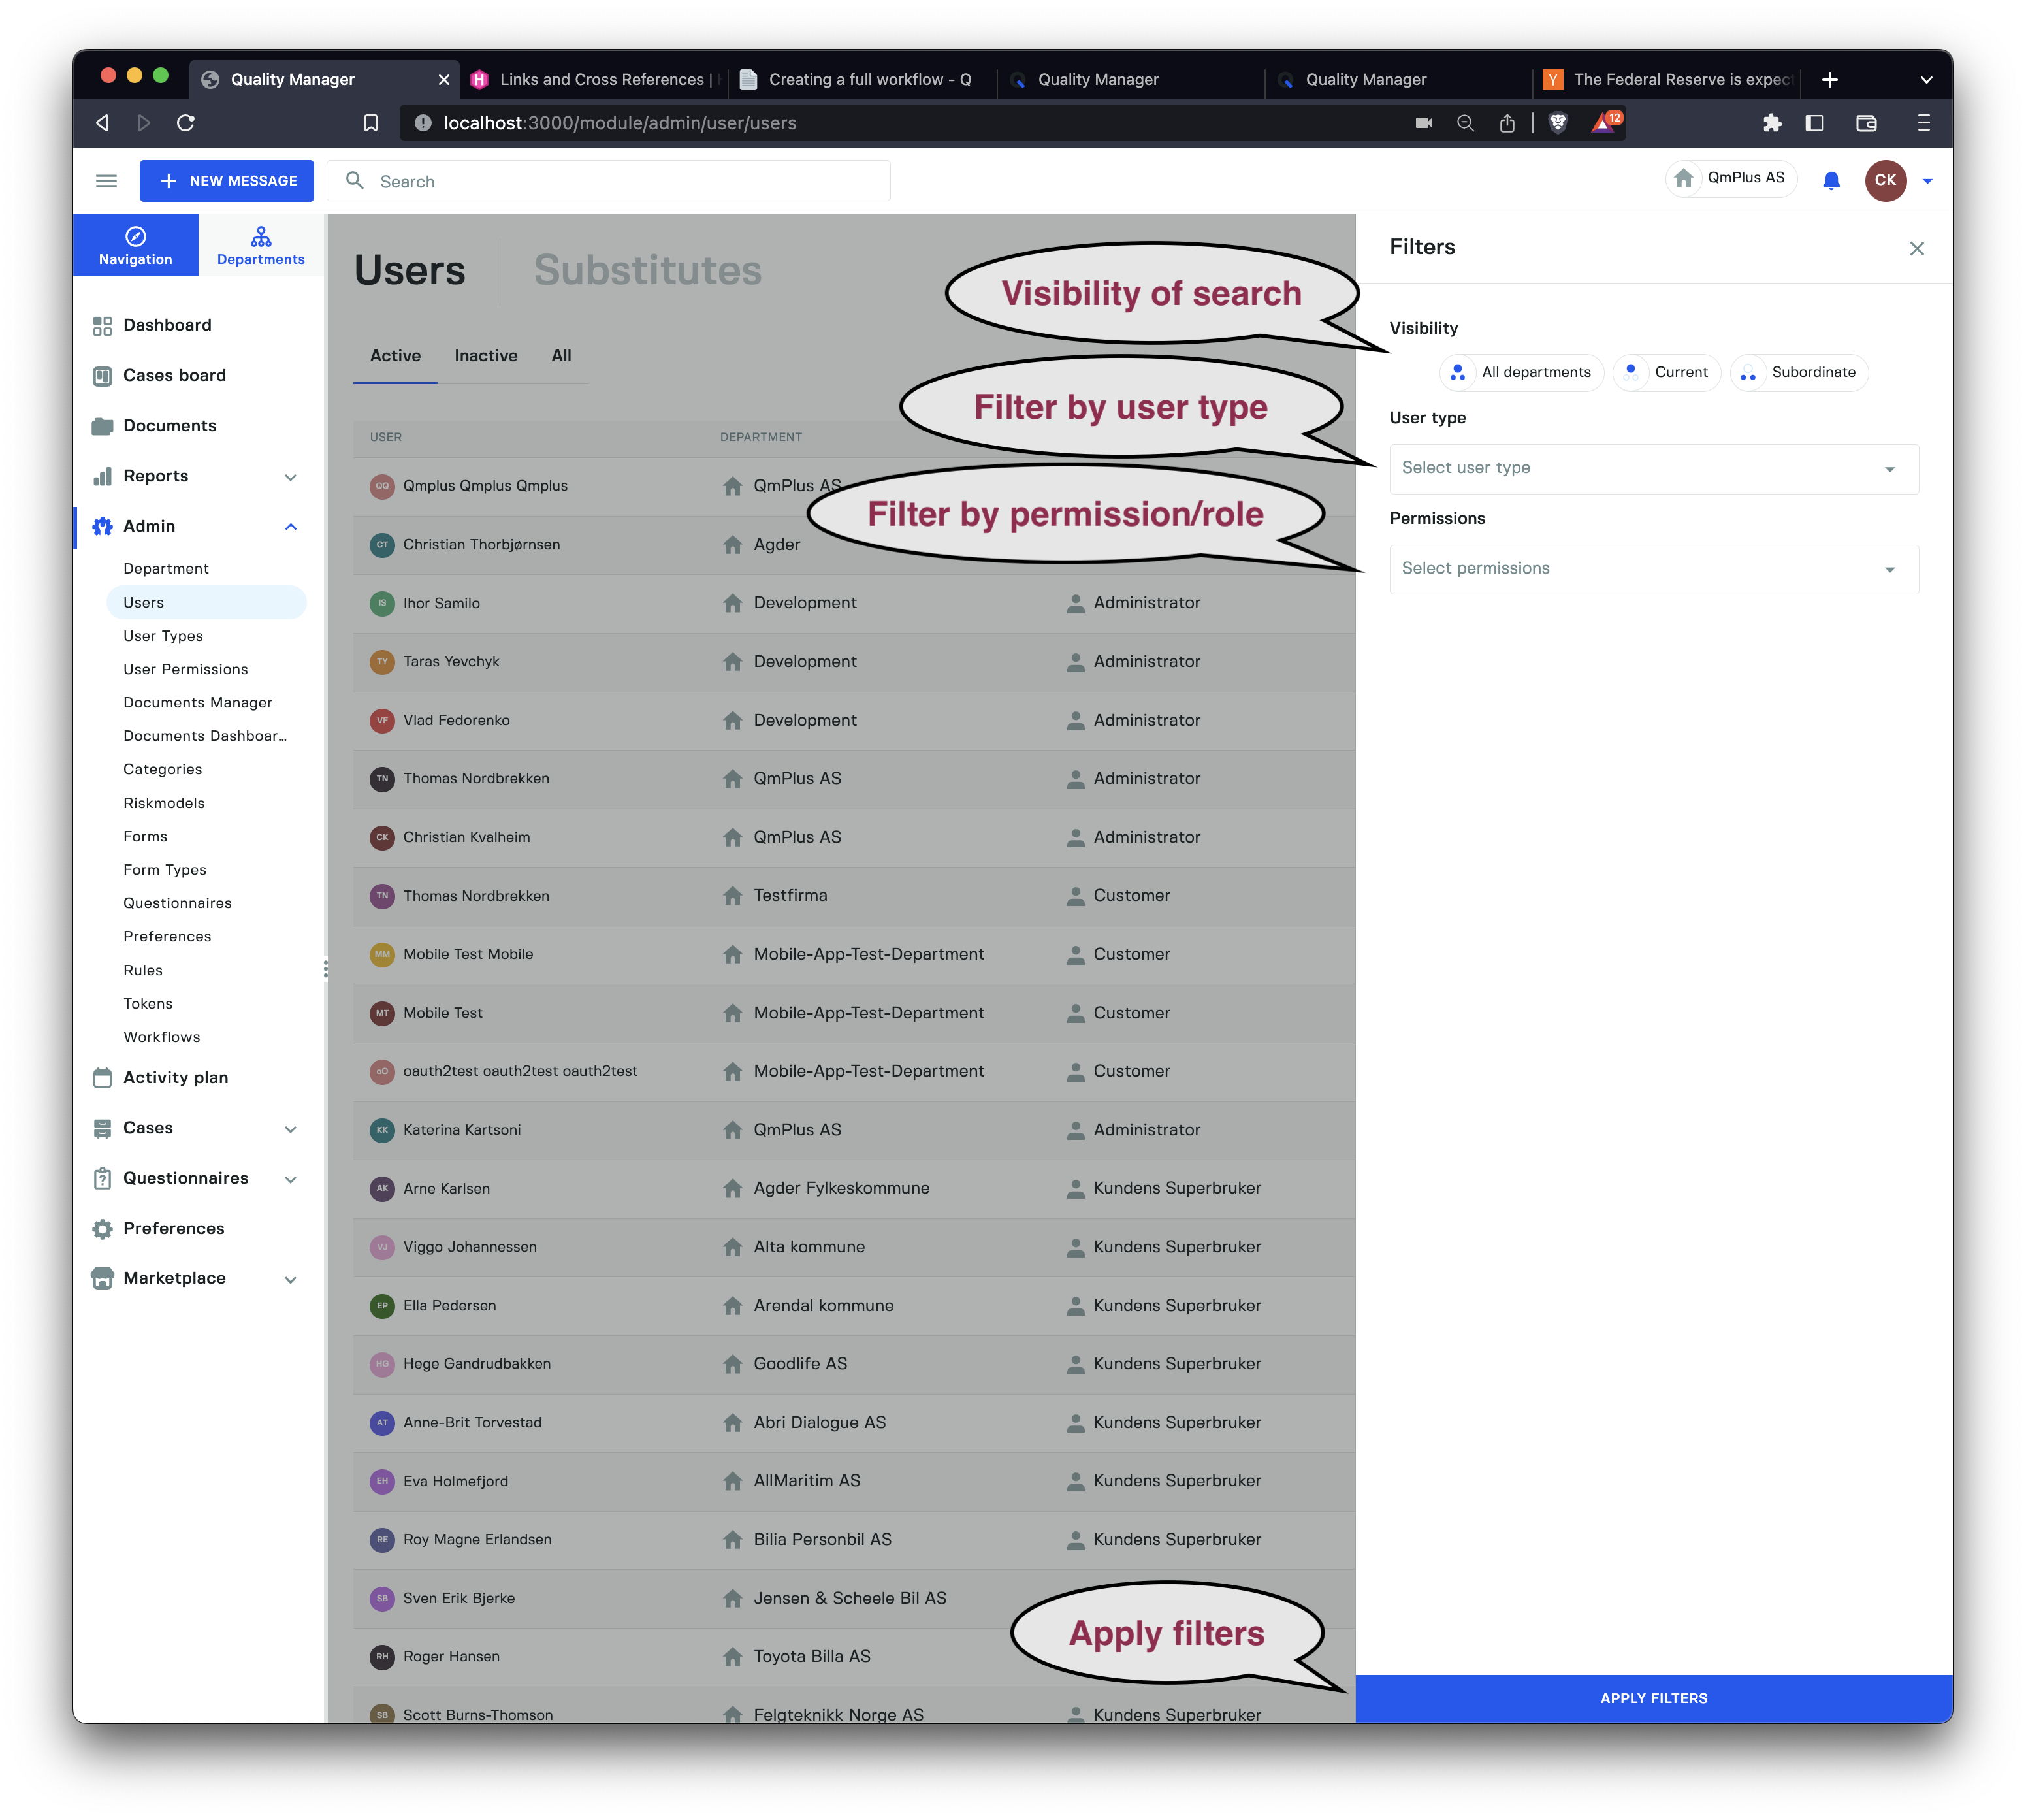
The options for filtering are as follows.
| Filter | Description |
|---|---|
Visibility | Only show users in the All departments, This department, or Only child departments |
User type | Show only users who have the specific user type |
Permission/Role | Show all users who have a specific permission/role |
All these filters can be combined to limit the search even more.
Create User
General Settings
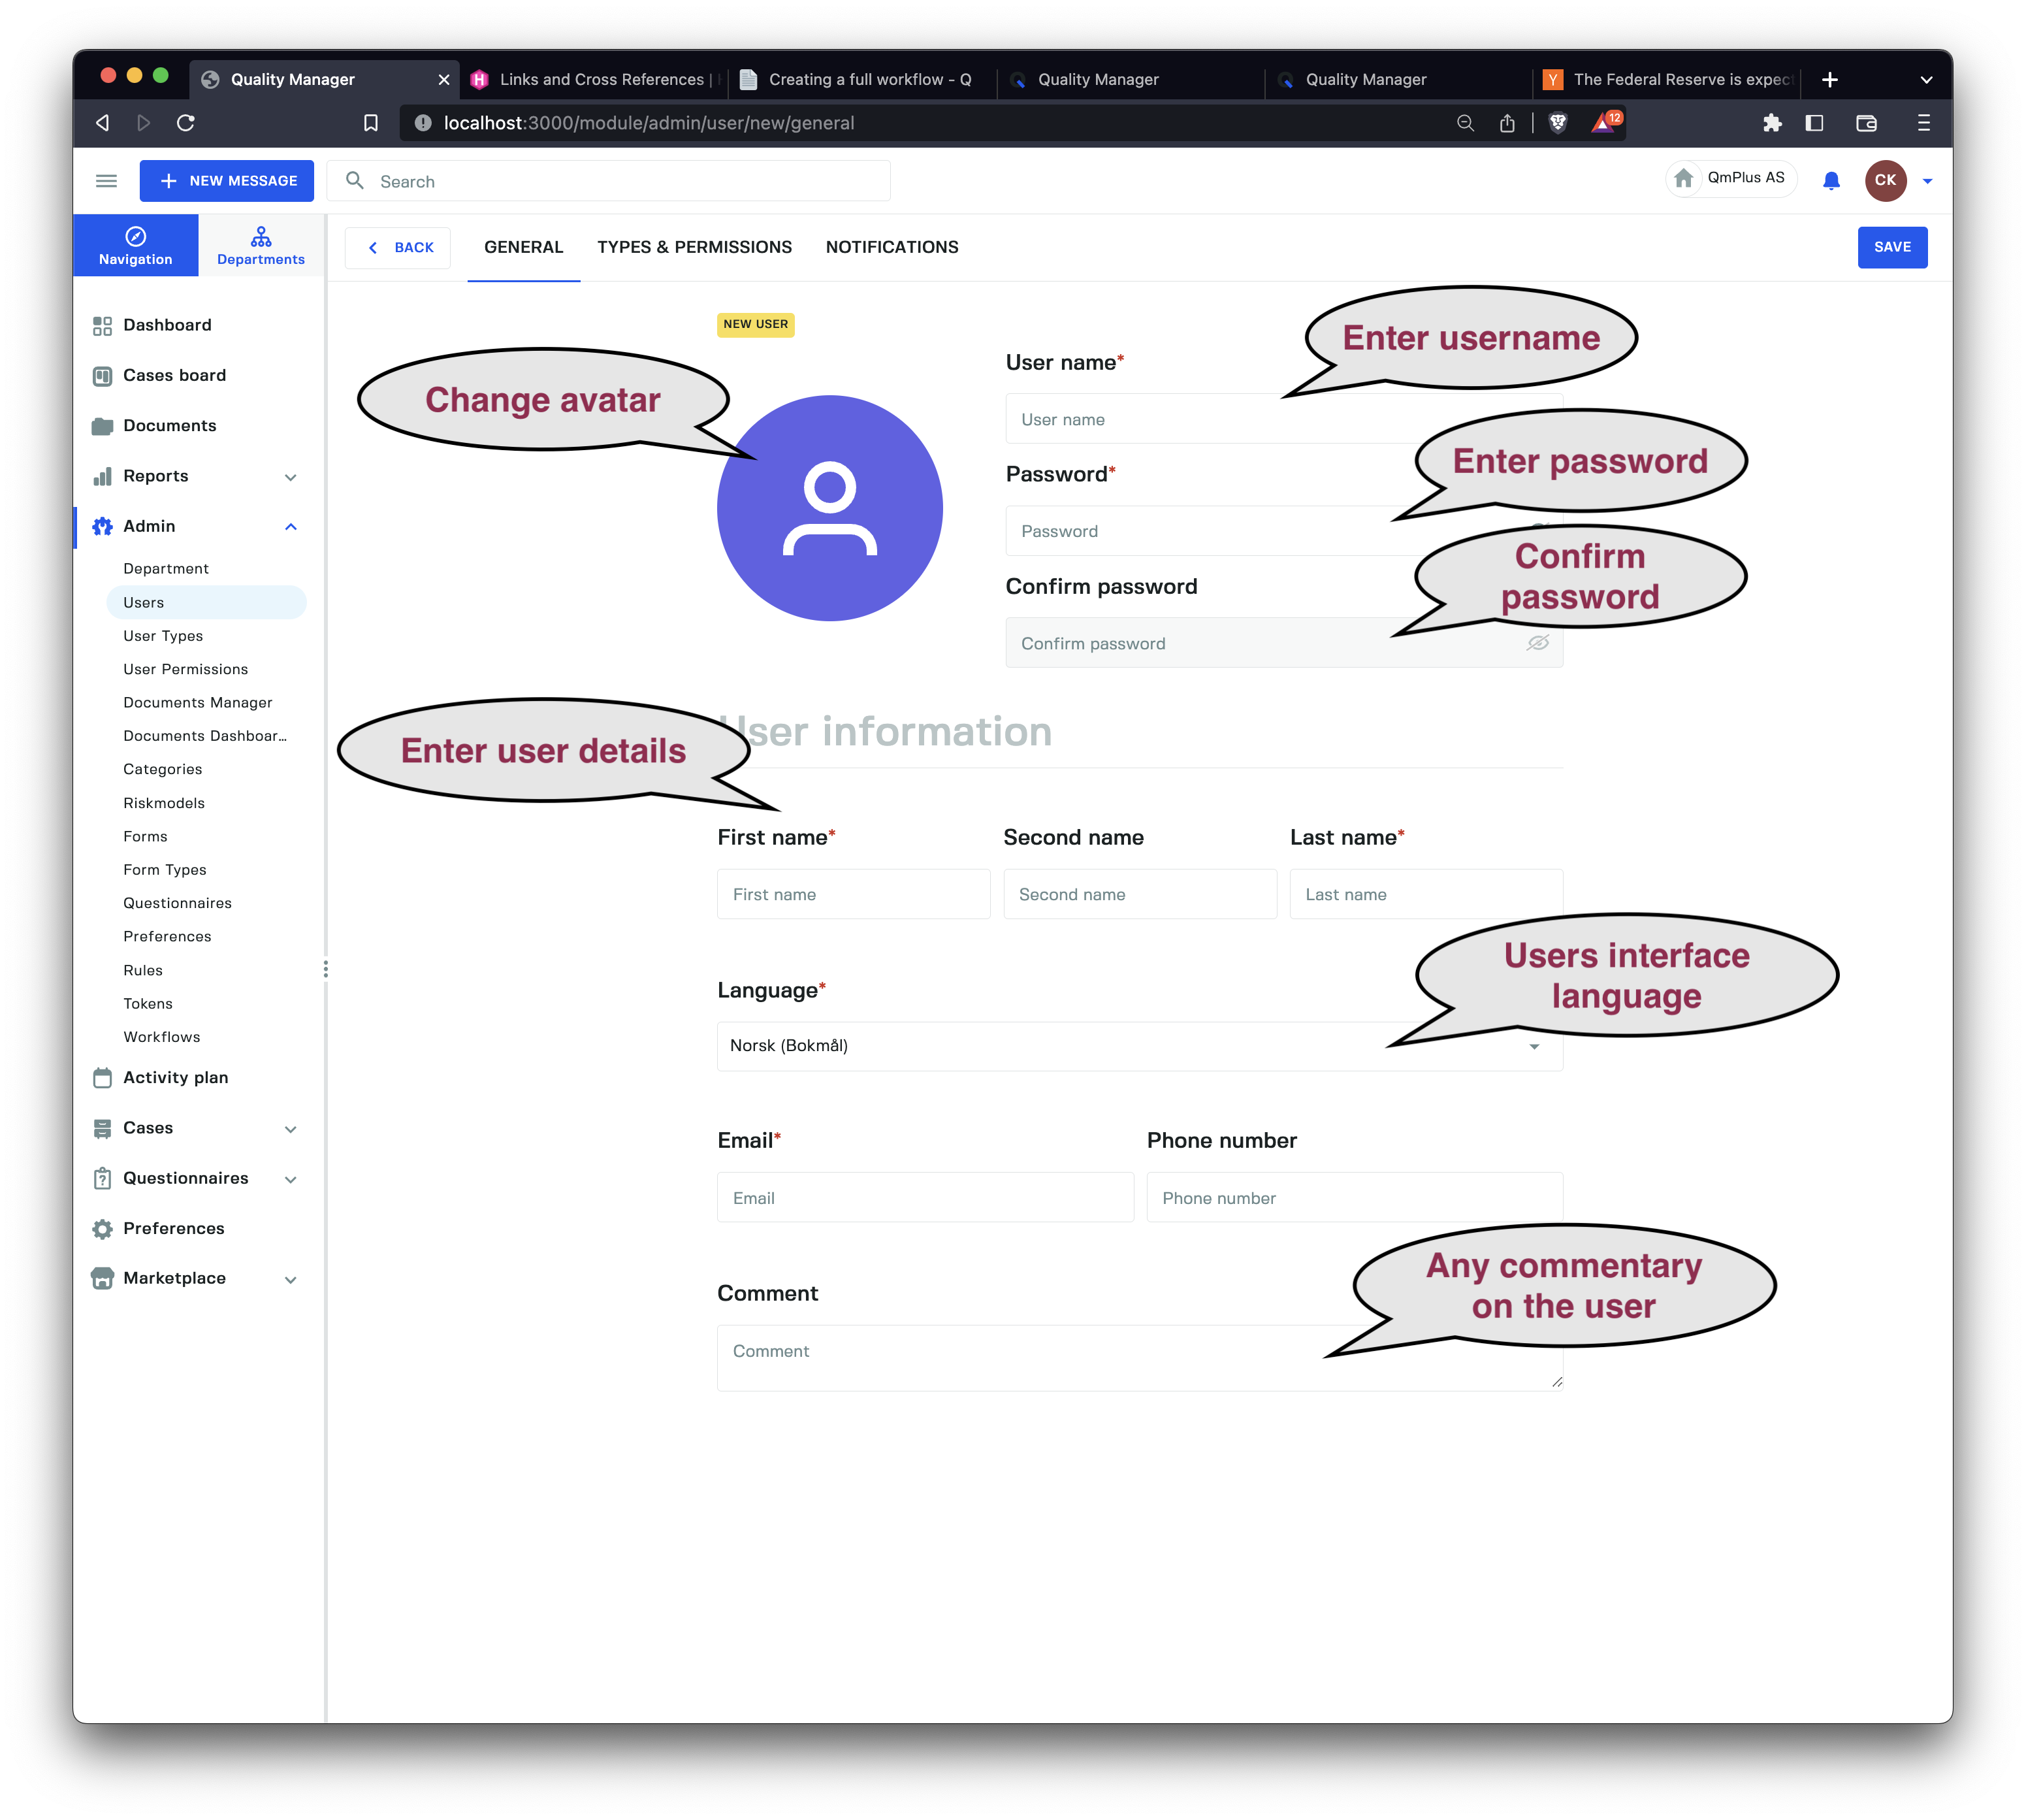
The create user dialog lets us create new users for the system, and specify their user types as well as custom permissions. Finally, we can adjust the notification settings.
The following are available.
| Field | Required | Description |
|---|---|---|
Username | X | The login username for the user (must be unique in the system) |
Password | X | The user’s password |
Confirm password | X | Confirm the password in this field |
First name | X | The first name of the user |
Middle name | The middle name of the user | |
Last name | X | The last name of the user |
Language | X | The user’s preferred interface language |
Email | X | The user’s email |
Phone | The user’s phone number | |
Comment | Any commentary on the user, such as additional information about the user created. |
Once these fields are filled in, we have to assign at least one department and user type combination. Click on the Types and Permissions Tab.
Avatar
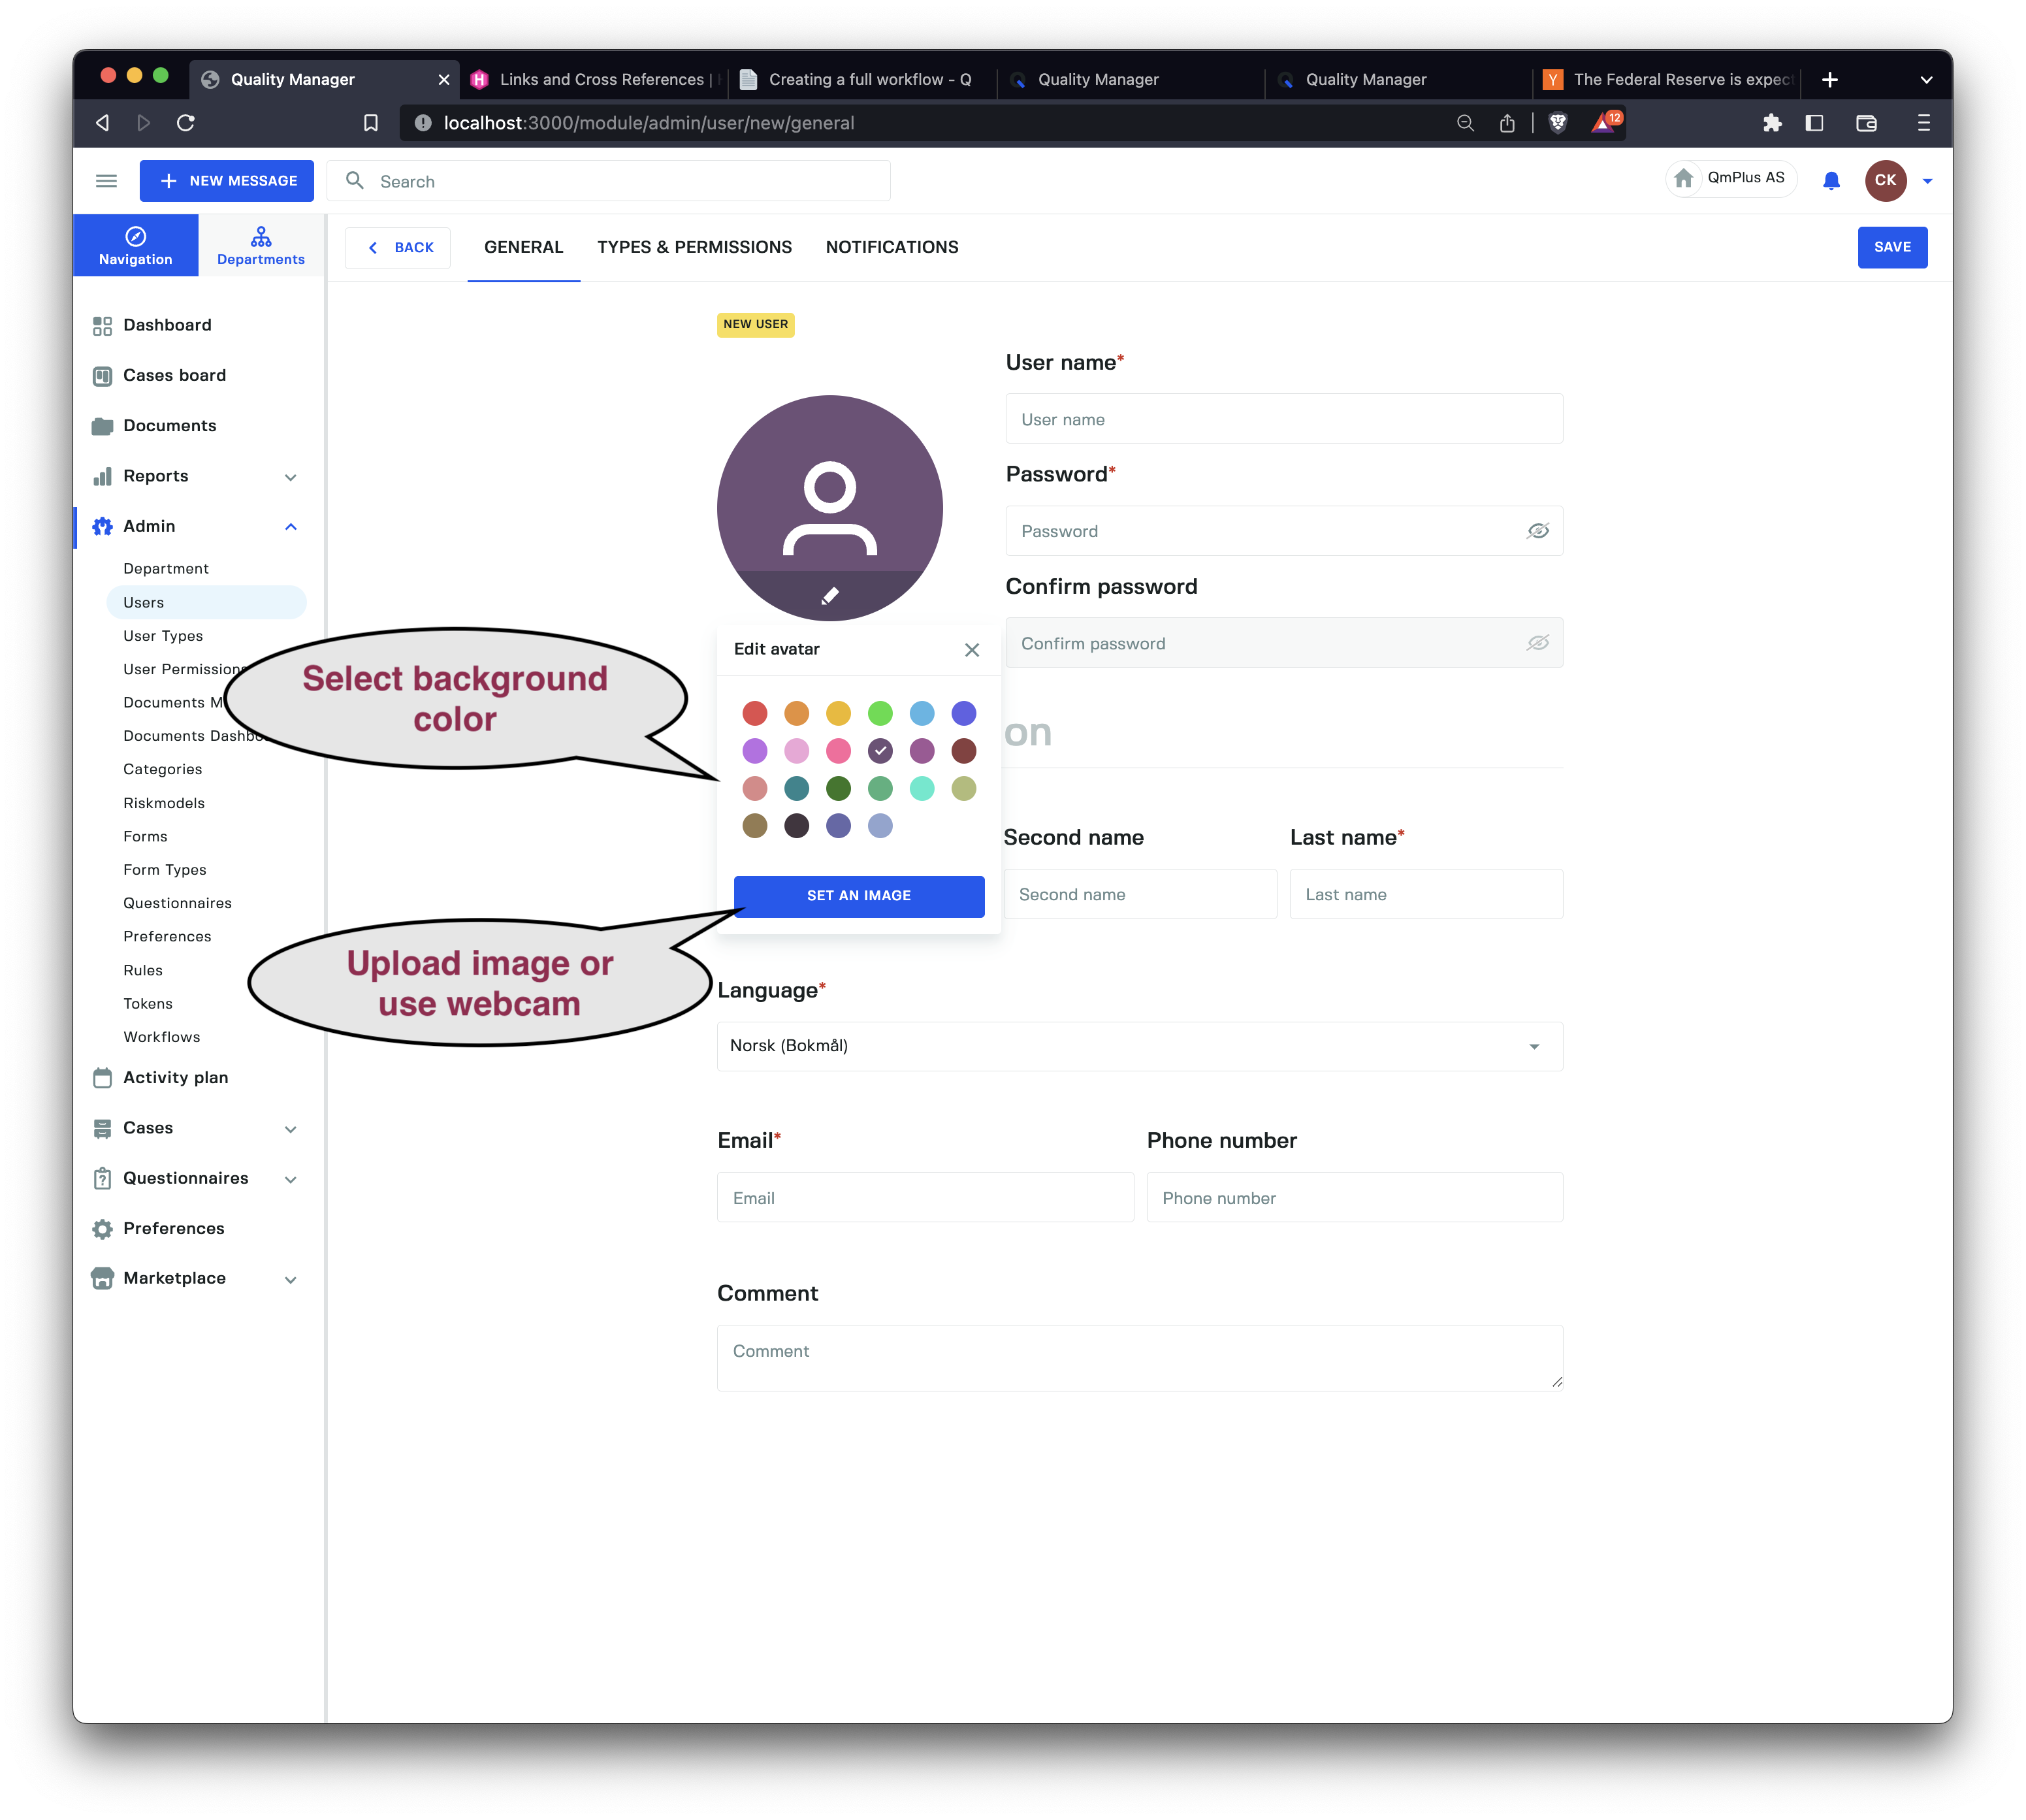
We can modify the avatar for the user by clicking on the avatar circle. Options here are changing the background color, uploading an image, or capturing an image with the webcam.
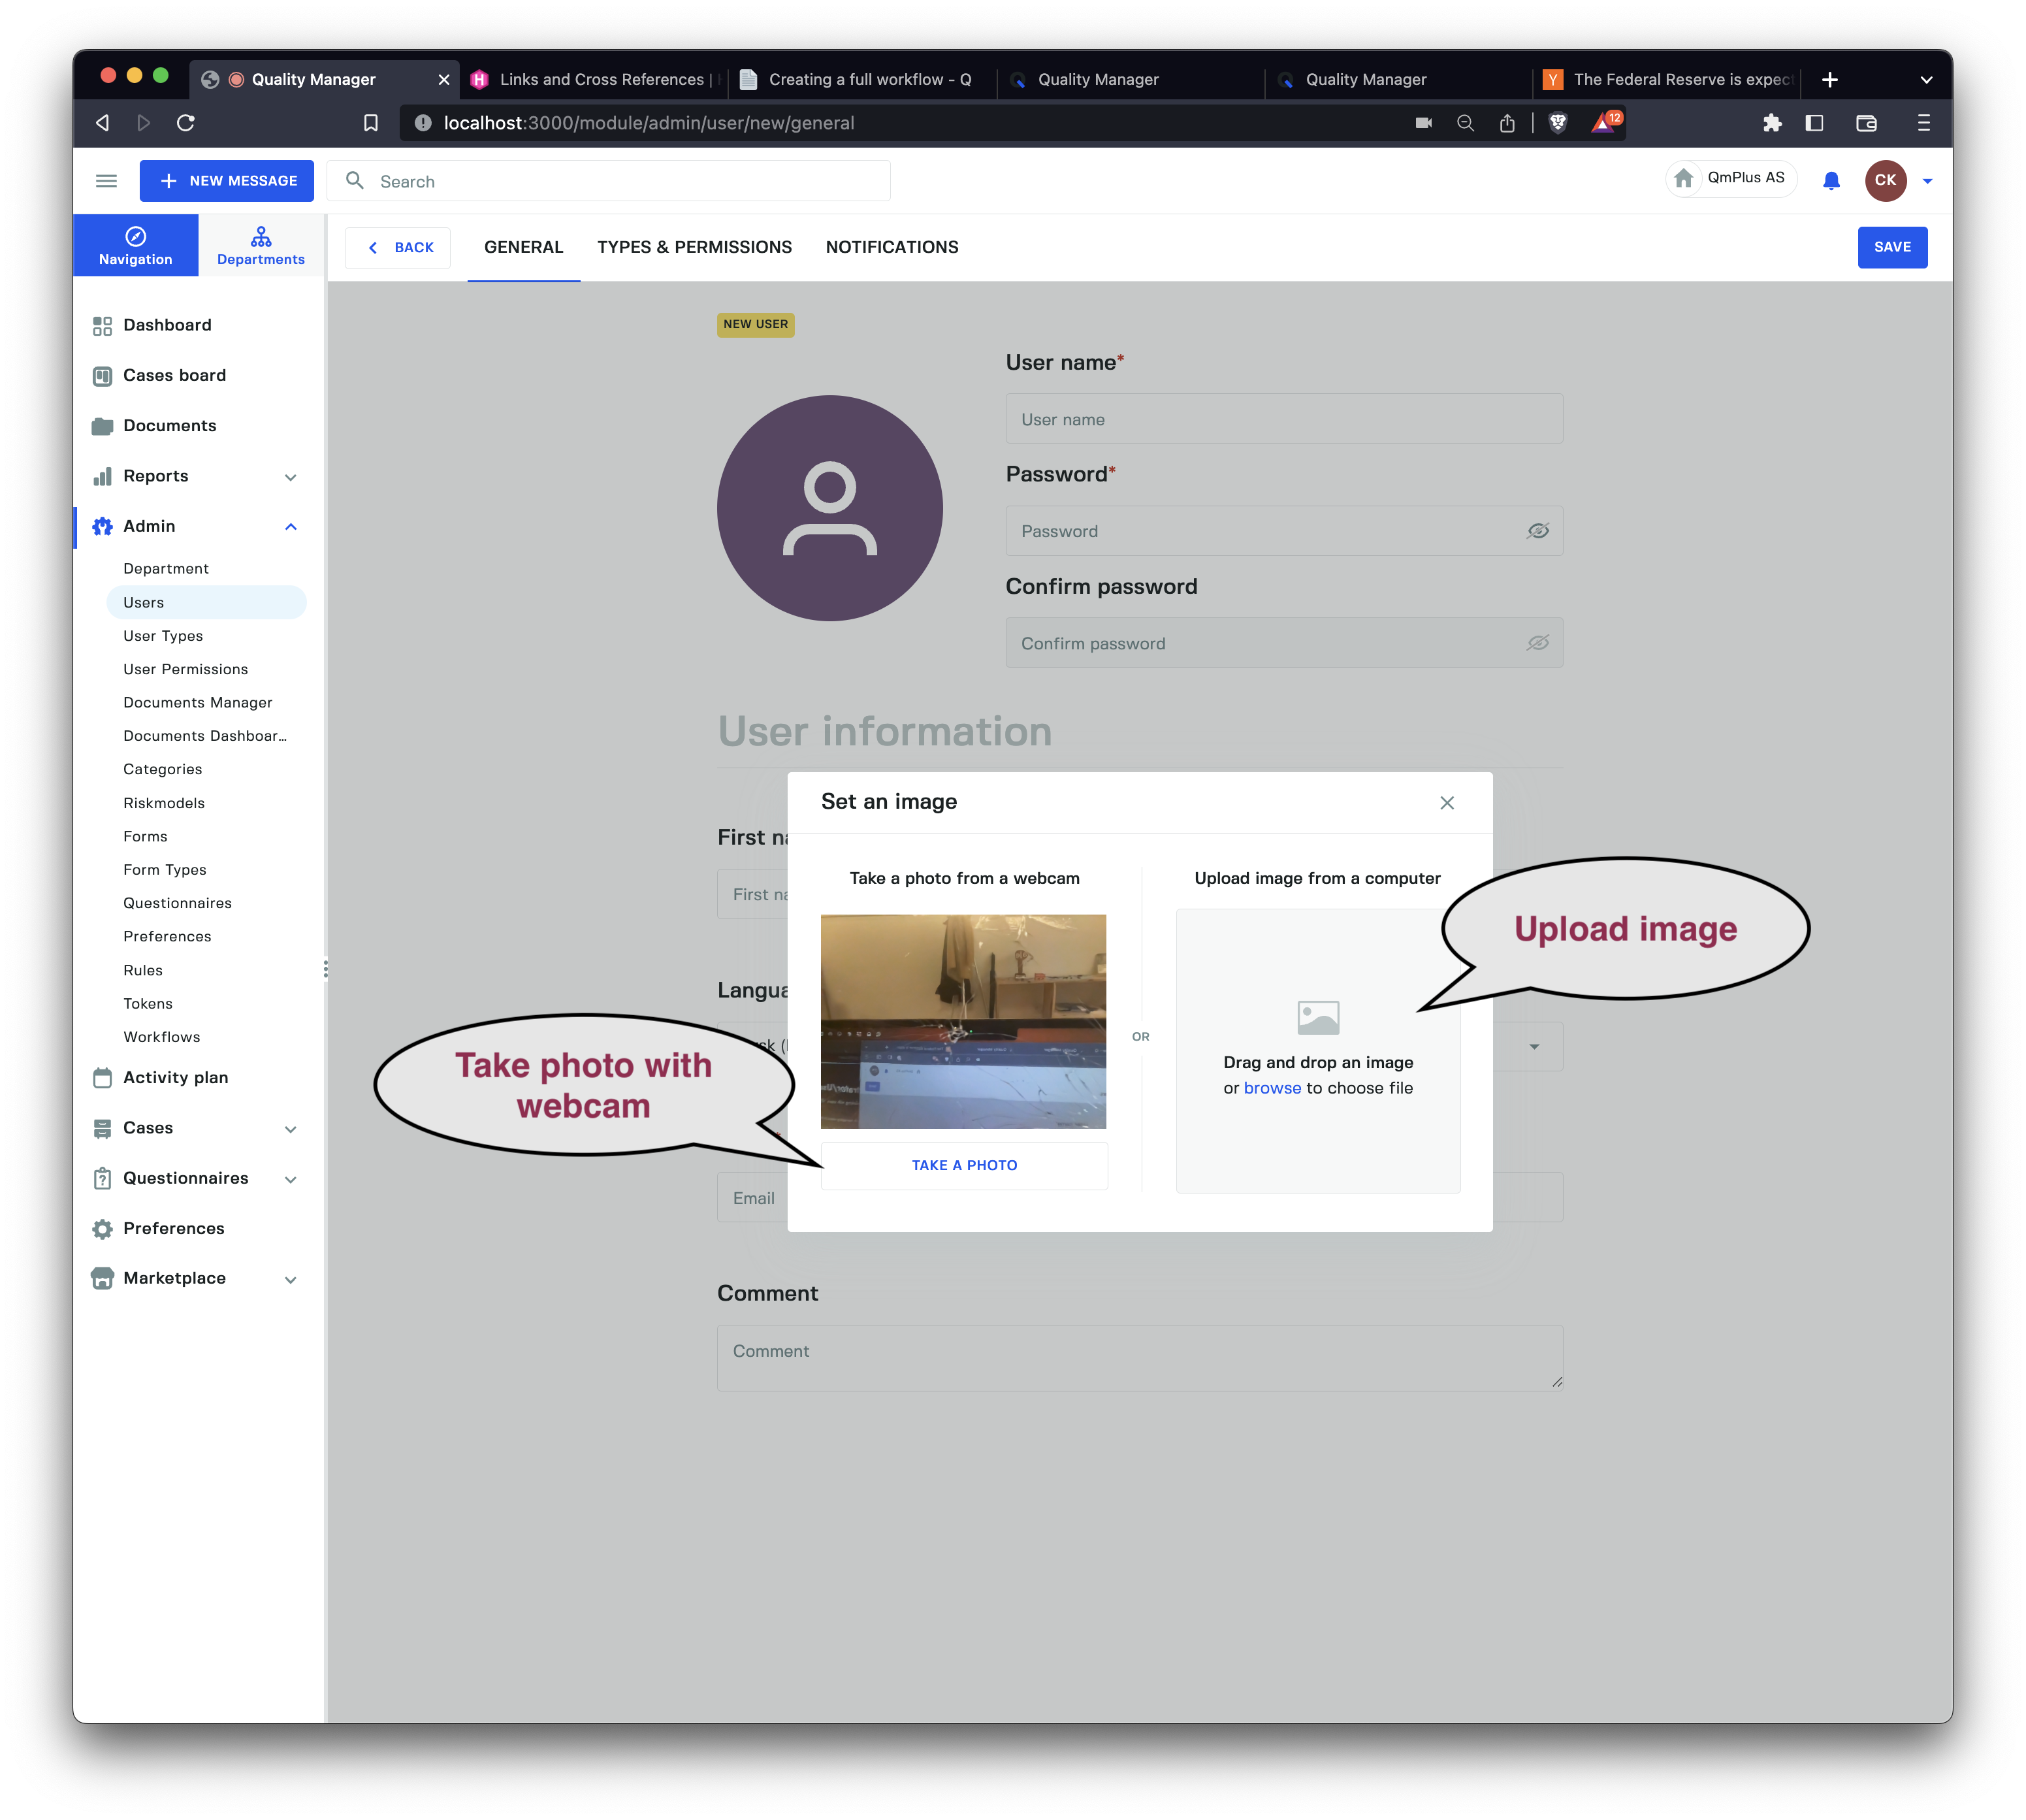
Below, we can see the dialog where we can upload an image or use the webcam (requires the user to give permissions to access the camera).
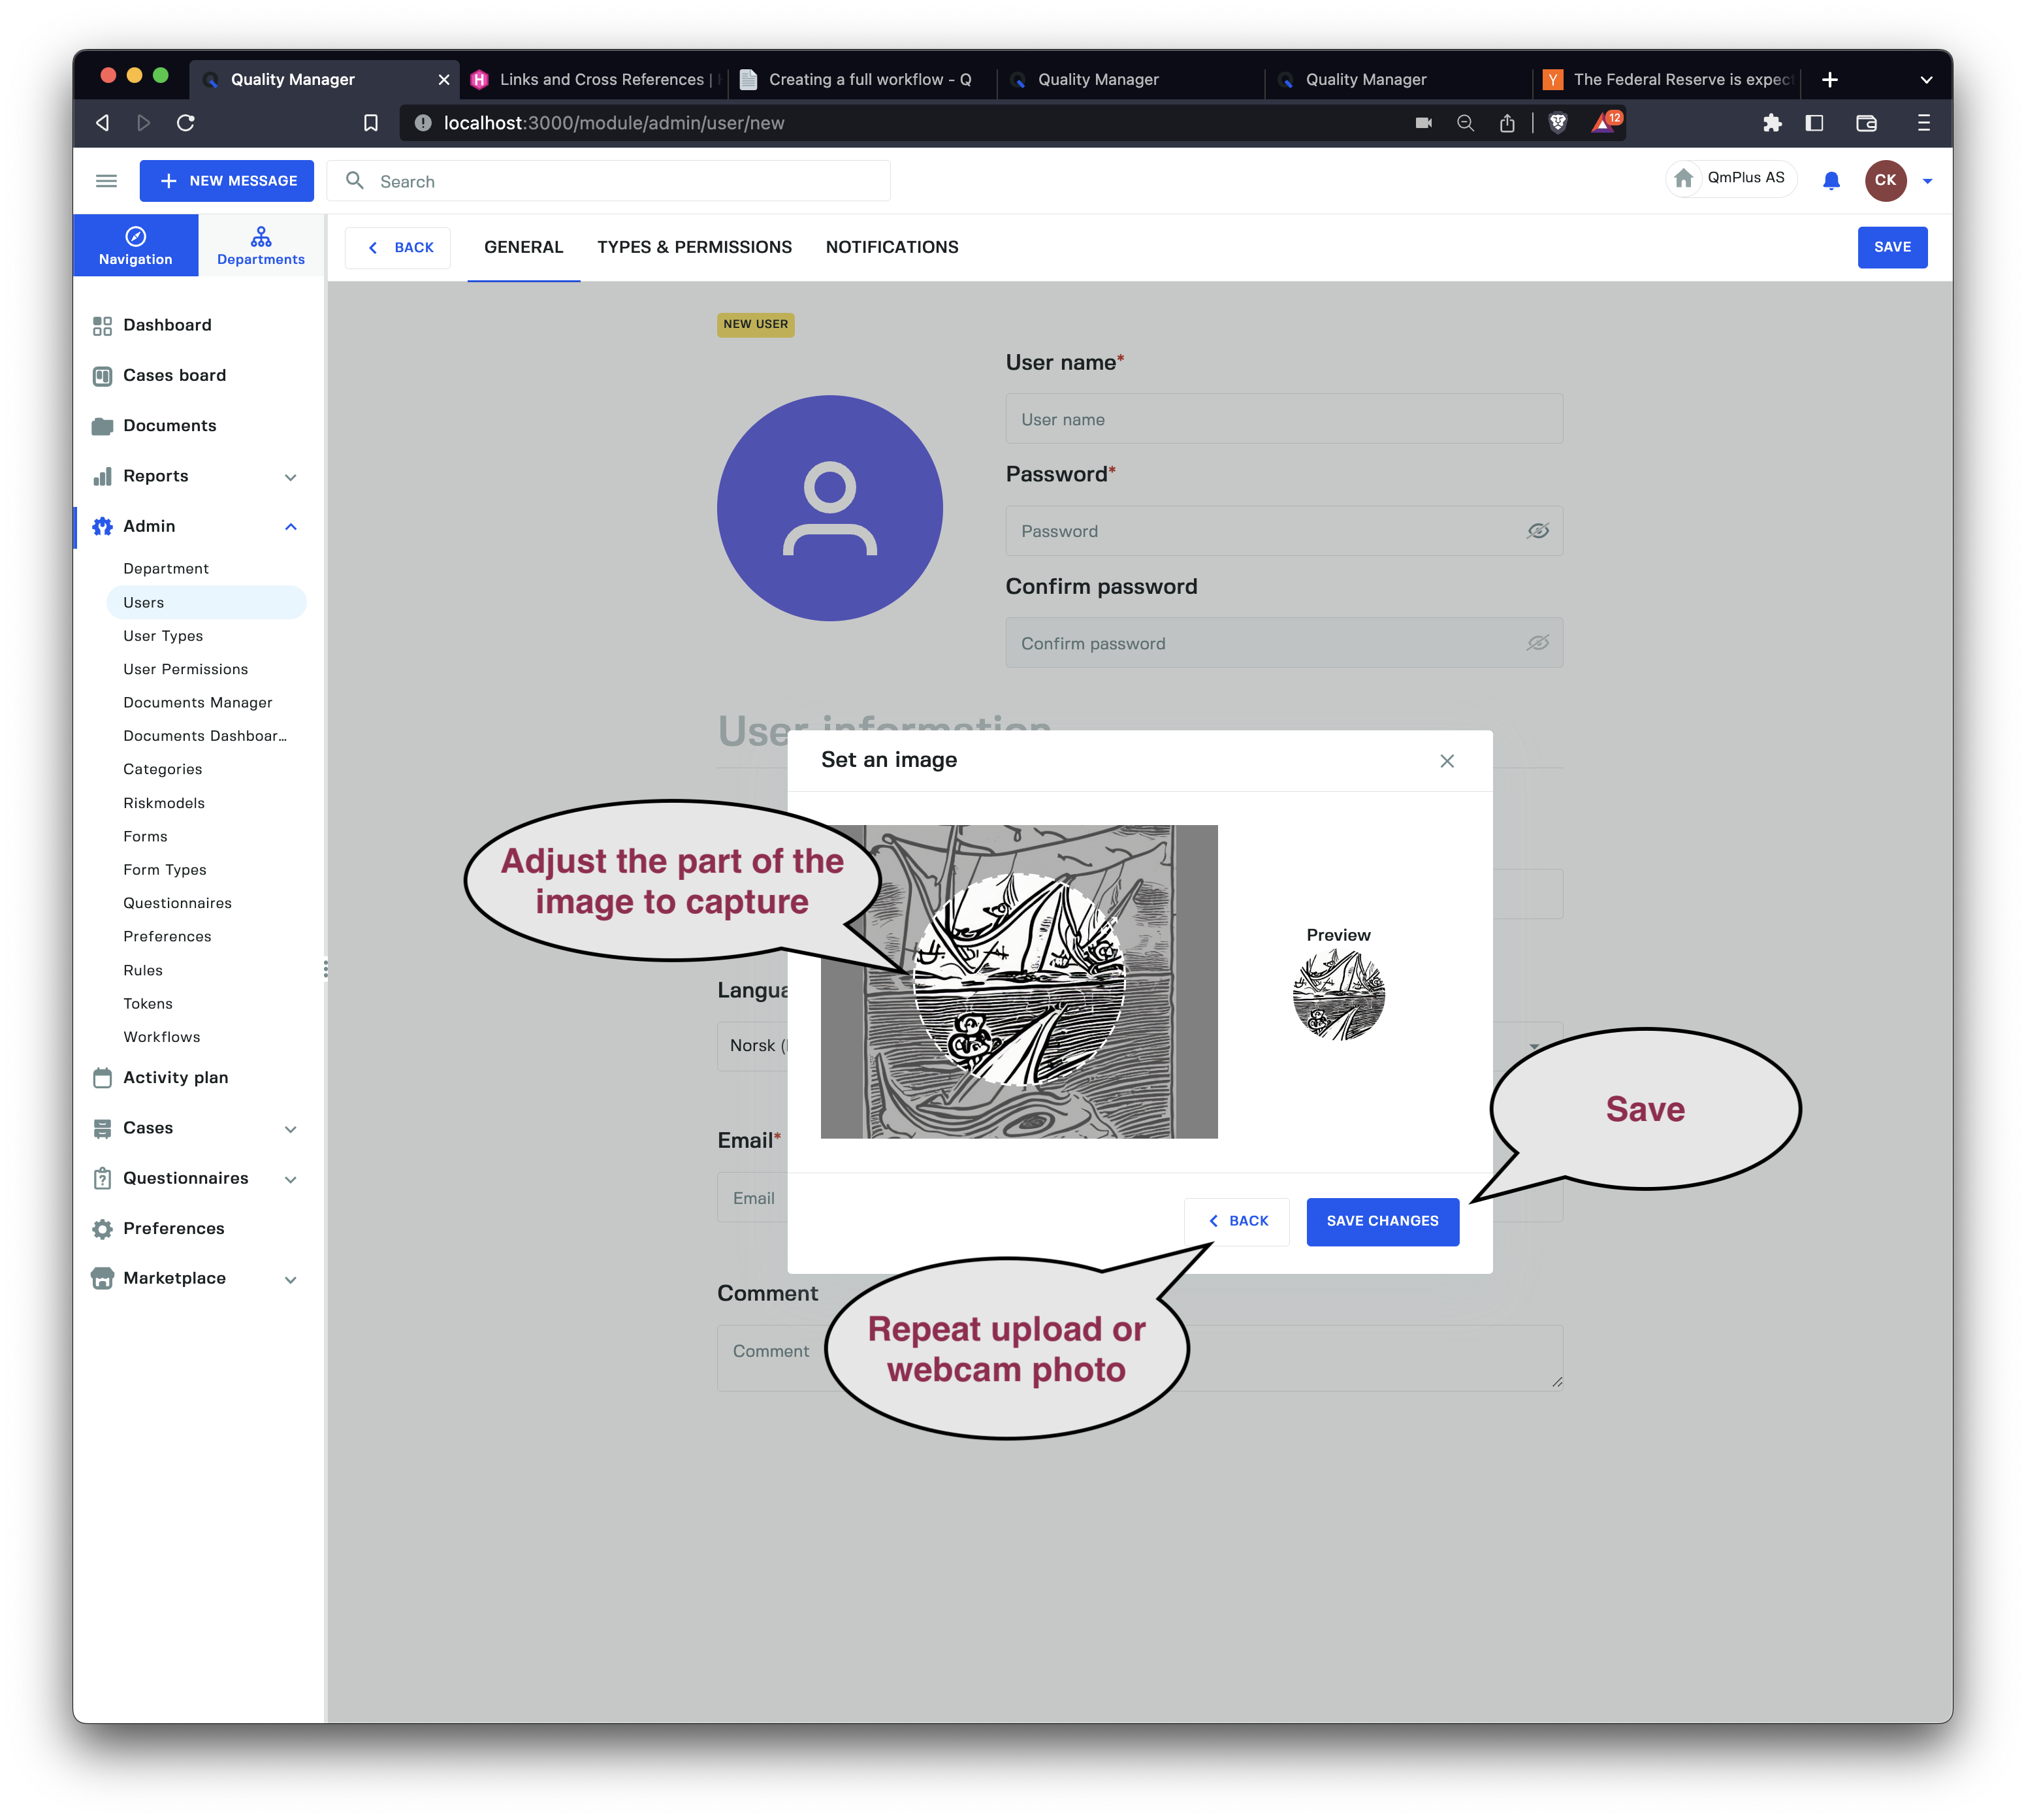
Once you have uploaded an image or taken a photo with the webcam, you can adjust the capture area and set the result.
Department and User Types
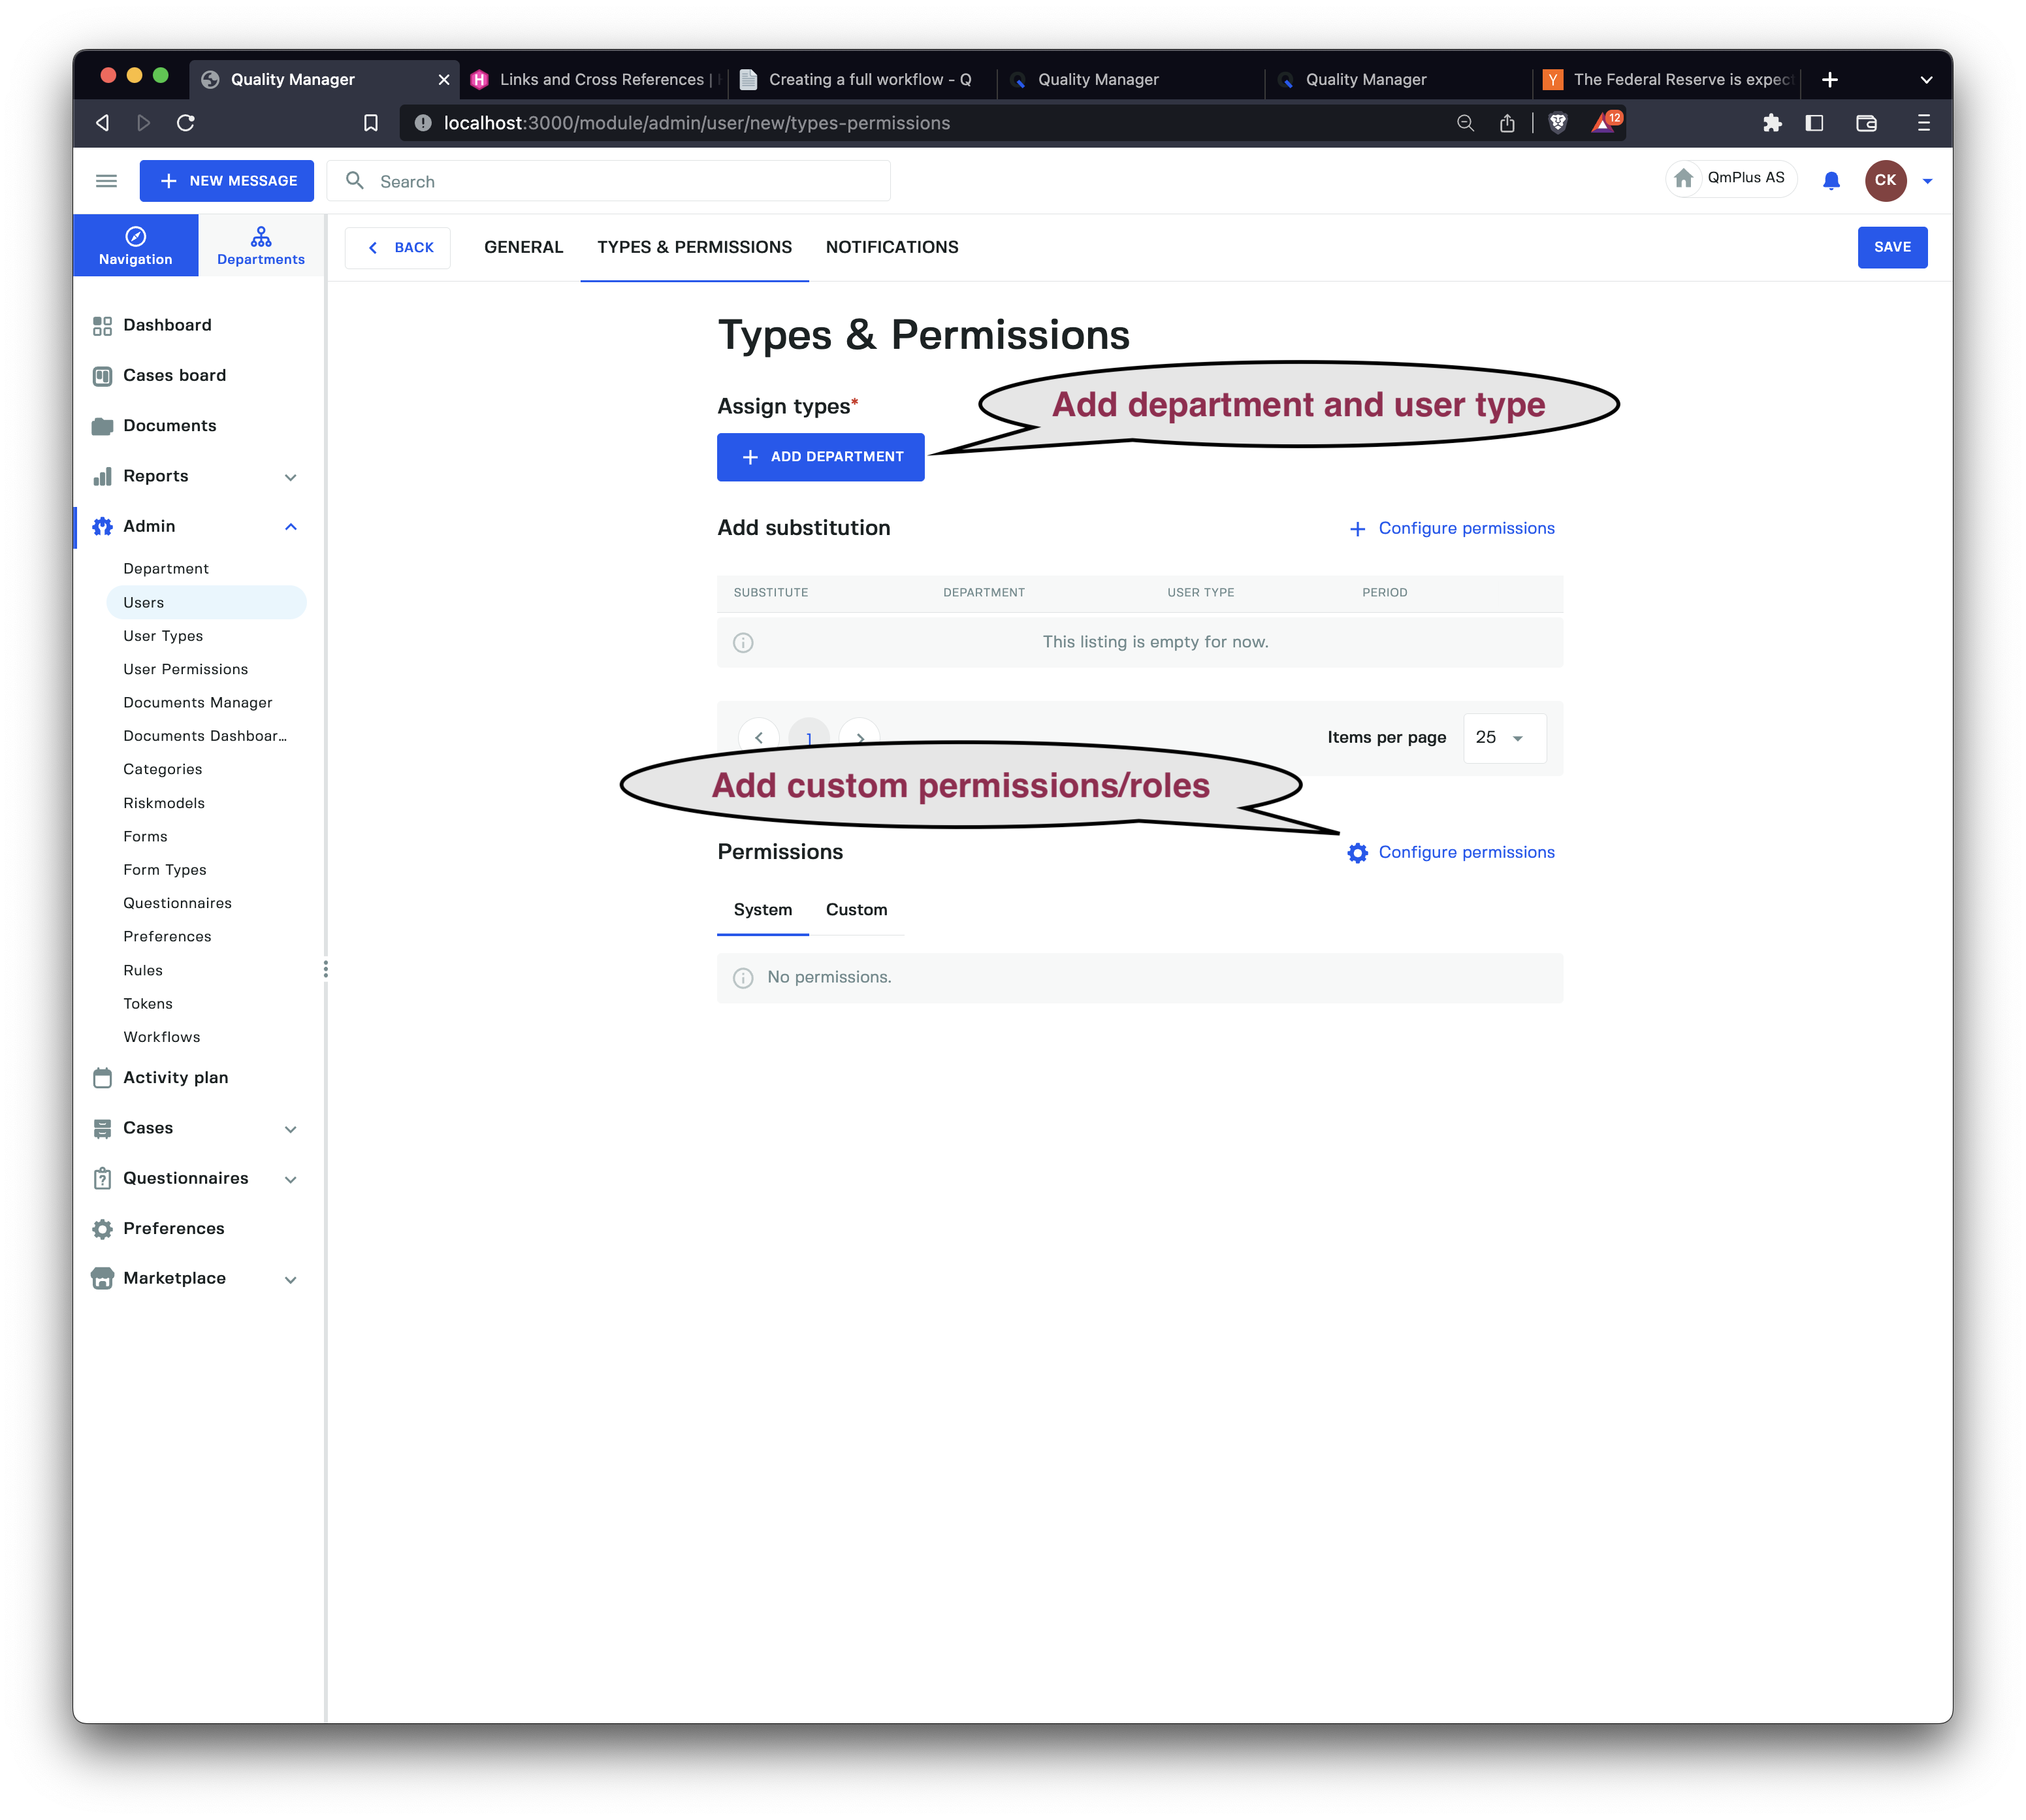
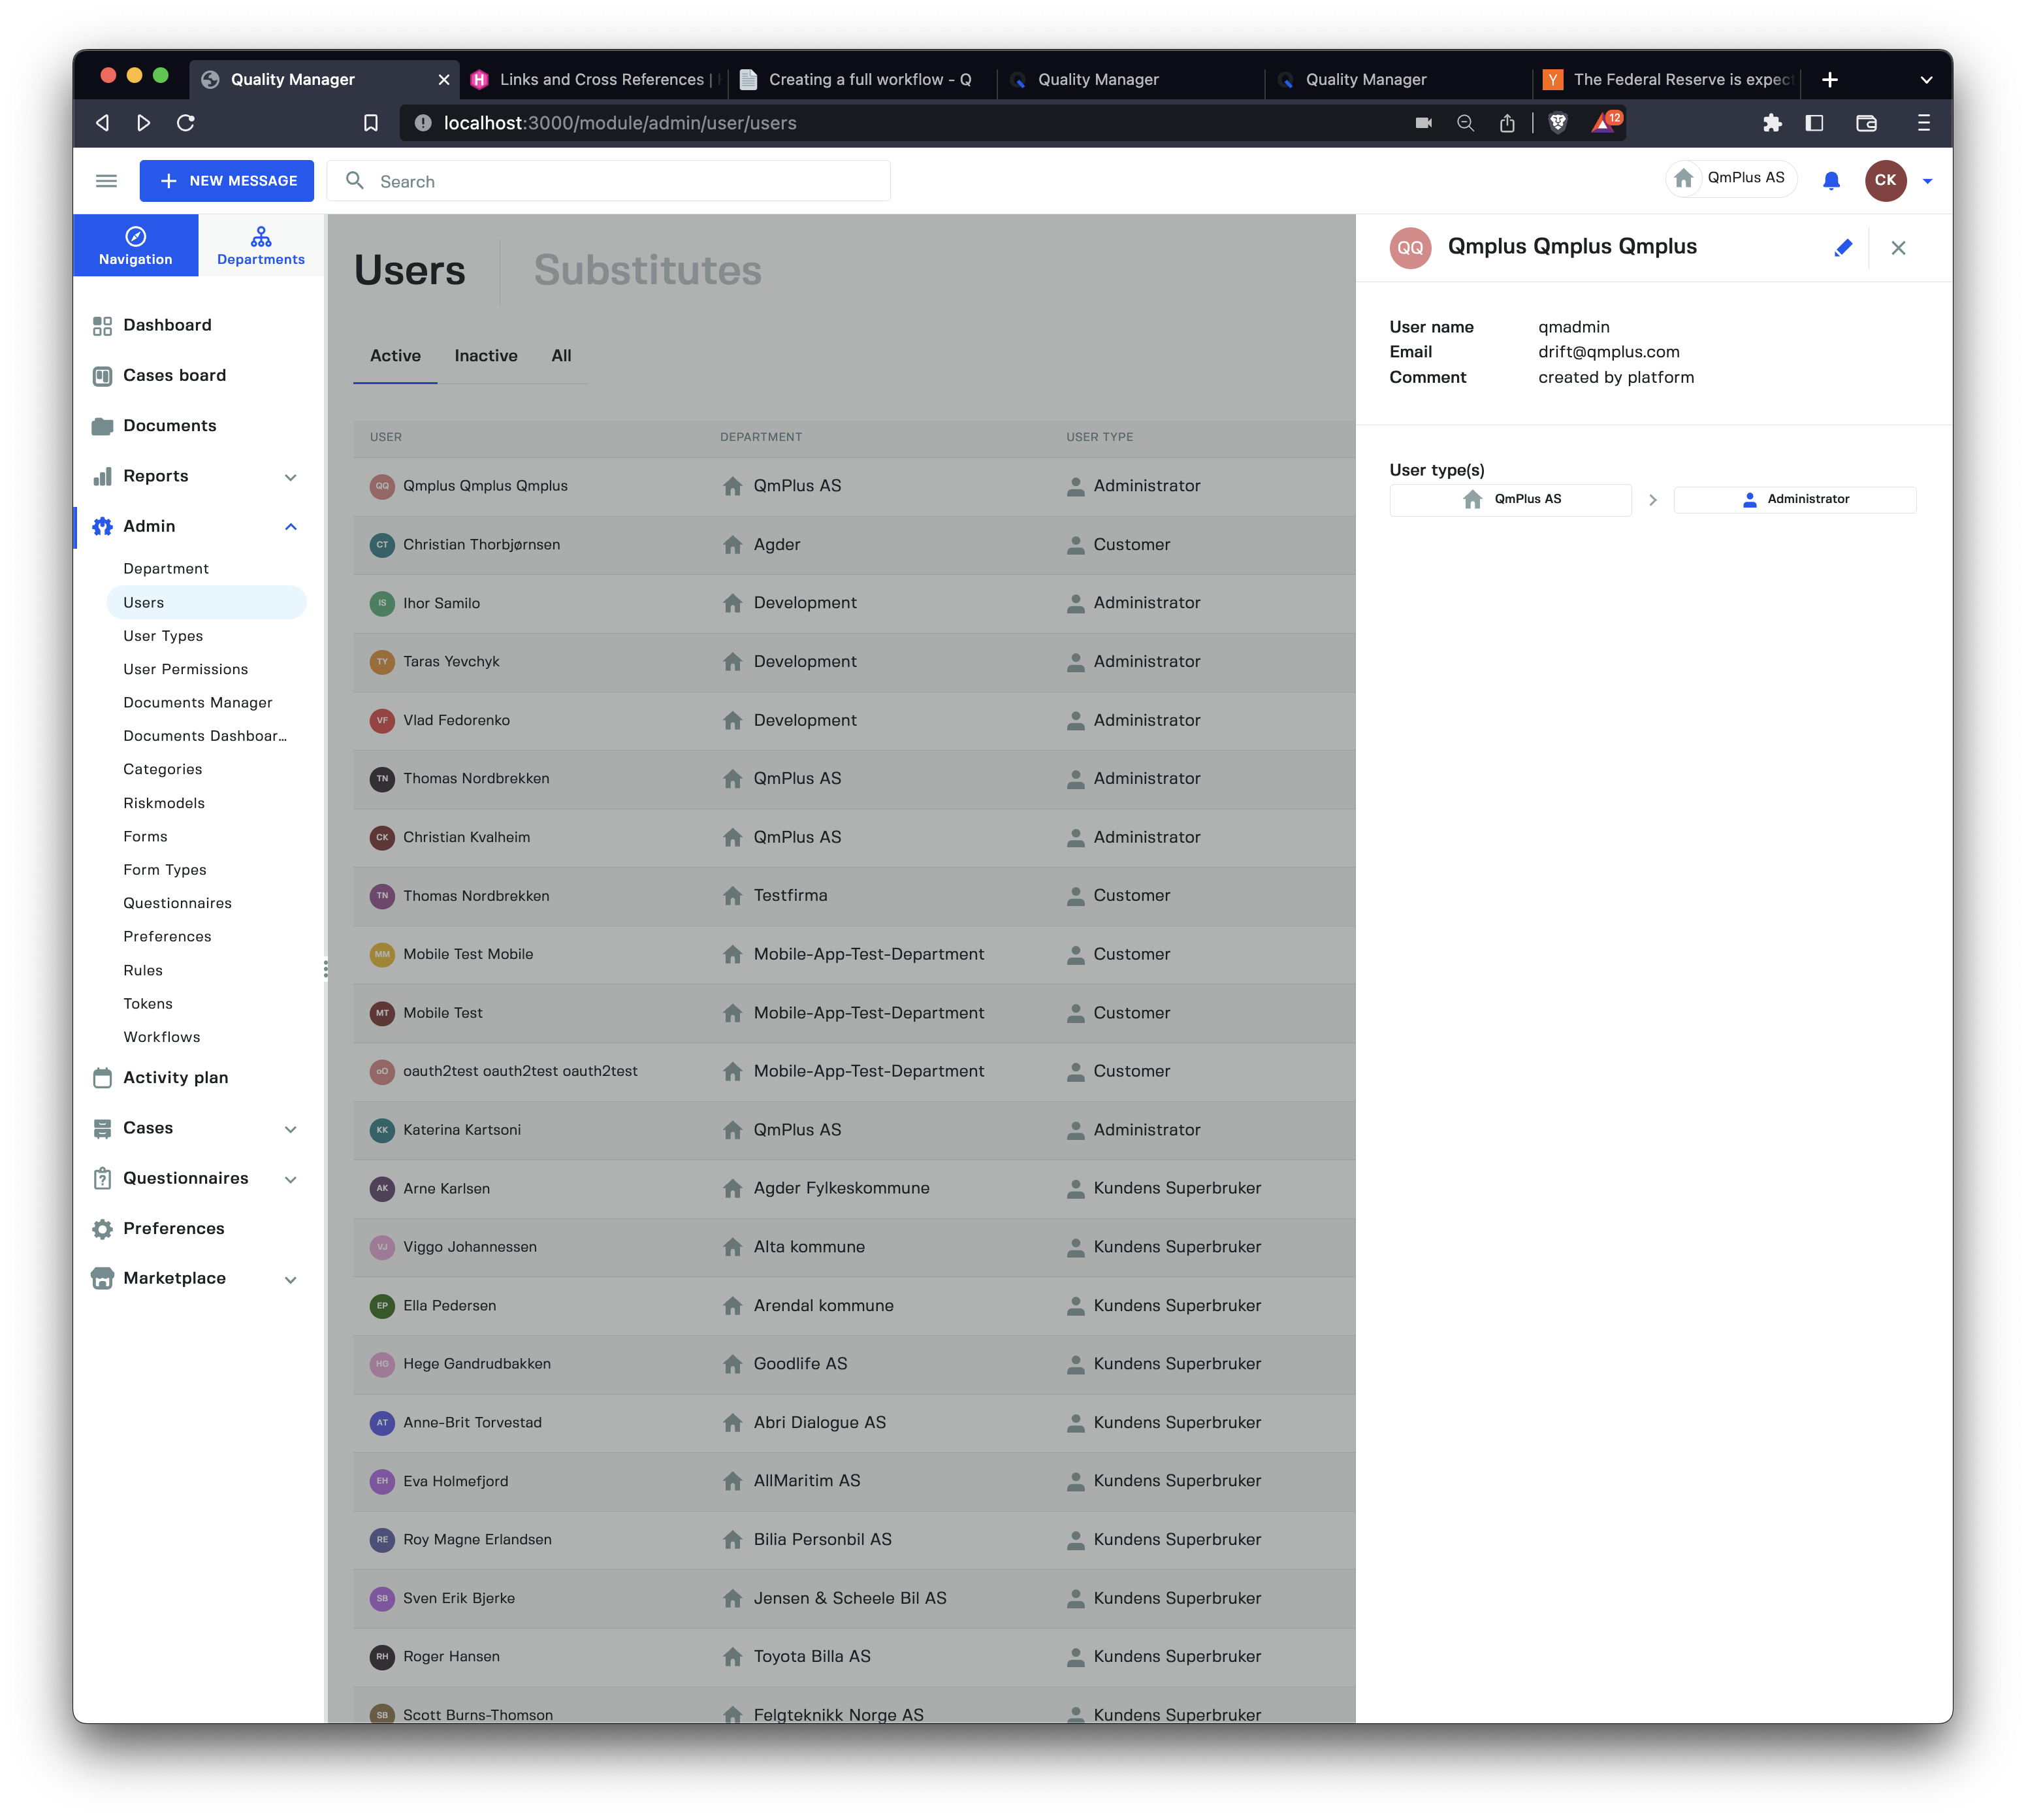
Every user needs at least one department and user type combination added to it. A user can have multiple combinations of
department and user type, but no duplicated roles.
For example, an administrator might have two combinations.
For the top department, they might be an
administrator. At the same time, they are anemployeein another department.
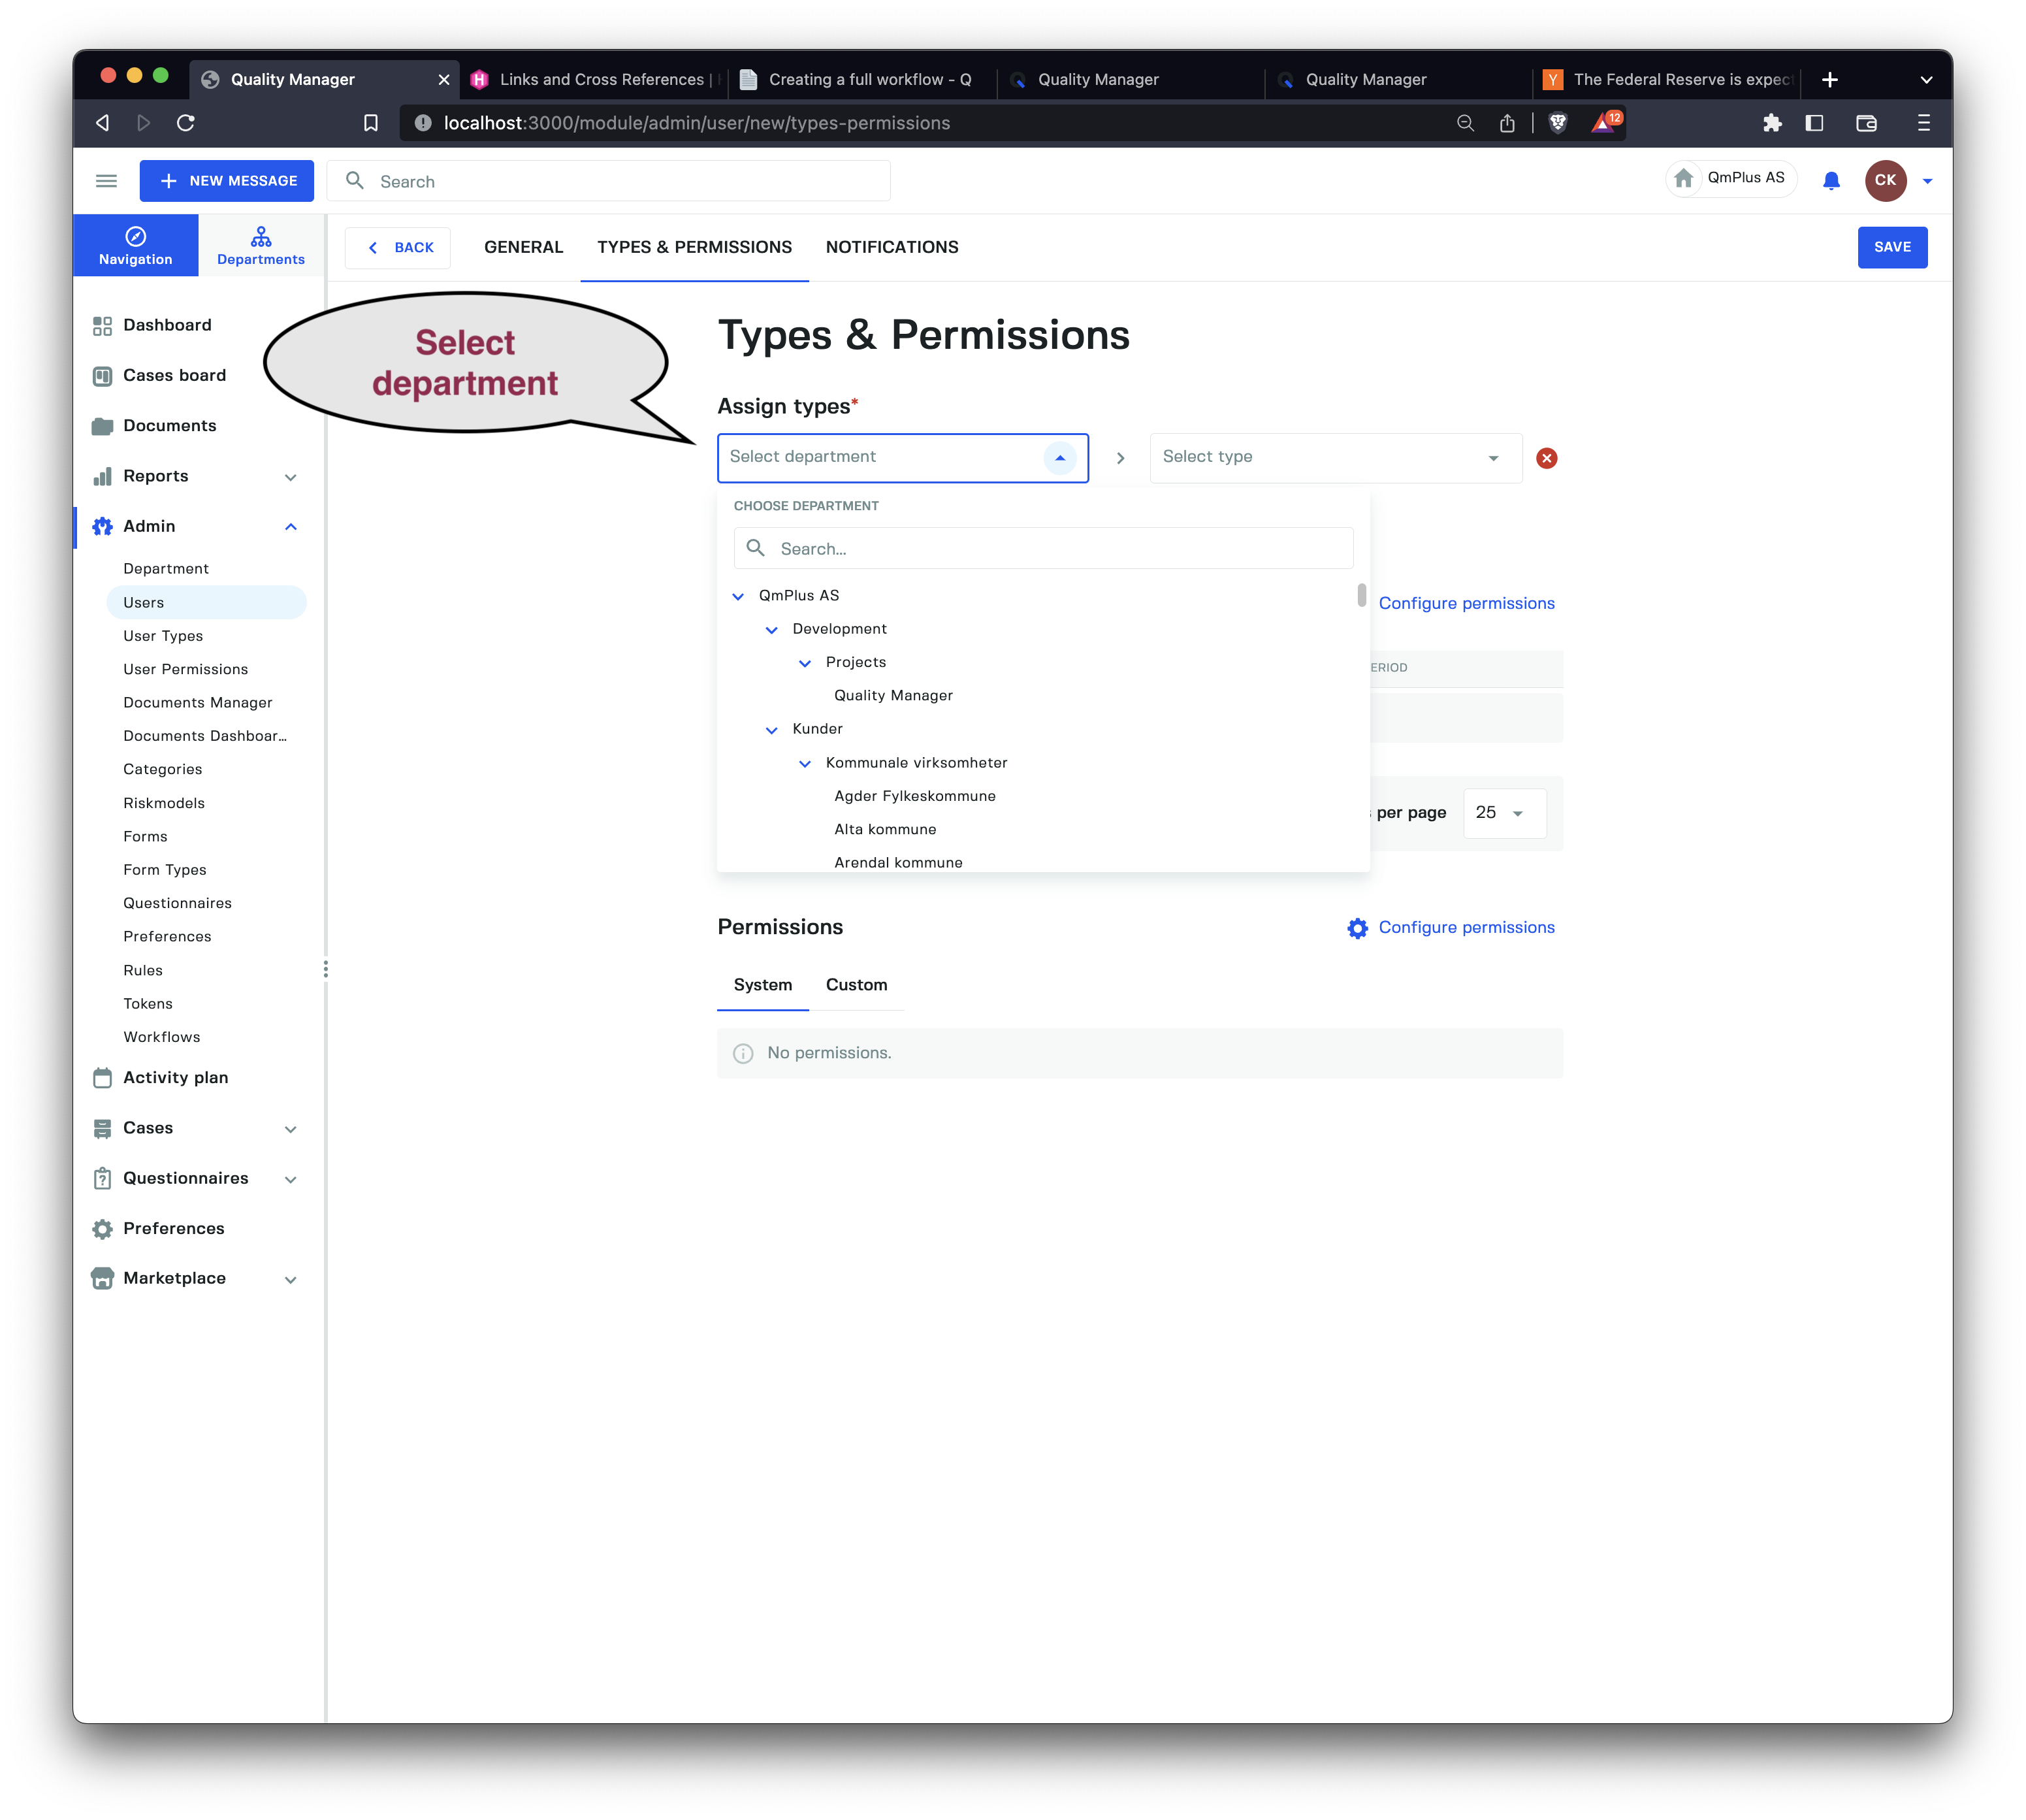
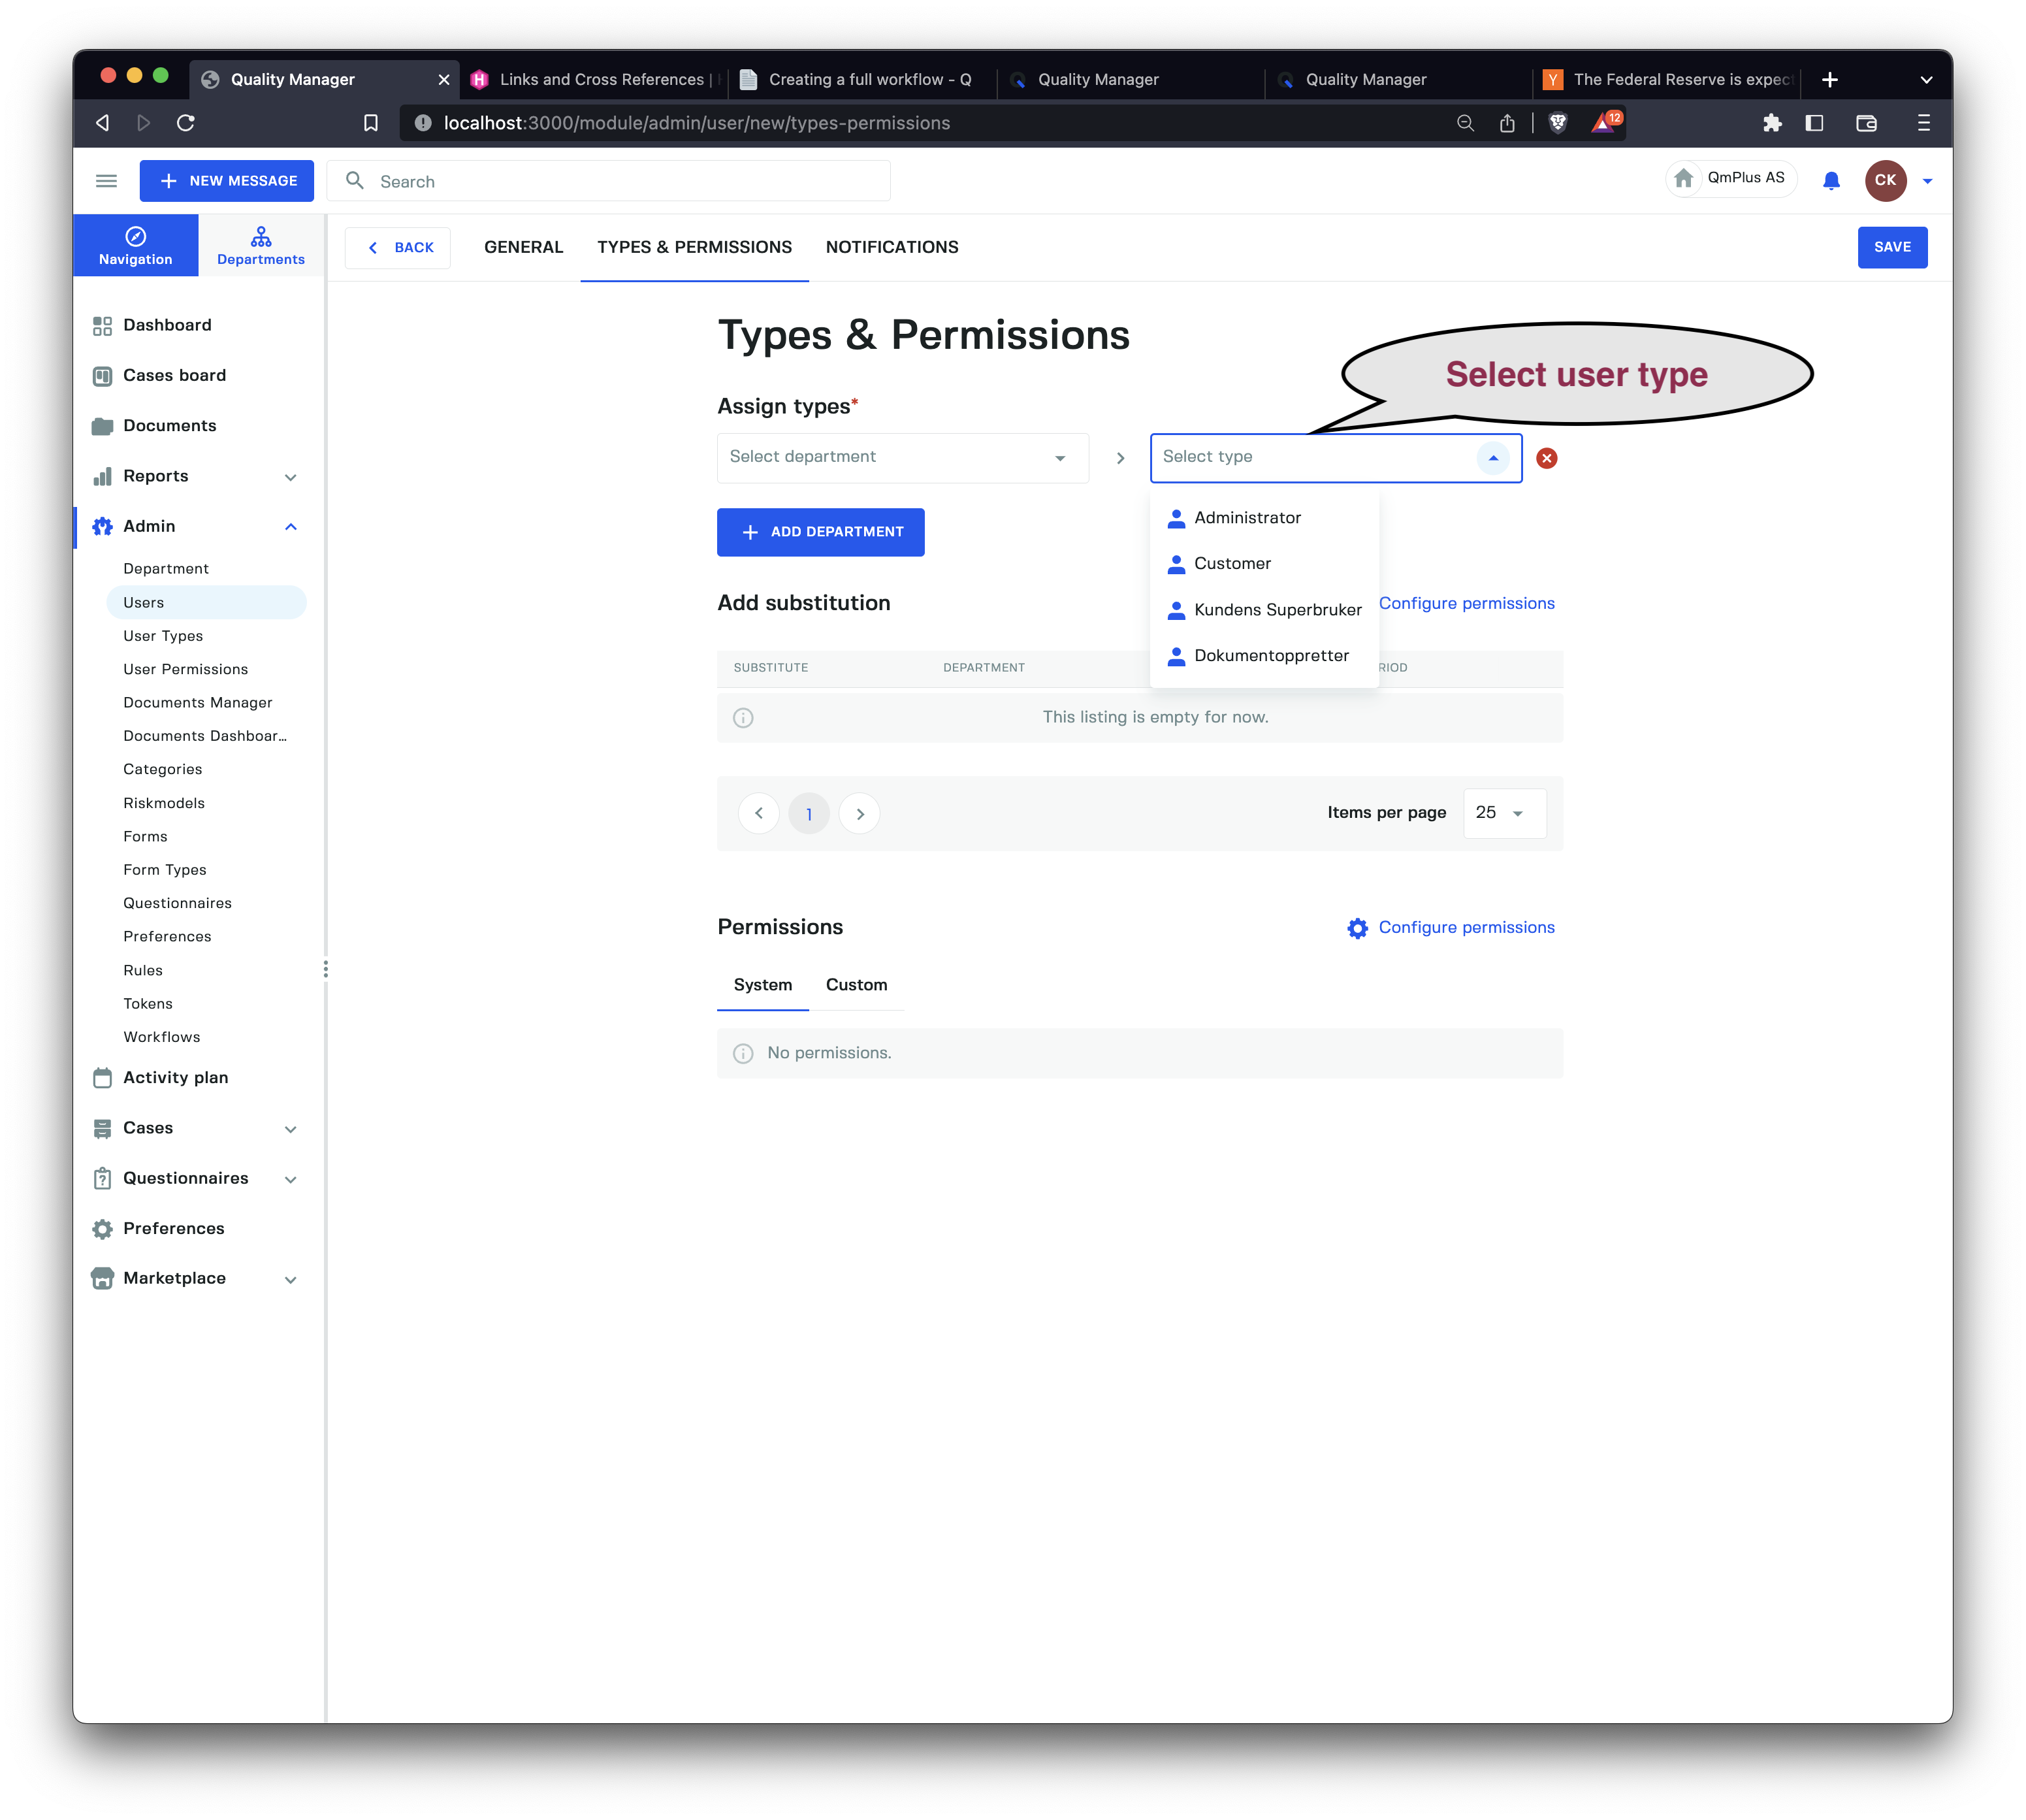
The effect of having multiple combinations of department and user type will lead to a dialog when logging in, allowing you to pick which combination
you are going to log in as.
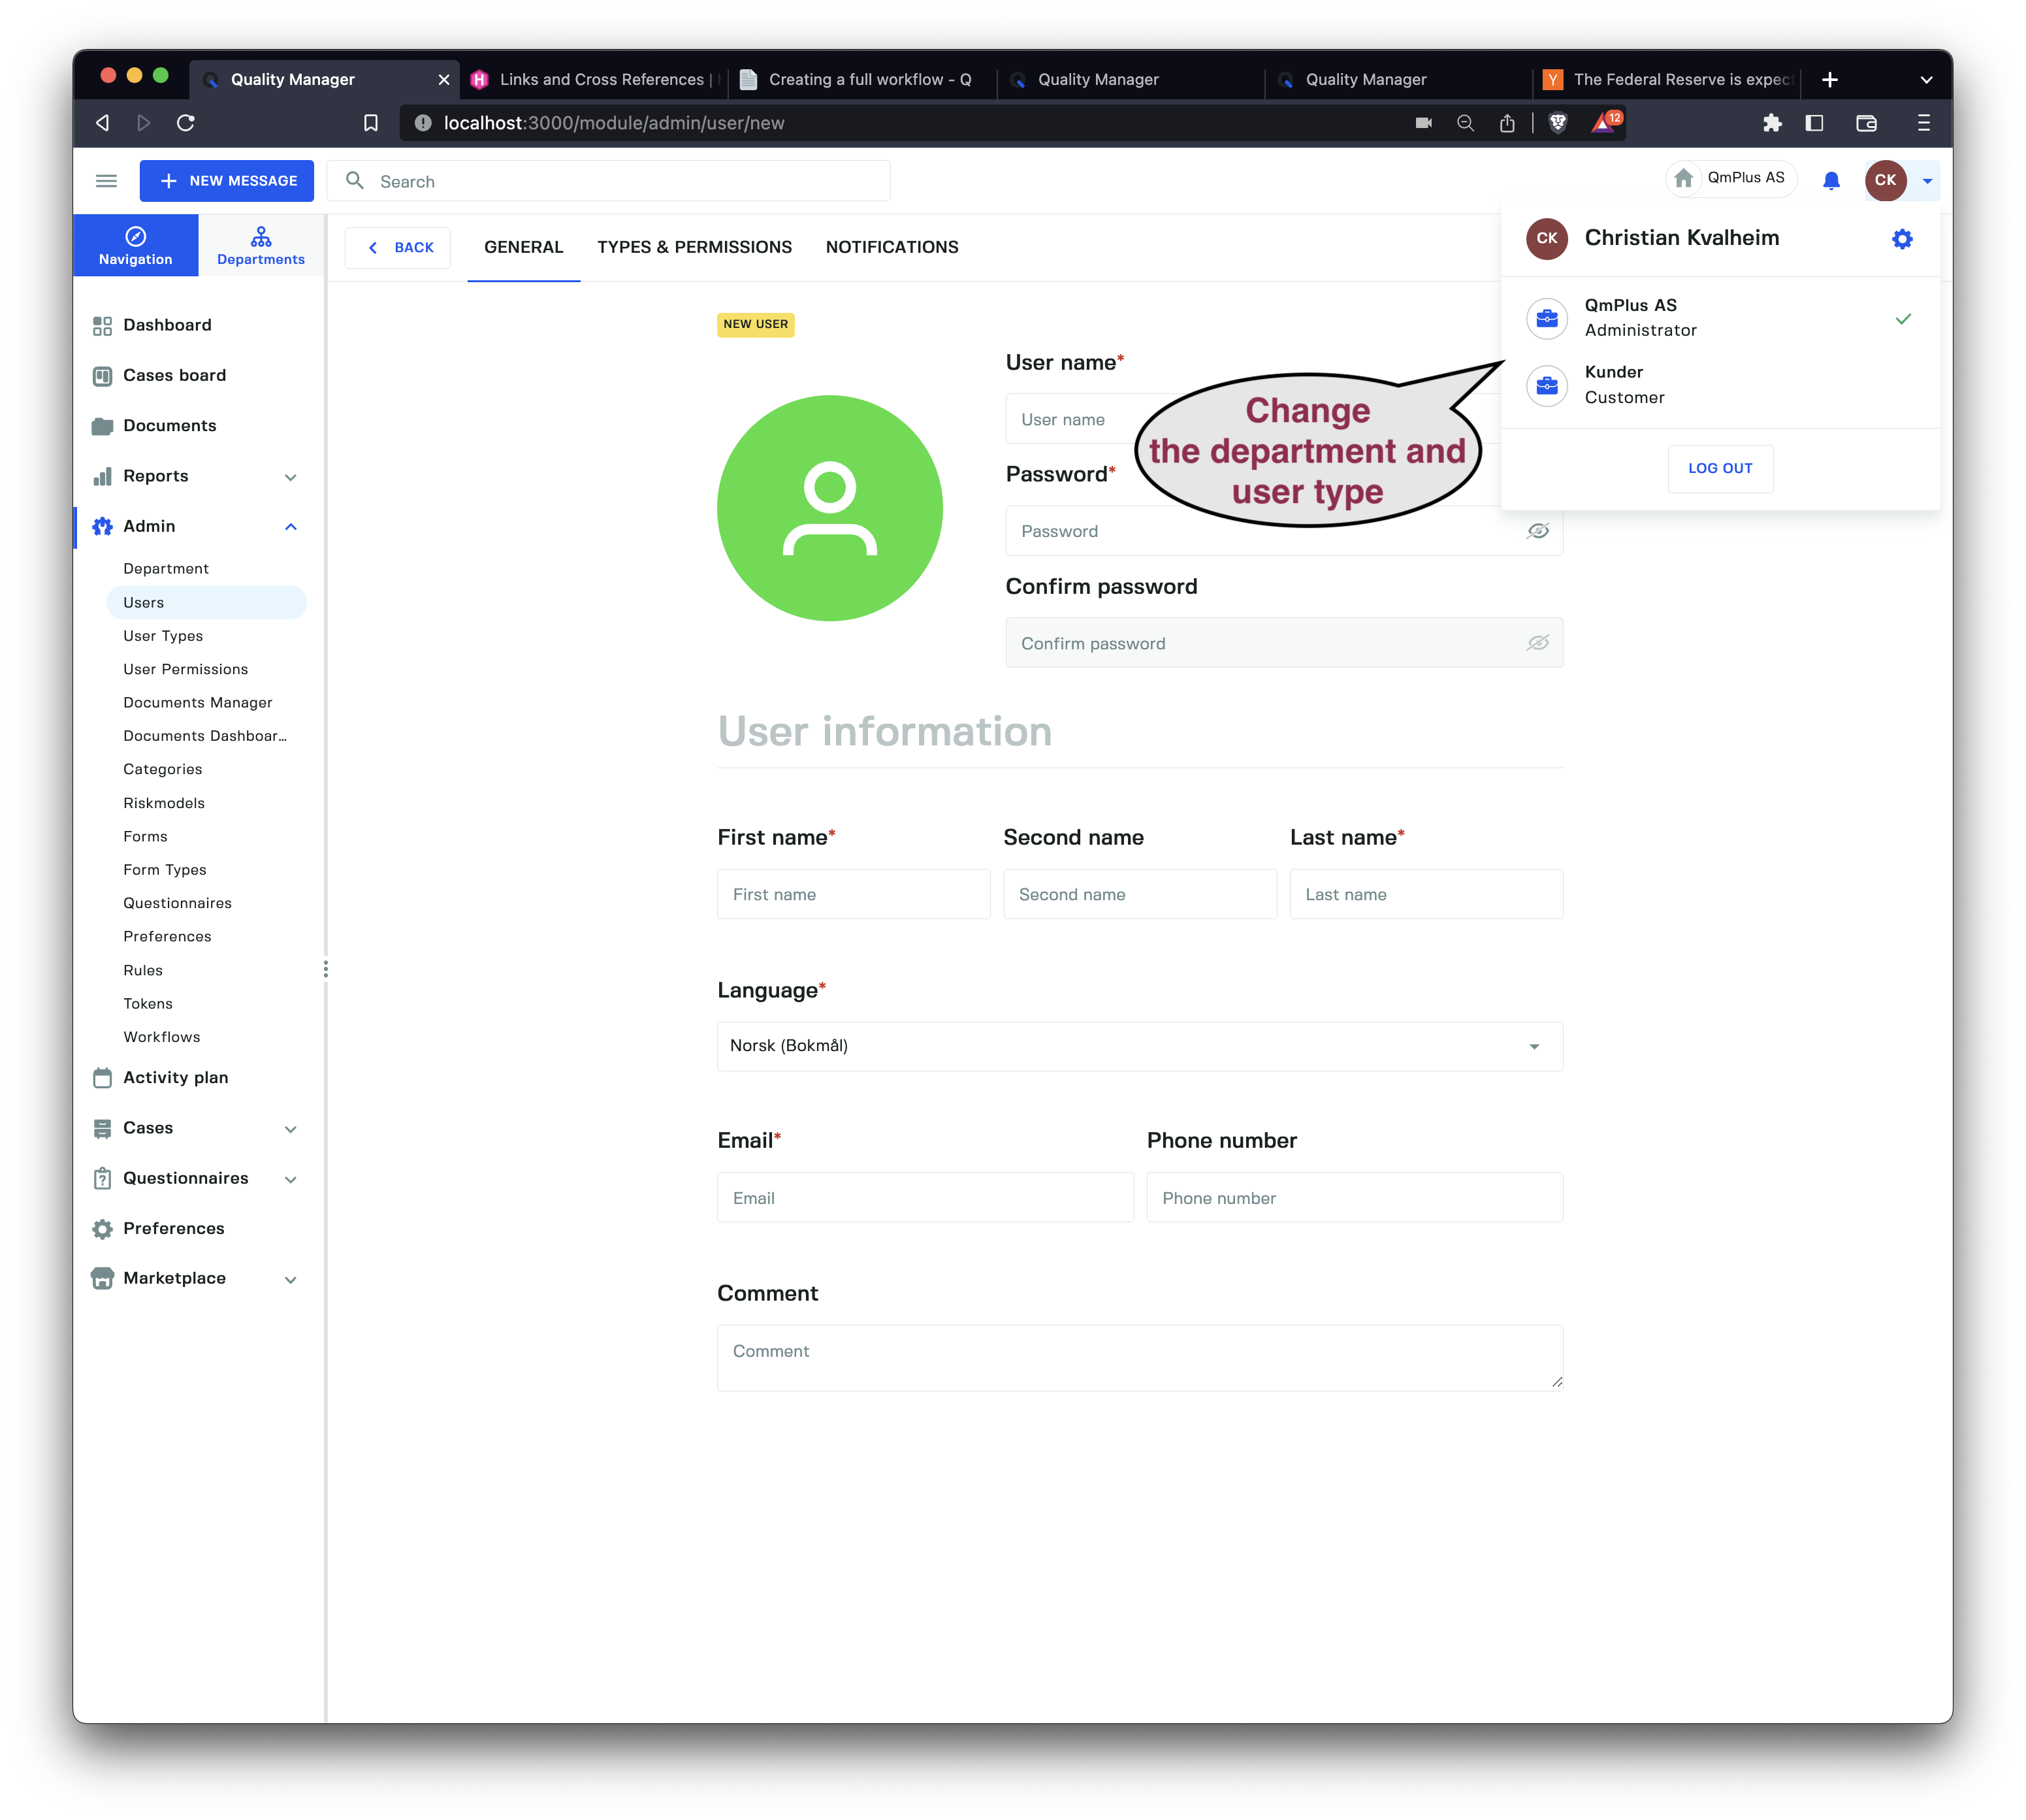
You also get access to changing your department/user type combination in a pull-down menu on the top right. Clicking on one of the combinations will change your view
of the application, allowing you to switch from, for example, an employee view of the organization to an administrator view.
Custom Permissions/Roles
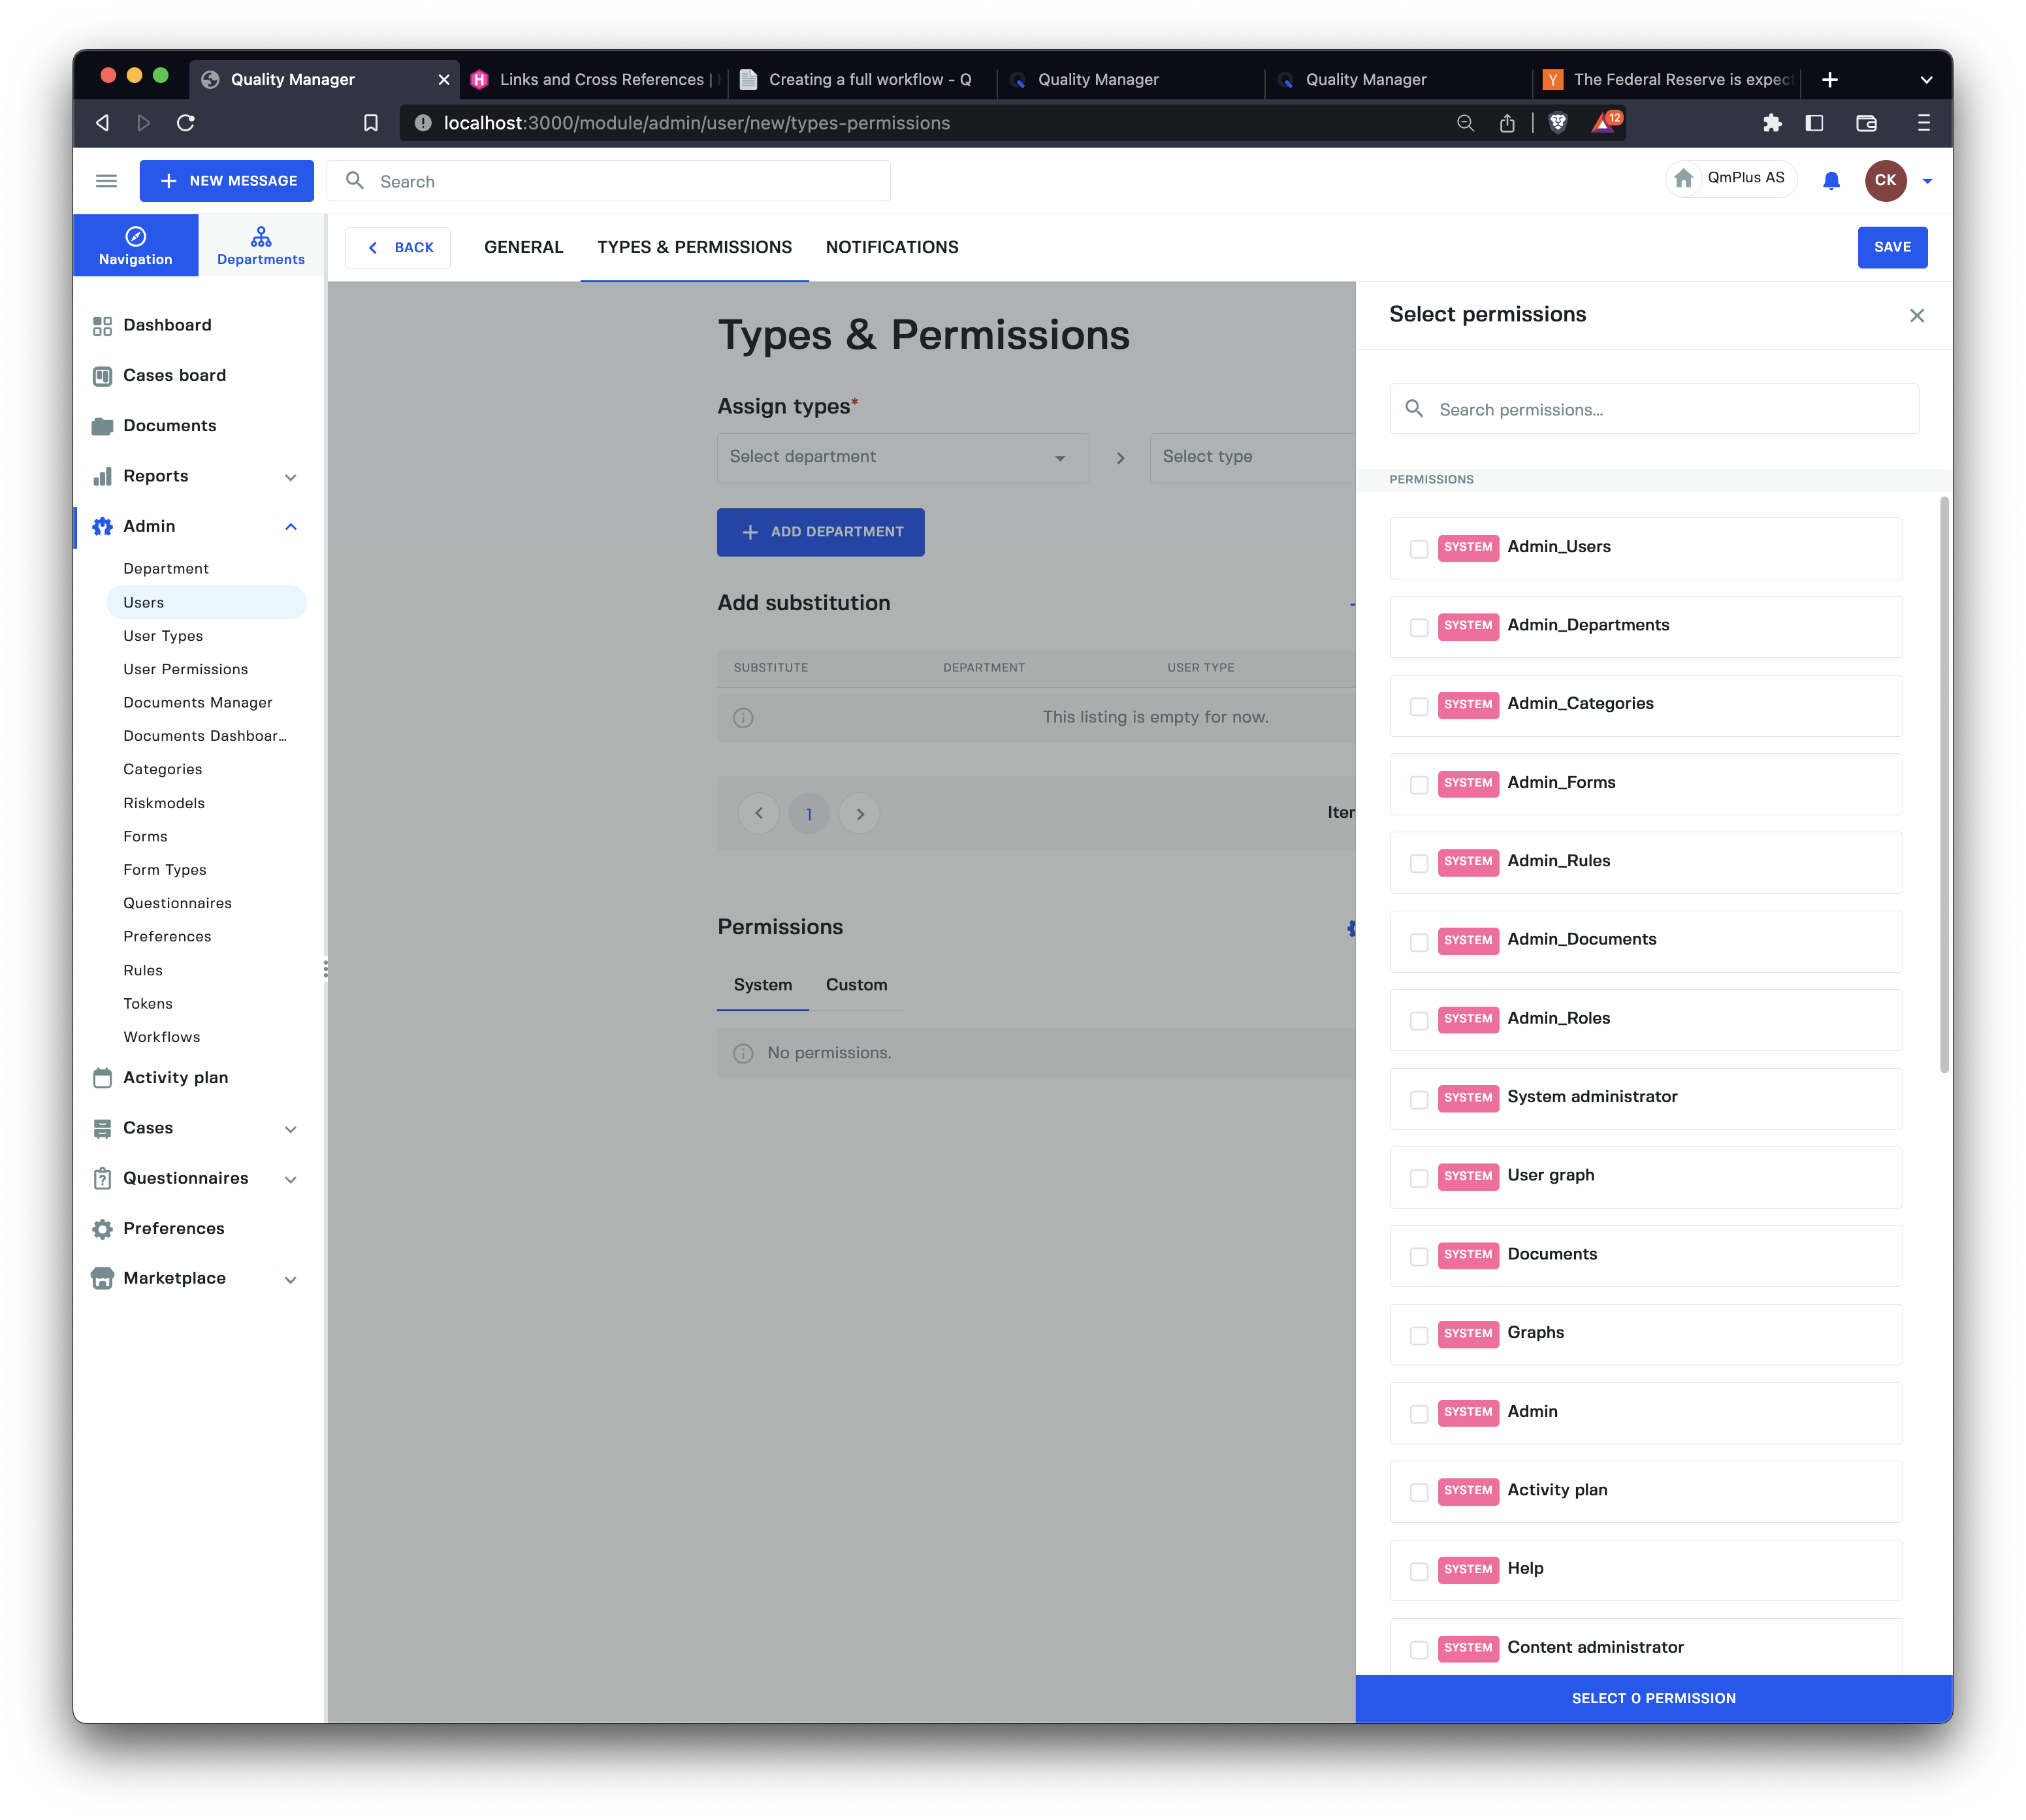
Besides setting combinations of department and user type, you can also add user-specific permissions/roles. This allows you to control the permissions of a specific user in a fine-grained manner, using the user type as a starting point.
Notifications
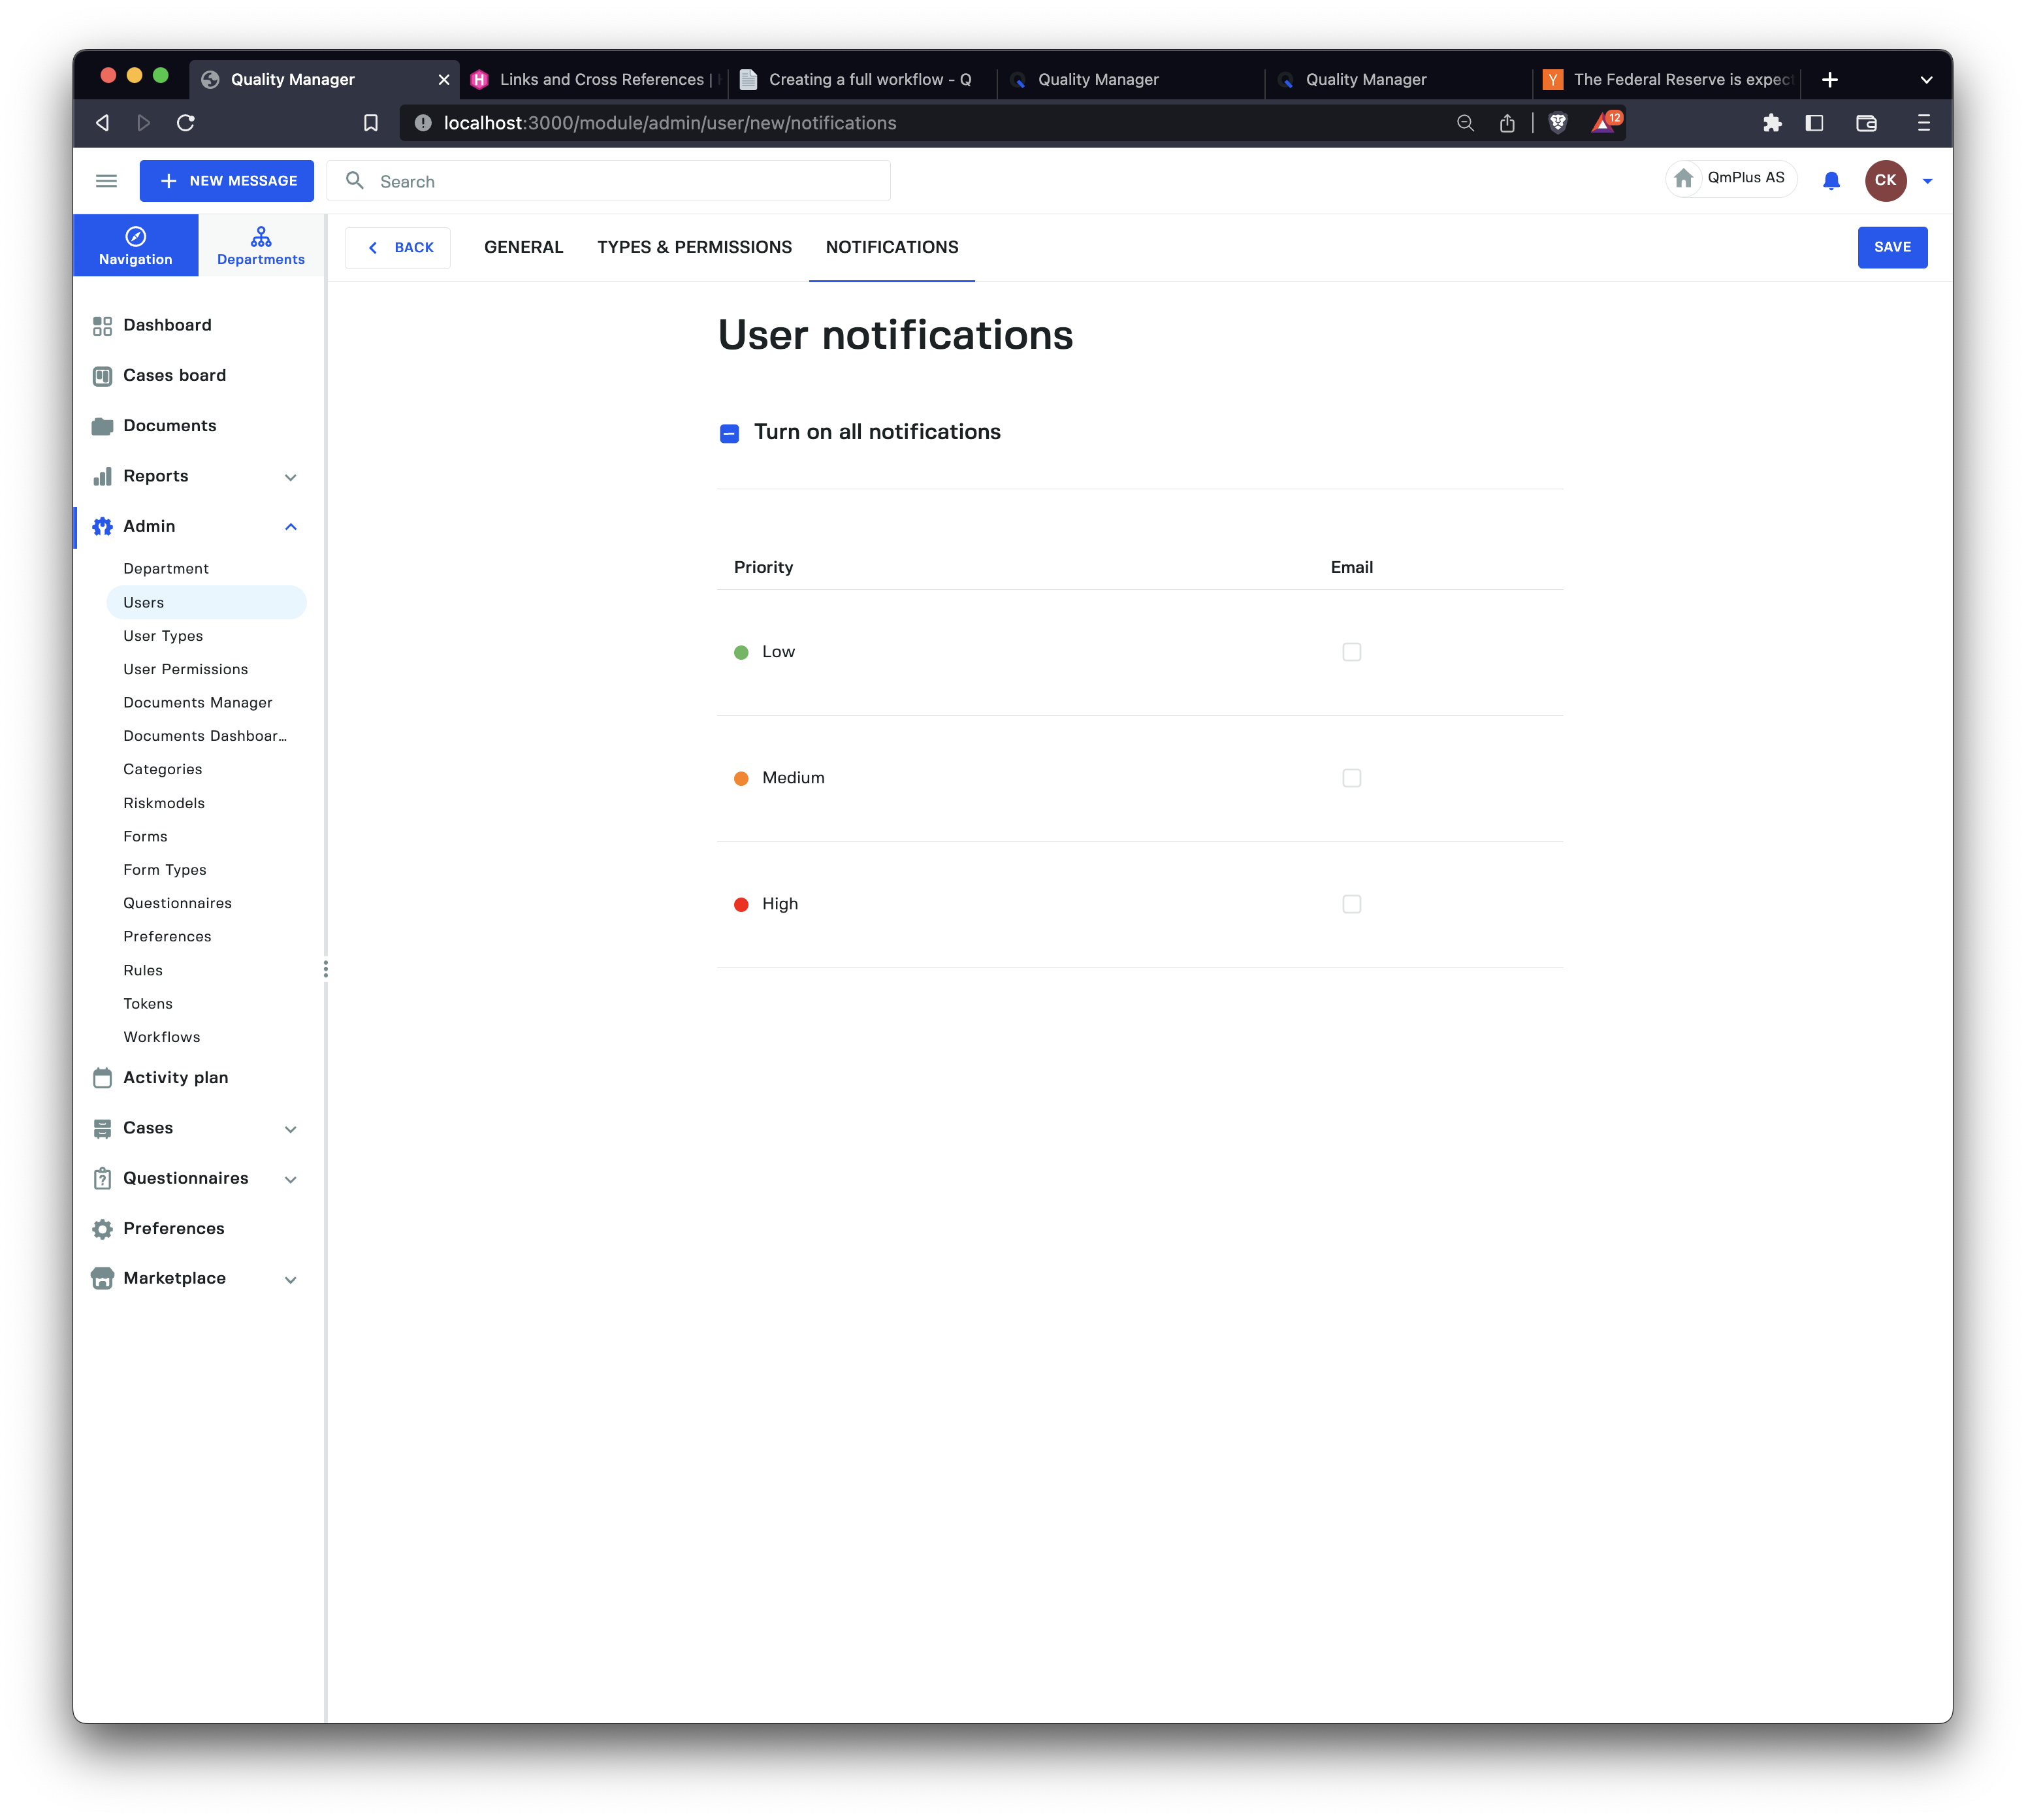
In the Notifications tab, you can set the notification settings for the user.
User Substitutions
List View
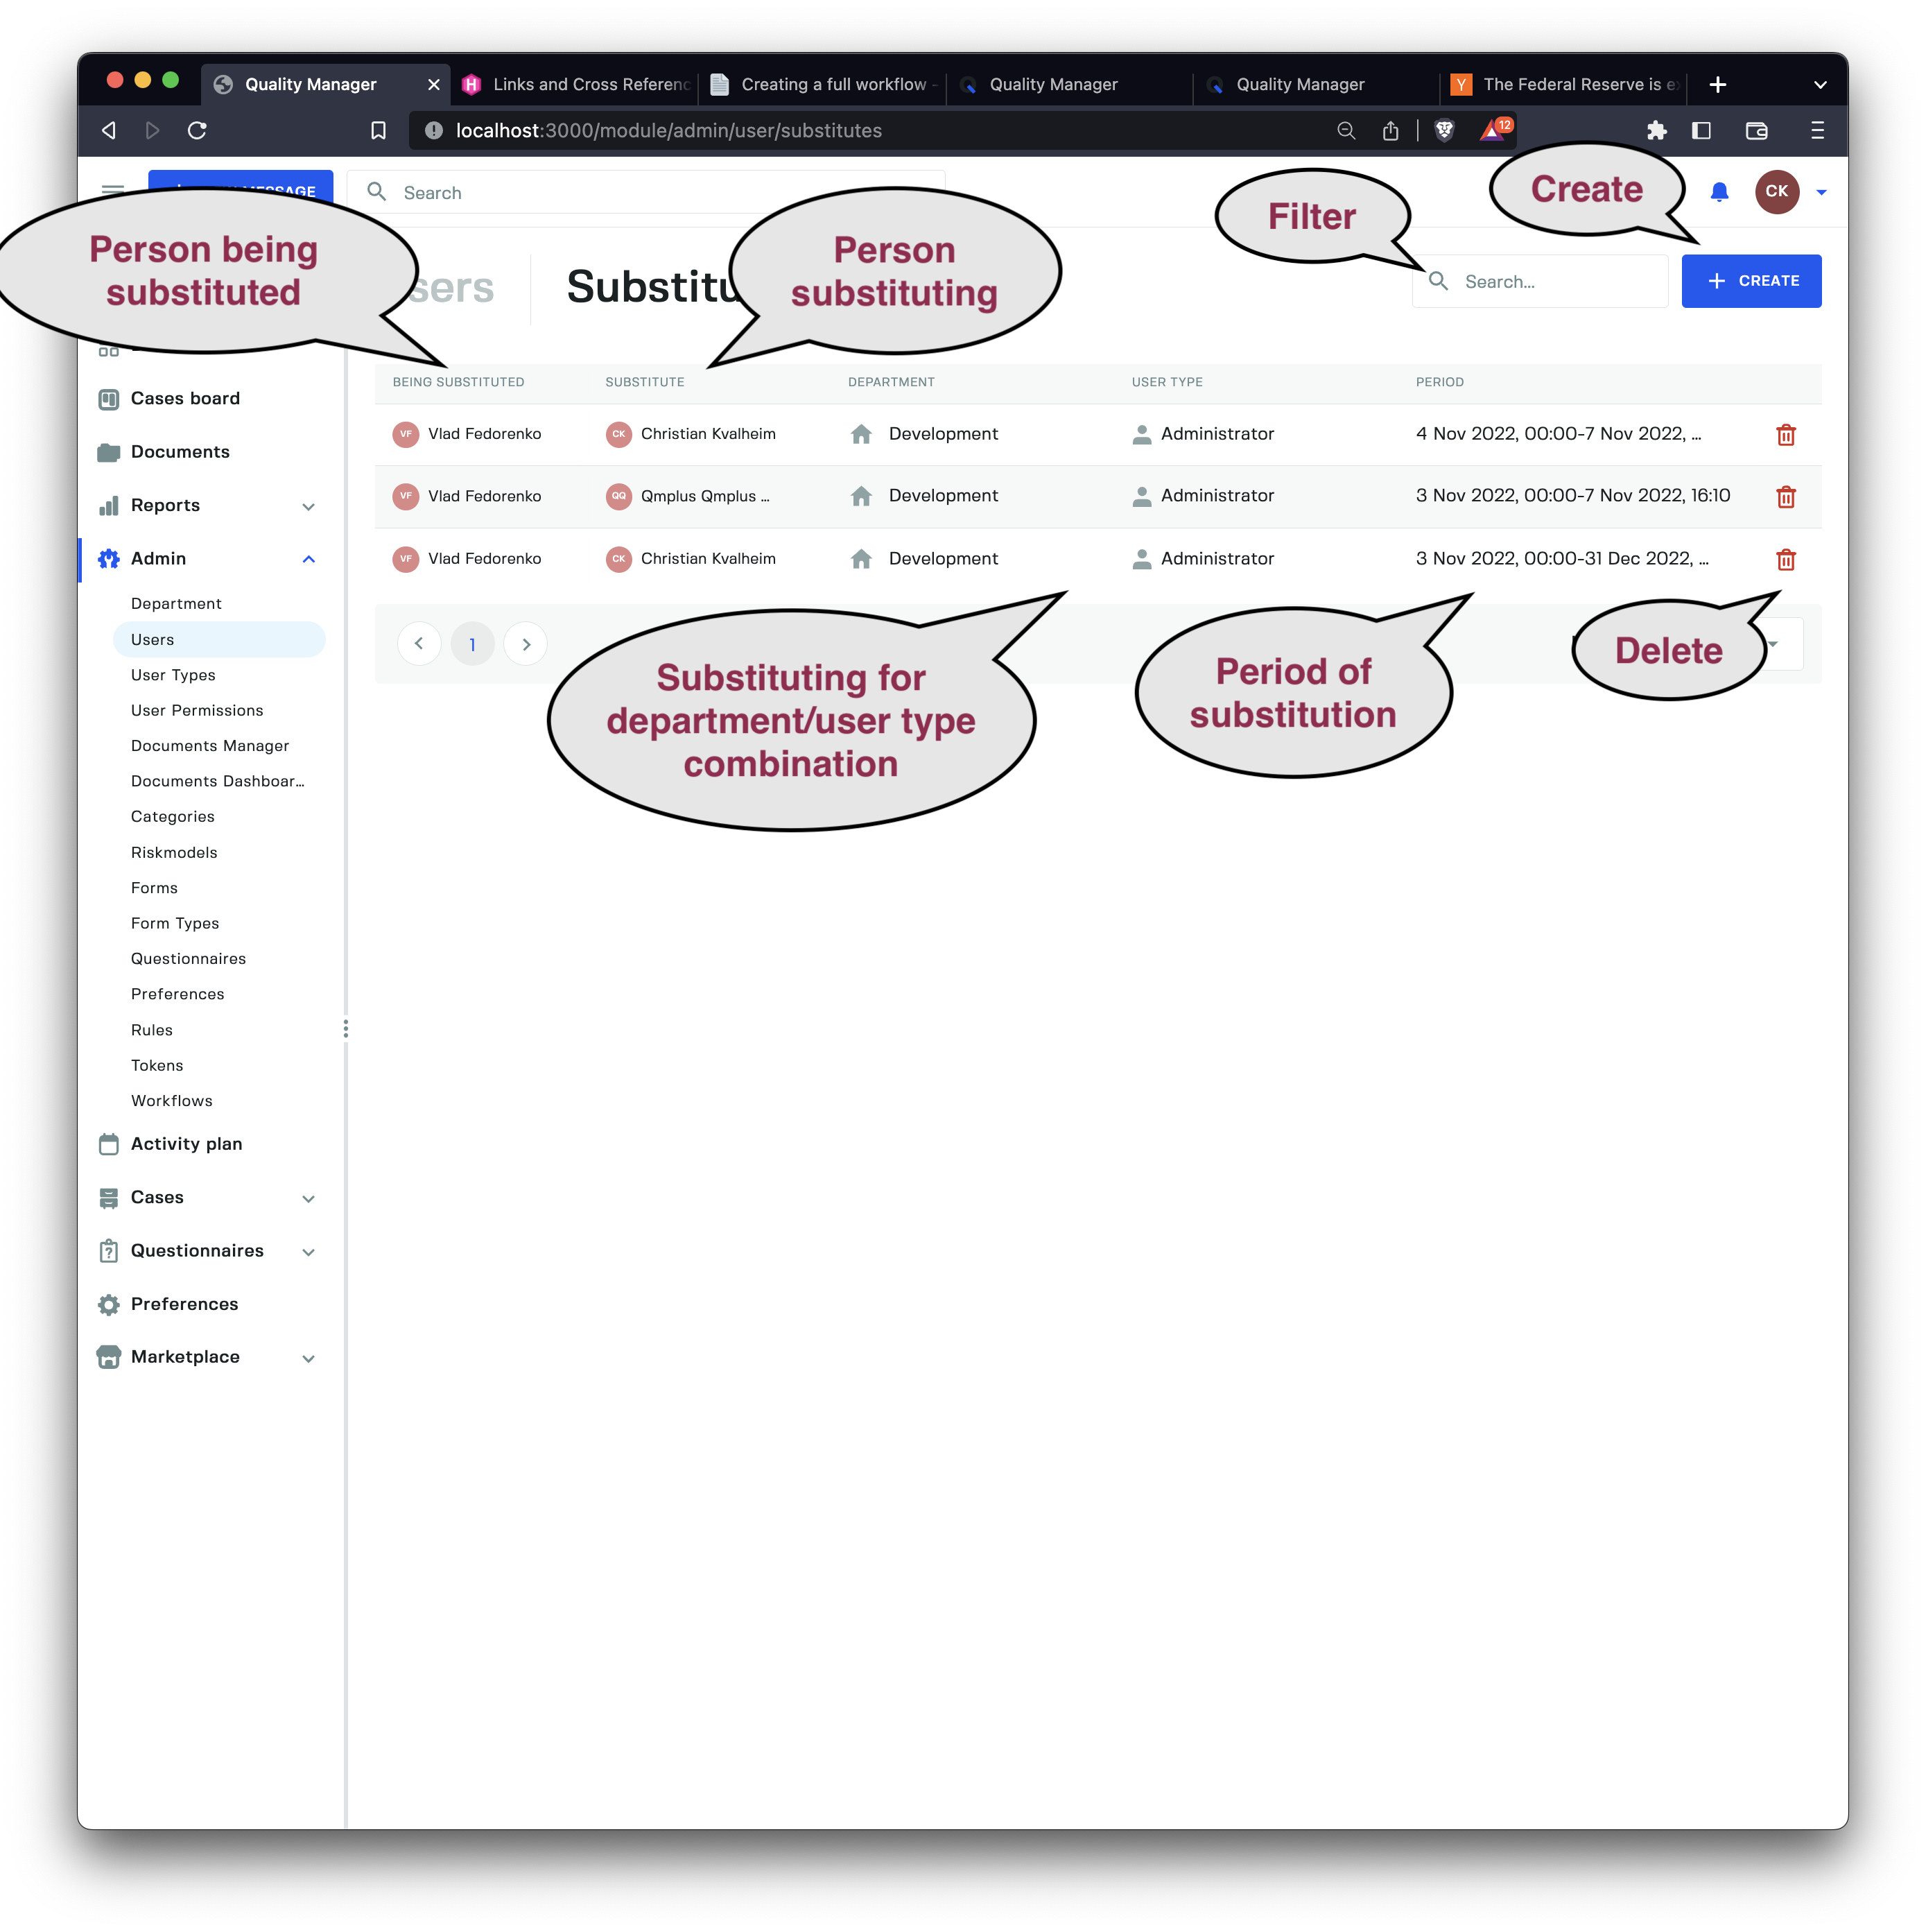
The User Substitutions tab allows us to create substitutions for employees, enabling us to delegate responsibility to other users for a specific amount of time.
Substitutions can be used to delegate responsibilities in cases such as vacation, medical leave, or parental leave.
As seen from the listing, we get a complete list of the substitutions.
This lets us know the person being substituted, who is substituting the person, what combination of department and user type the substitution applies to, and finally the duration of the substitution.
If we decide to delete a substitution entry, we have two scenarios.
- If the period is not active, the whole substitution is deleted.
- If we are already in the substitution period, it’s cut short (end date is modified to the current date and time).
Create Substitute
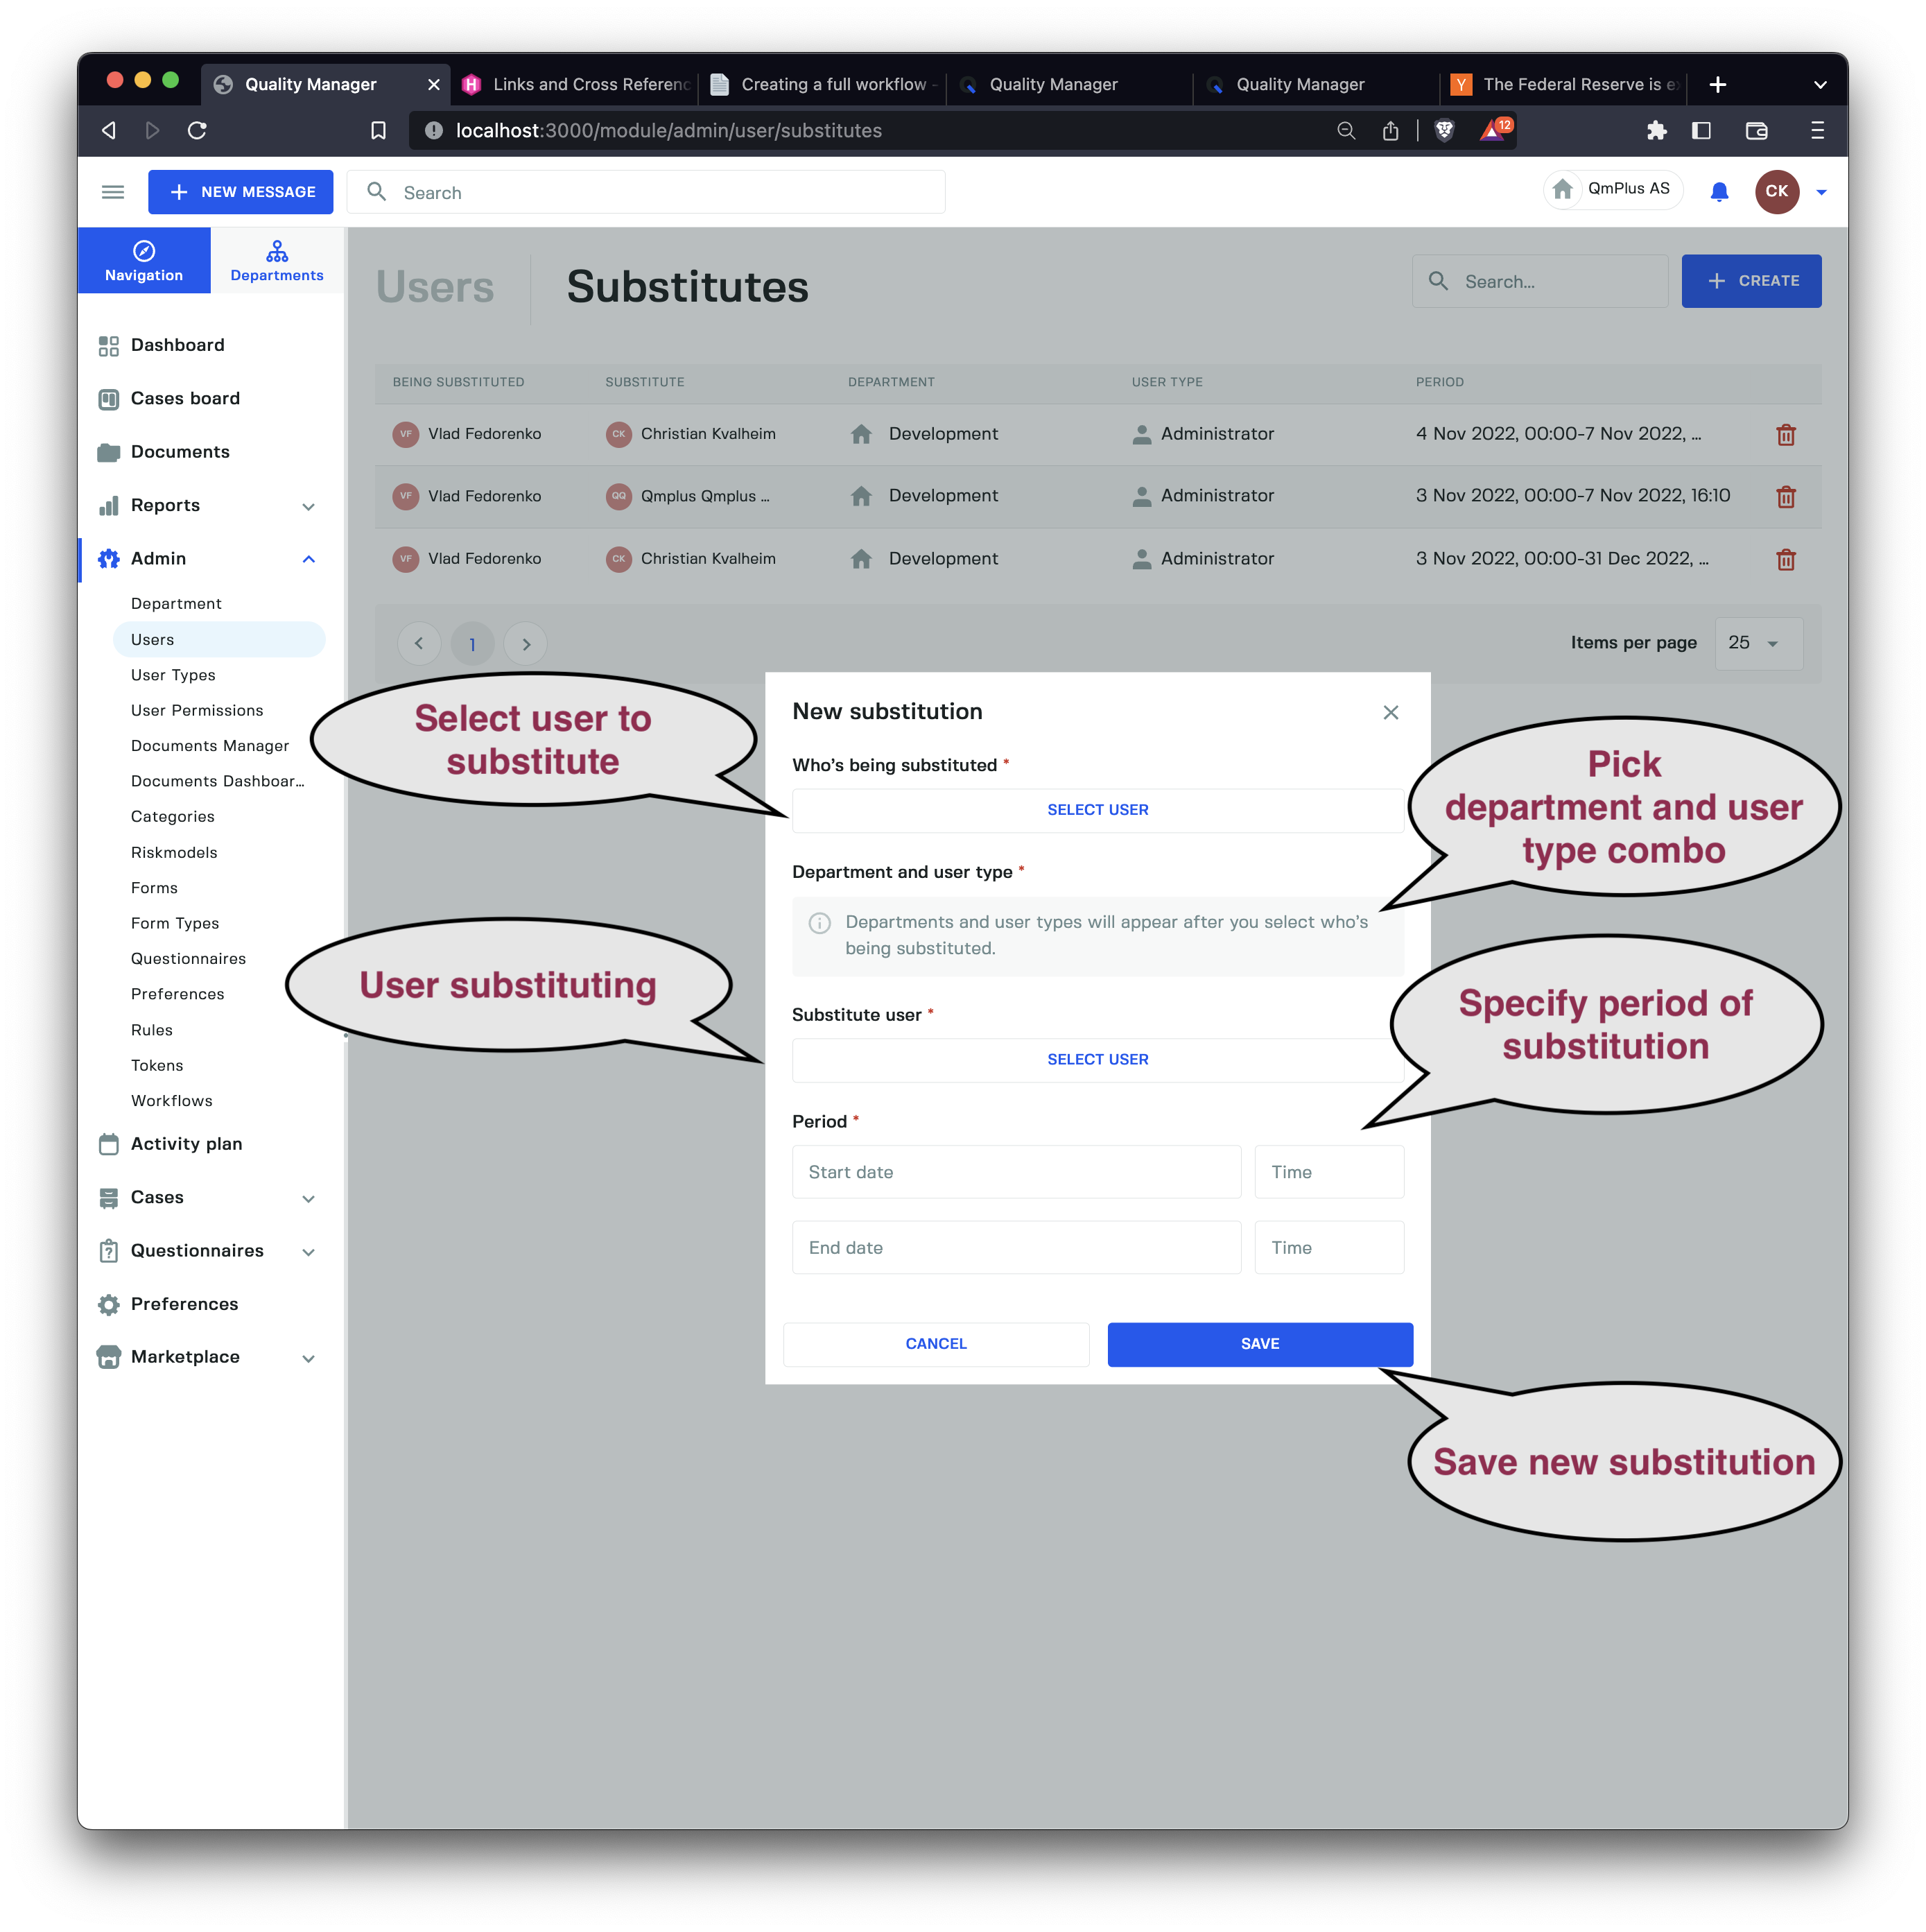
We can create substitutions of a user by another easily. First, select the user to be substituted. This will then show you their list of department and user type. Pick which combination you wish to substitute. Then select the substituting user and set the period the substitution is in effect. Finally, click Save to create the substitution rule.
A
substitutinguser will now see the additionaldepartmentanduser typecombination show up in the list of available options when logging in.Data routed to the original user will now also be routed to the
substituteuser instead of the original user.